|
0 registered members (),
190
guests, and 0
spiders. |
|
Key:
Admin,
Global Mod,
Mod
|
|
|
Forums69
Topics113,948
Posts1,344,213
Members1,629
| |
Most Online1,570
Dec 2nd, 2024
|
|
|
 Quantum Coupe - Neil and Joe's secret project!
#1063809
04/07/2010 07:18
04/07/2010 07:18
|
Joined: Dec 2005
Posts: 33,720
Berlin
barnacle
 OP
OP
Club Member 18 - ex-Minister without Portfolio
|
 OP
OP
Club Member 18 - ex-Minister without Portfolio
Forum Demigod
Joined: Dec 2005
Posts: 33,720
Berlin
|
Those of you who have been trying to get stuff booked at Joe's this will will already have discovered I've got him booked out for a week. Pictures and details later - but here's the overview: (The bulk of the pictures and more details will appear in Joe's newsletter, first edition - get subscribed!) I have a cunning plan, which doesn't involve turnips!I have a Quantum 2+2 kitcar, which is designed around the late 80's Ford Fiesta - in my case, the donor car was an XR2 with an alleged 96bhp. Small ponies, I suspect. The engine is twenty years old, tired, sounds nasty, and is generally not nice to be around. The gearbox is difficult to select in a hurry; the clutch works but painfully, and even the accelerator cable is sticky. Something must be done... Fiesta delenda est!I can't help feeling it'd go so much better with a little delicate coupe engine in there. Say, for the sake of argument, a 20vt. It weighs at present around 700-800kg. Could be fun... To the best of my knowledge, this could be the *only* 5-cylinder kit car in the UK. Day one - SaturdayStart from home 0600. Arrive at Joe's 0900. Sort out a general plan of action... Problem one: the coupe engine is about 5cm too wide for the frame it has to sit in. Oh well, that's why they invented angle grinders... Problem two: the existing wiring is a complete dog's dinner. It's really got to go. Problem three: who left that master cylinder there? Stupid place for it to live. Problem four: Clutch cable, hydraulic clutch. Damn... Problem five: the whole car is 10cm narrower than the coupe. Problem six: heavy steering even with the Ford engine. The Fiat engine is heavier - we don't know how much, yet. But it'd be nice to use the coupe's power steering. So we start measuring and undoing stuff. By 2000, we have removed (in approximate order): - The bonnet
- Inner wings
- Radiator
- Front suspension and driveshafts: note - new CV outers and bearings required.
- Engine and gearbox
- All engine bay ancillaries
- All the wiring loom forward of the driver's seat
- Pedal box
- Steering column and wheel
- Entire dashboard
- Carpets curtains and light fittings
Basically, there's nothing left forward of the driver's seat. We've made test fittings of the coupe pedal box and steering column and it looks hopeful. 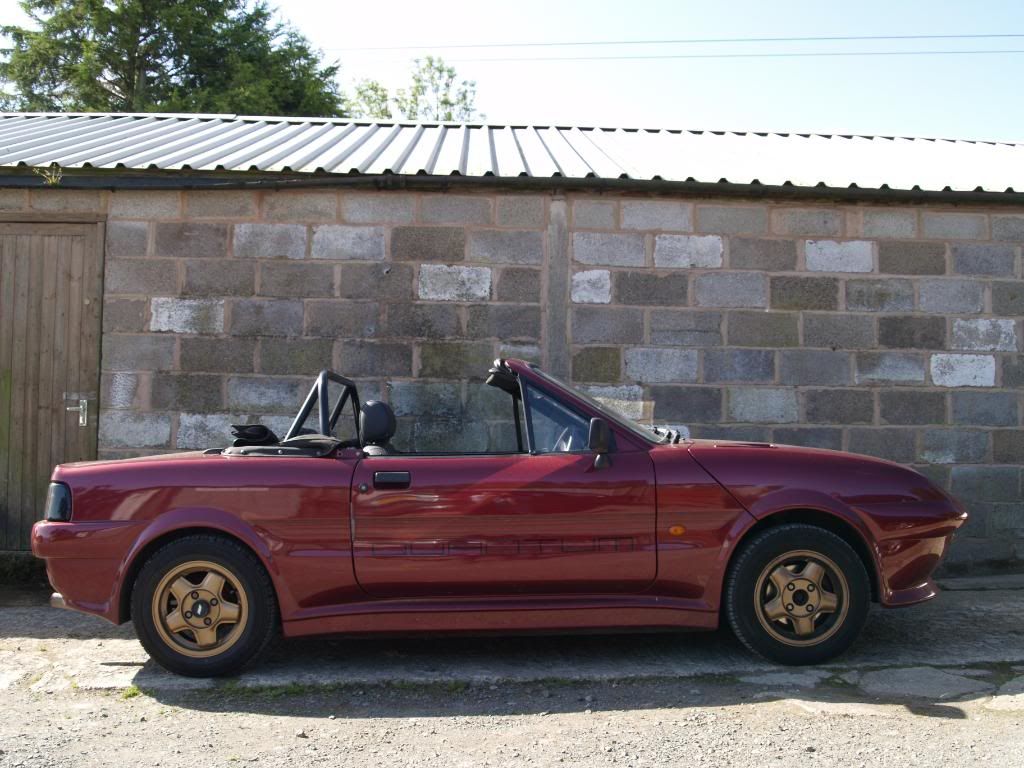 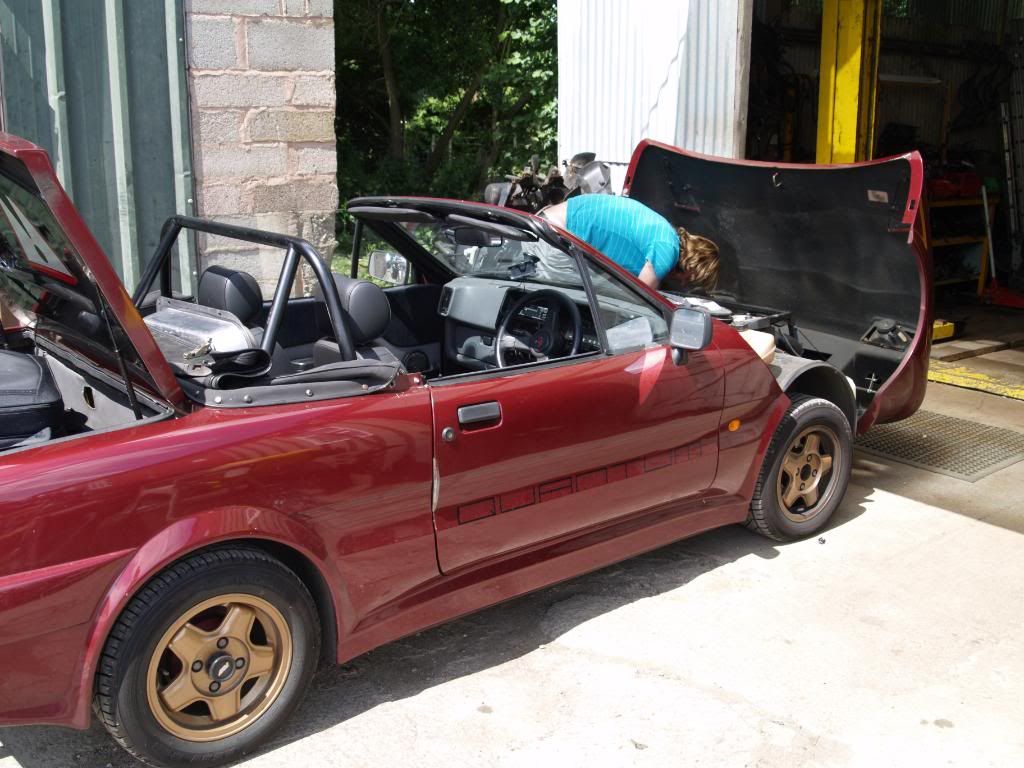 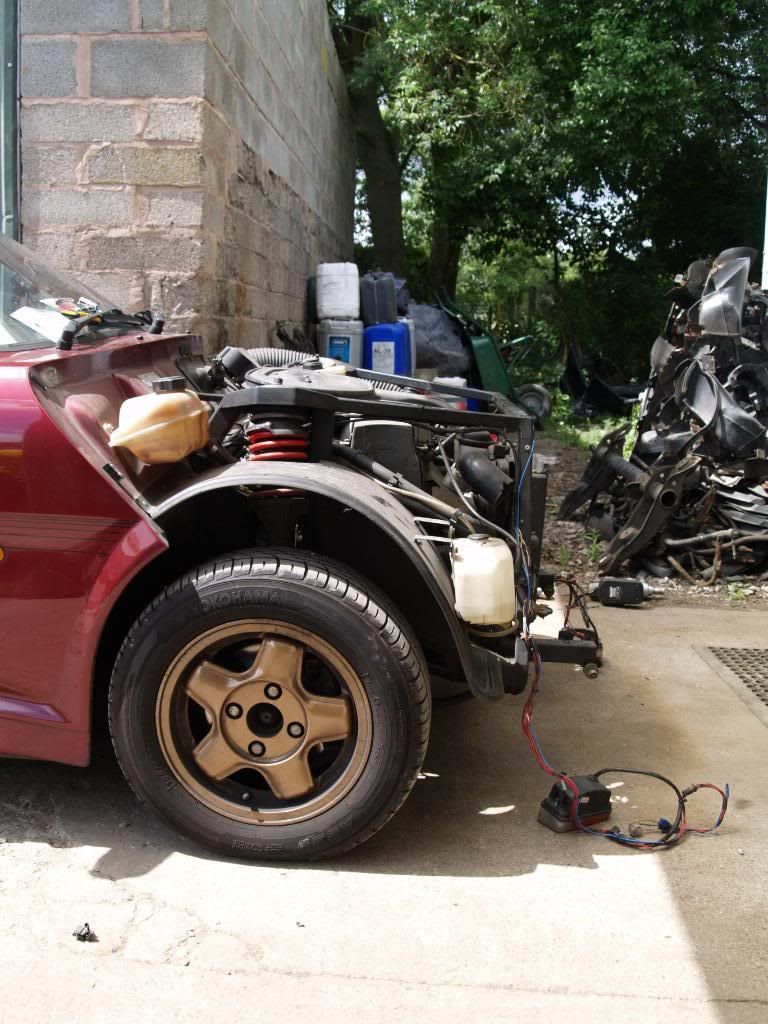 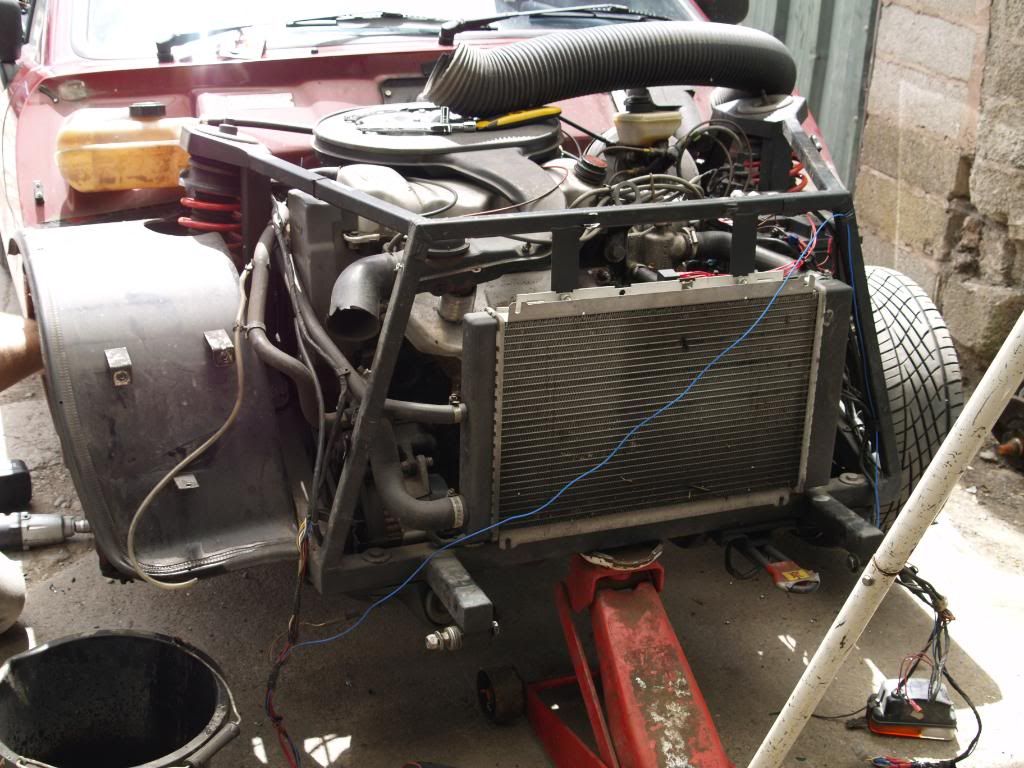 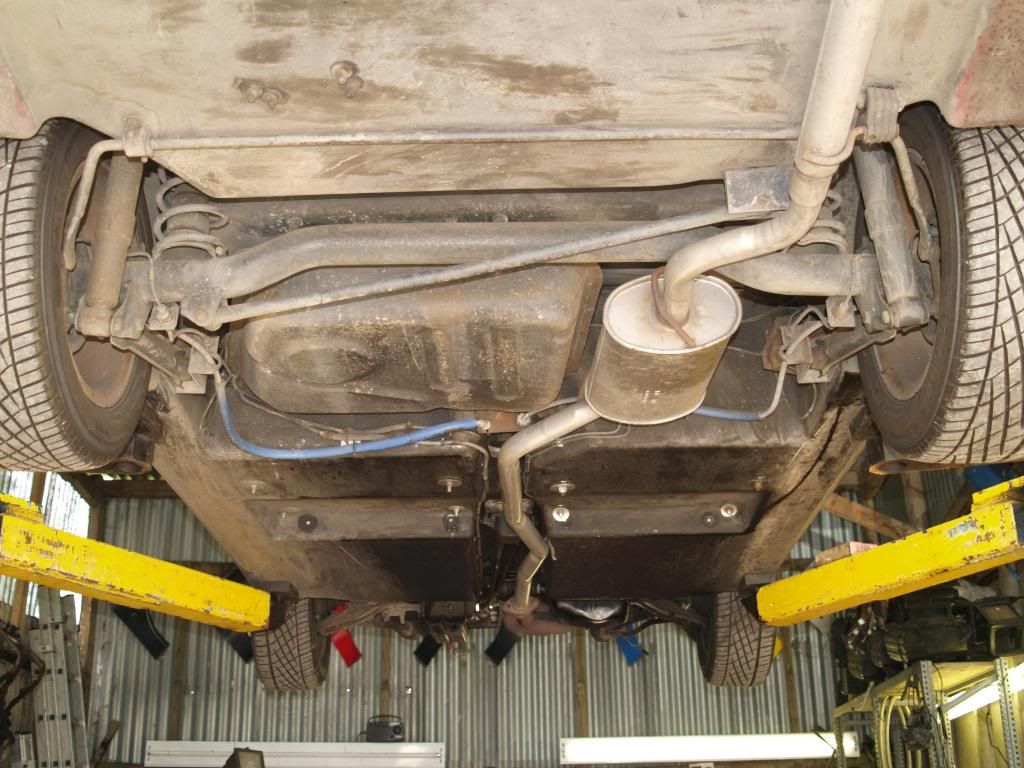 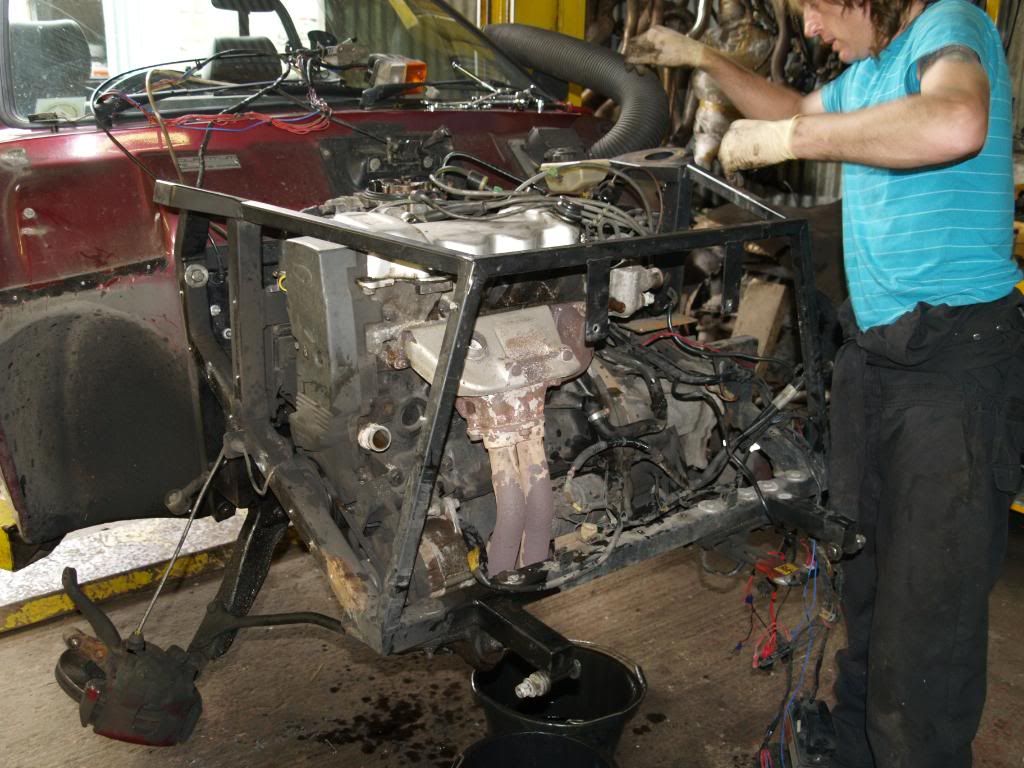 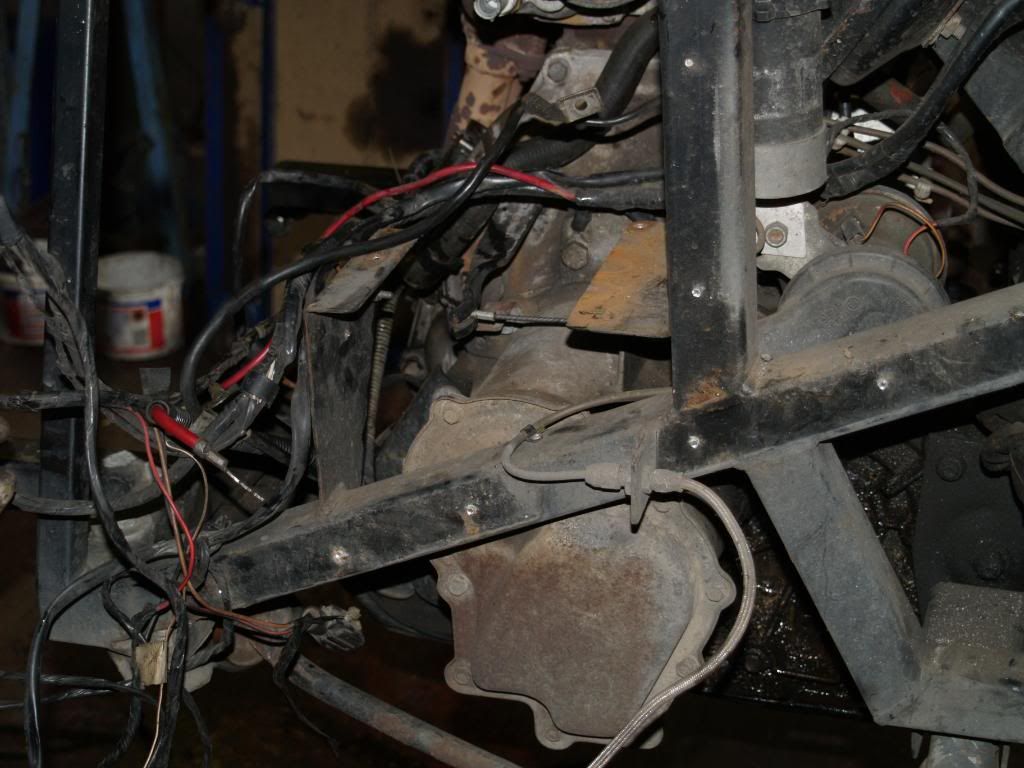 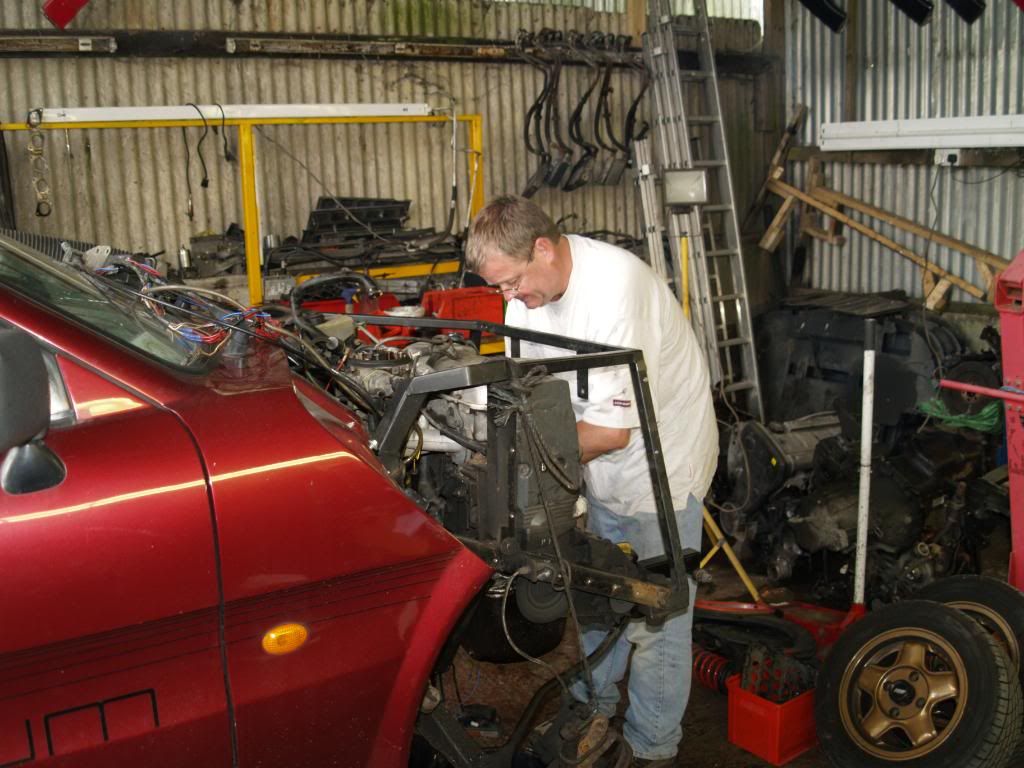 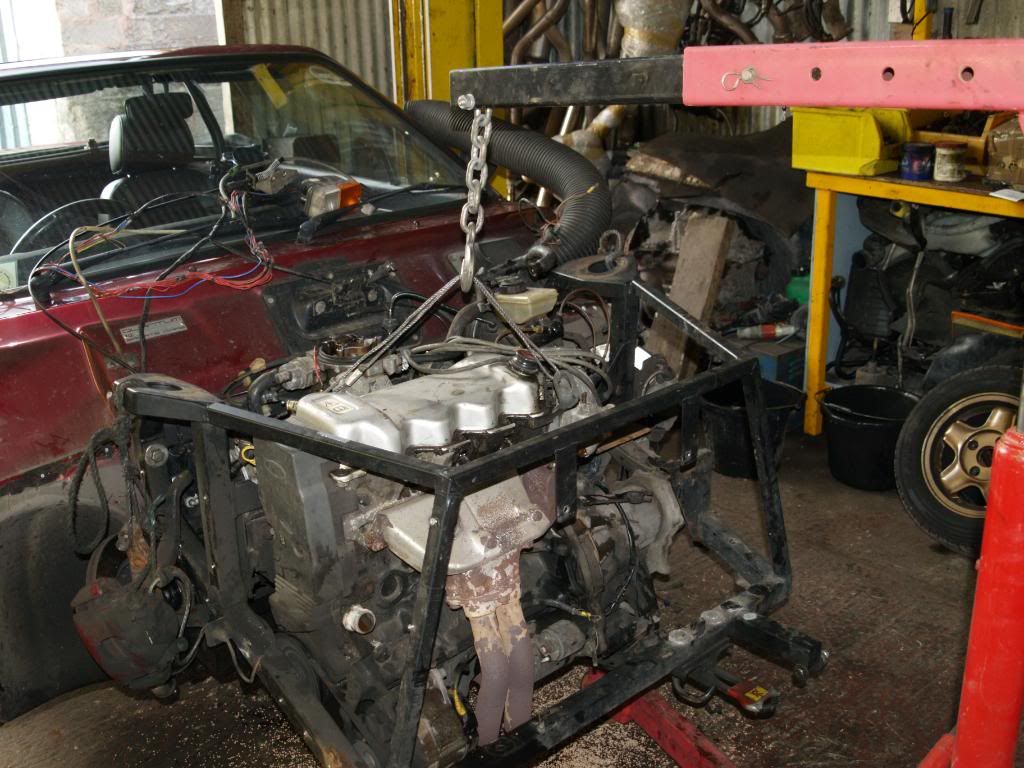 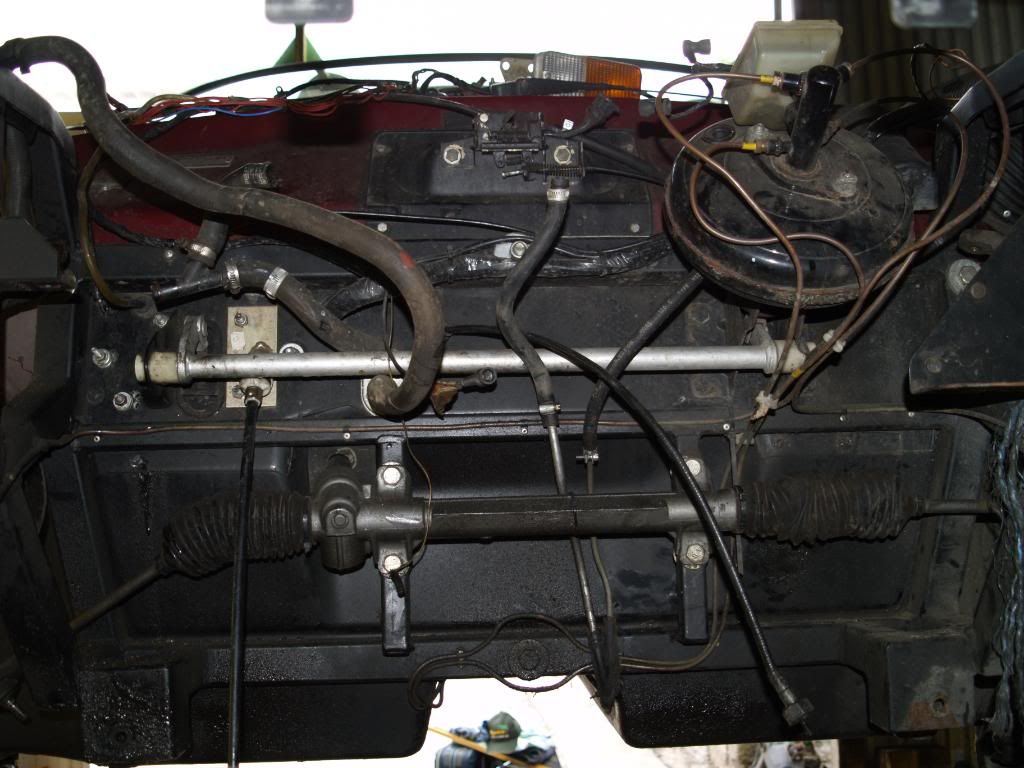 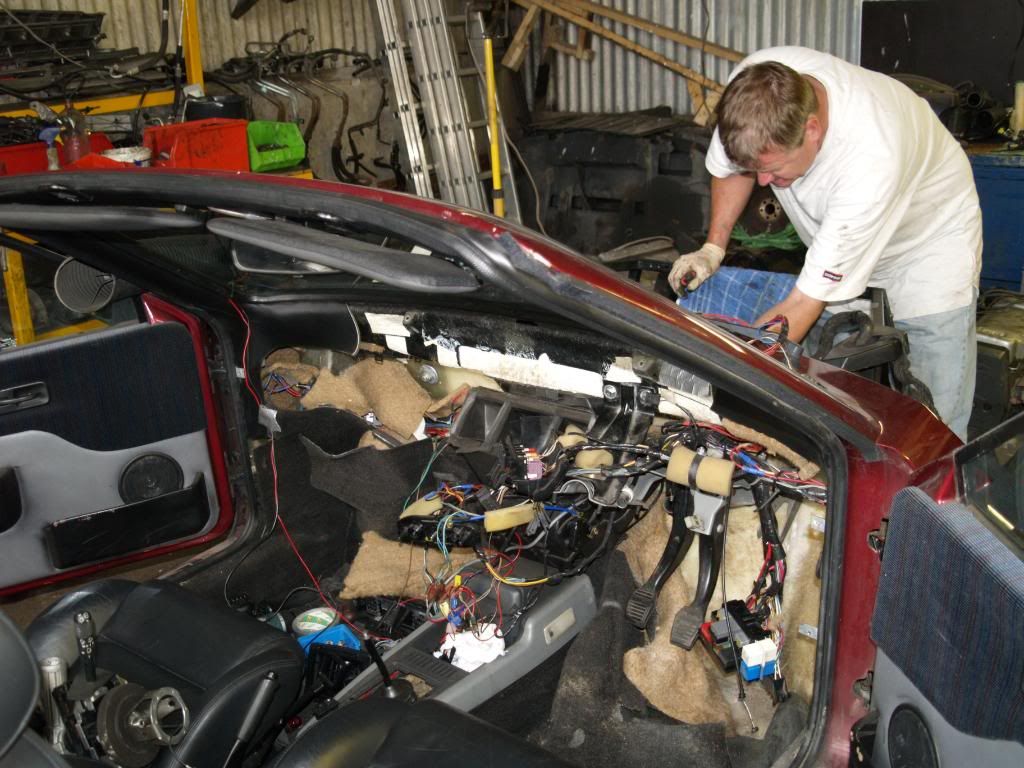 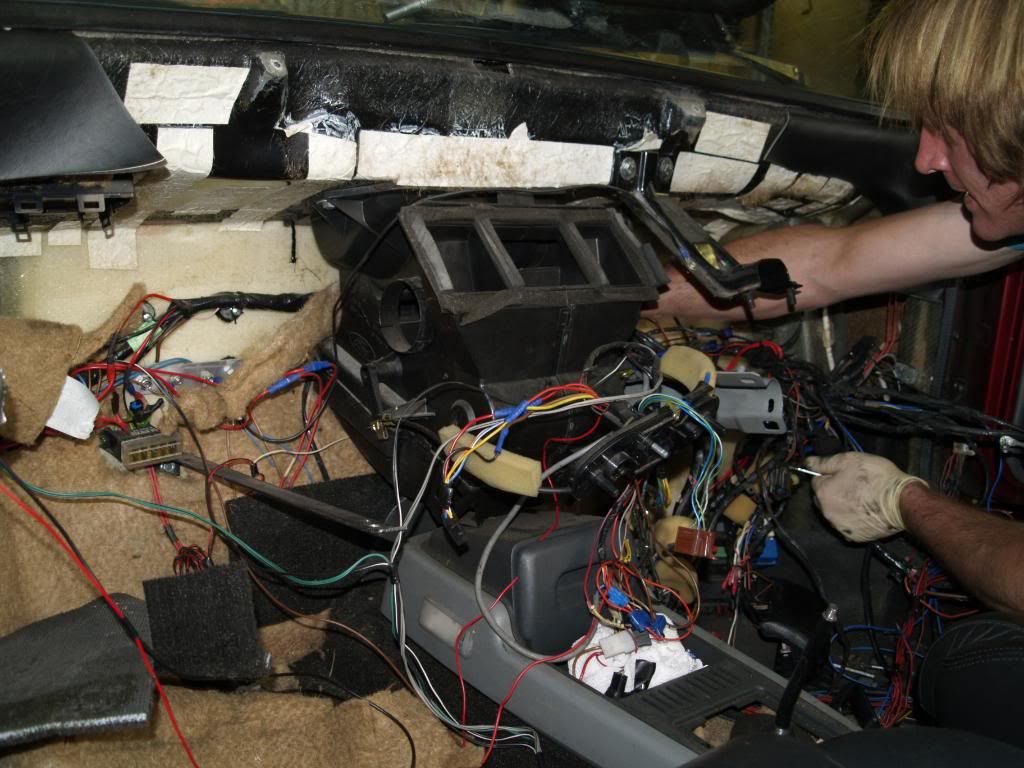 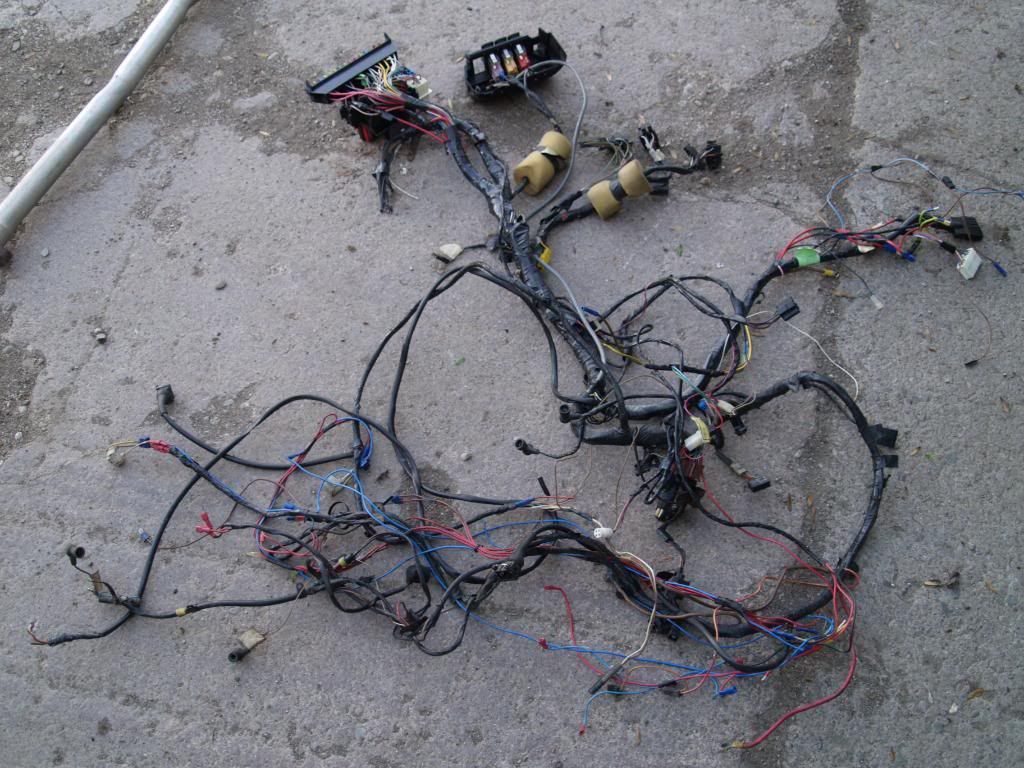 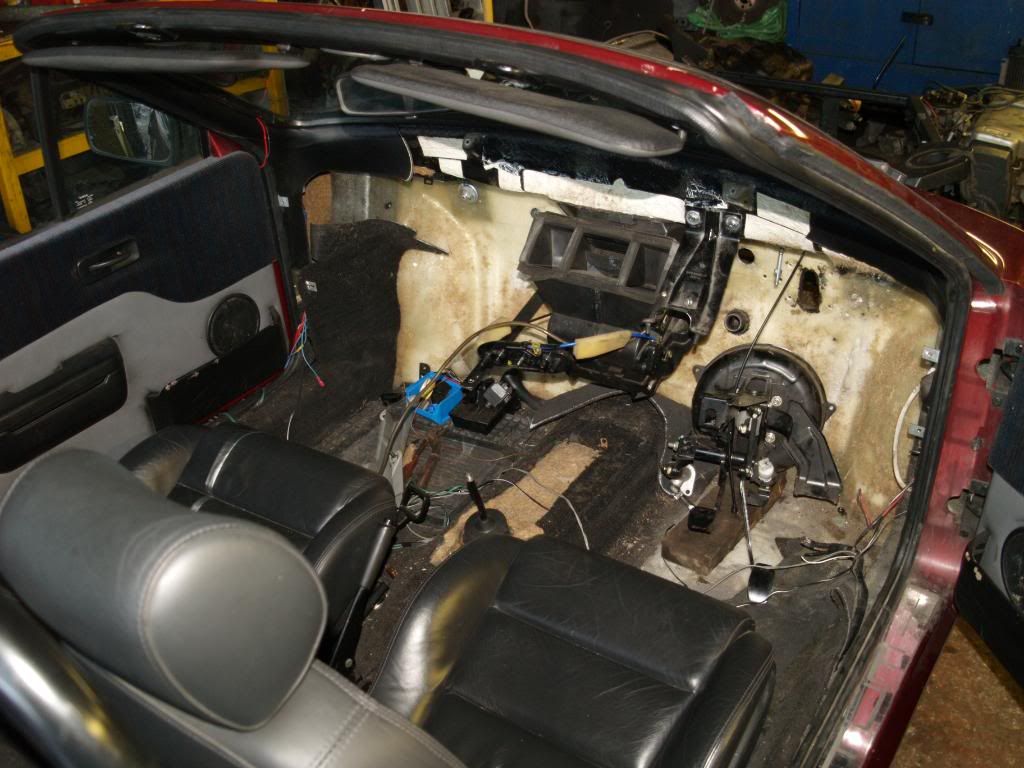 Sunday - A day of rest Sunday - A day of restSorted out the steering; with an amount of cutting away and gluing in of new bits of metal, the coupe power steering rack can be accommodated in the right place to avoid bump steer. It turns out that the track control arms for the Fiesta rack unscrew and fit the coupe rack. The rack is only about ten millimetres wider than the Fiesta, which is taken up by adjusting the track rod ends. We experimented with the 16v and the 20vt racks but it turns out that the 20vt rack - two turns end to end, vs four turns for the Fiesta rack - gives the maximum steering without binding the wheels, so the turning circle should be as good as it was before. 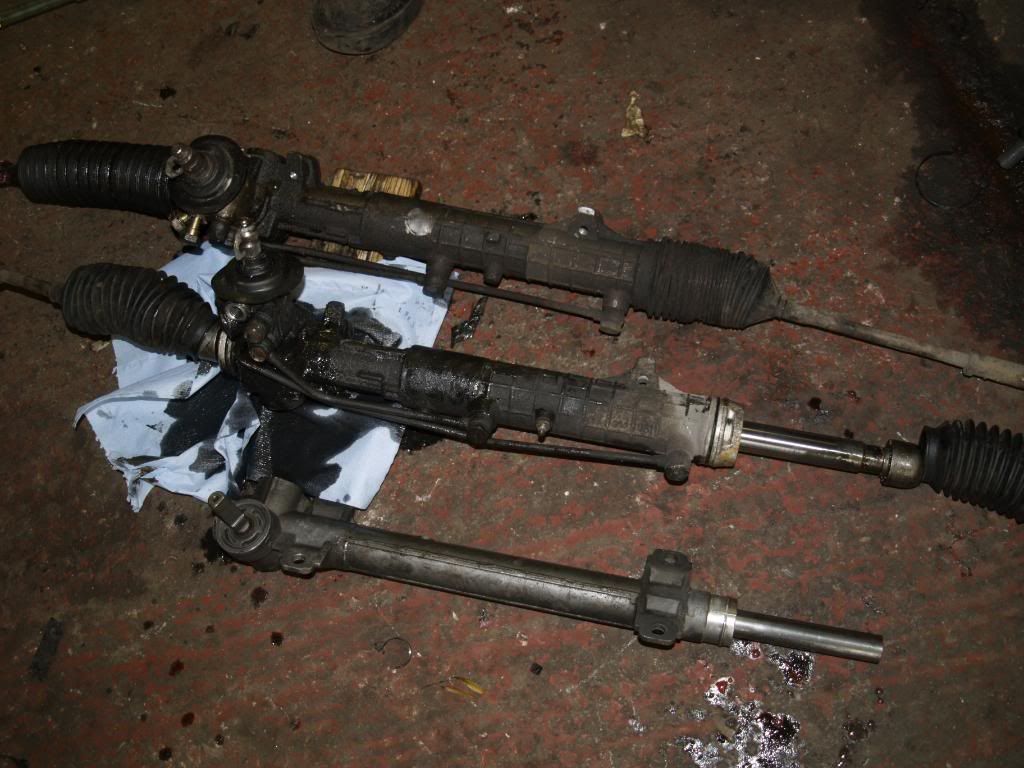 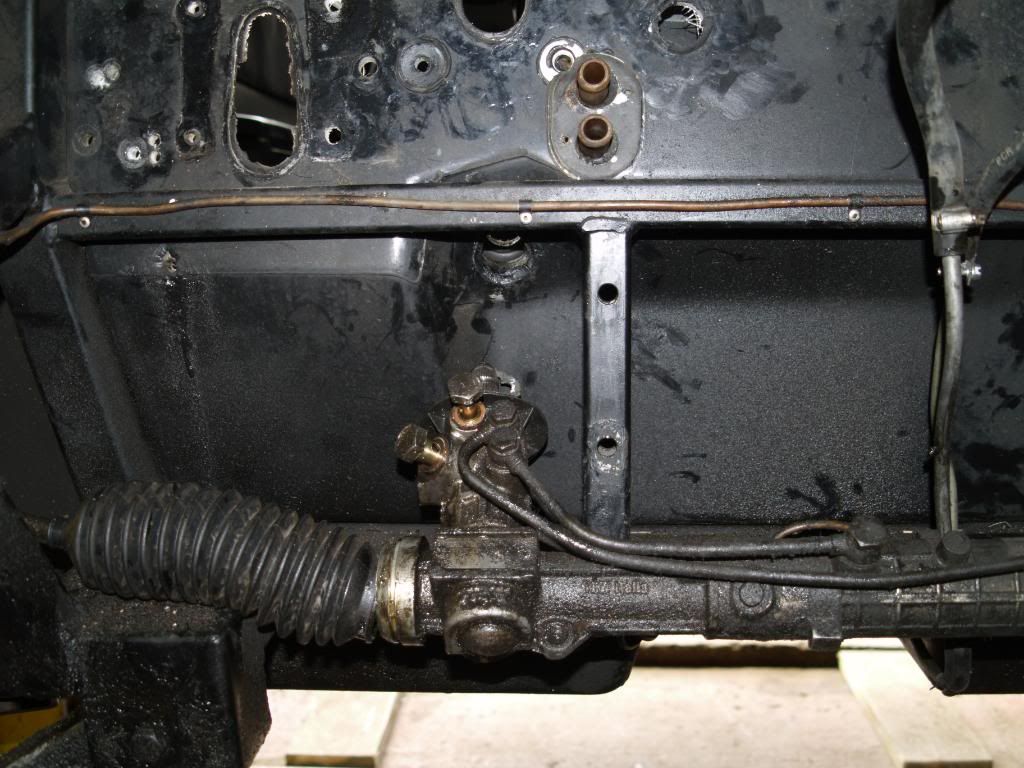 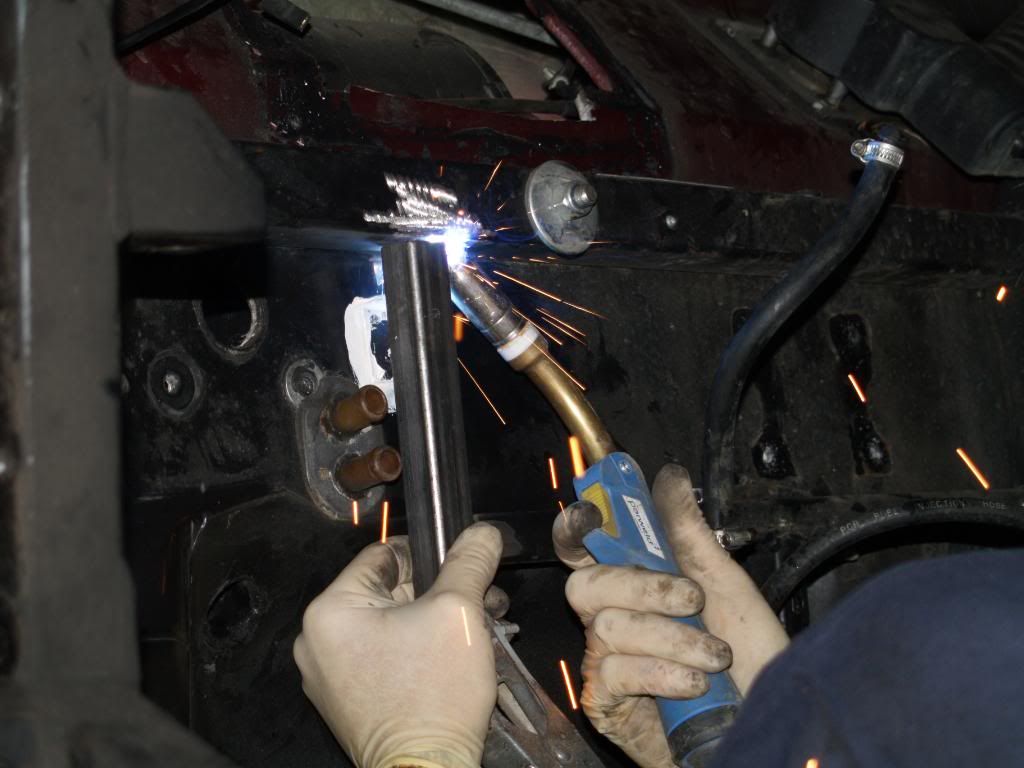 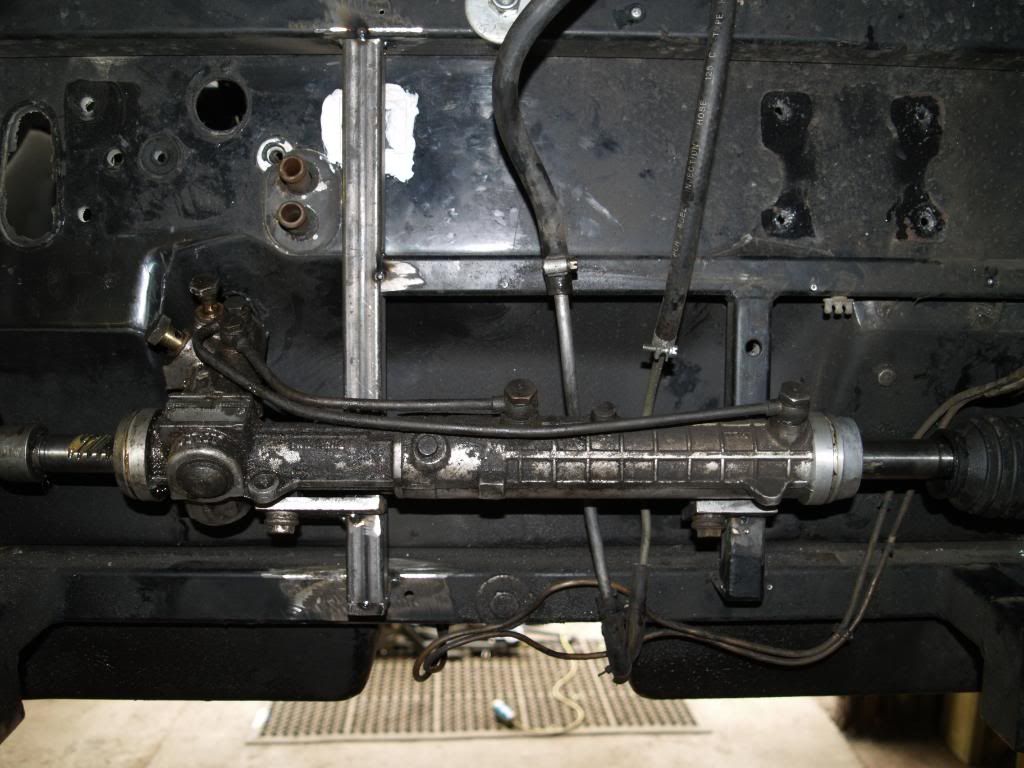 The engine is proving recalcitrant. There's a chunk of pulleys and bearings in the right front corner which want to interfere with the frame and the suspension pickup; still thinking about how to get that sorted out. Let's see in the morning. 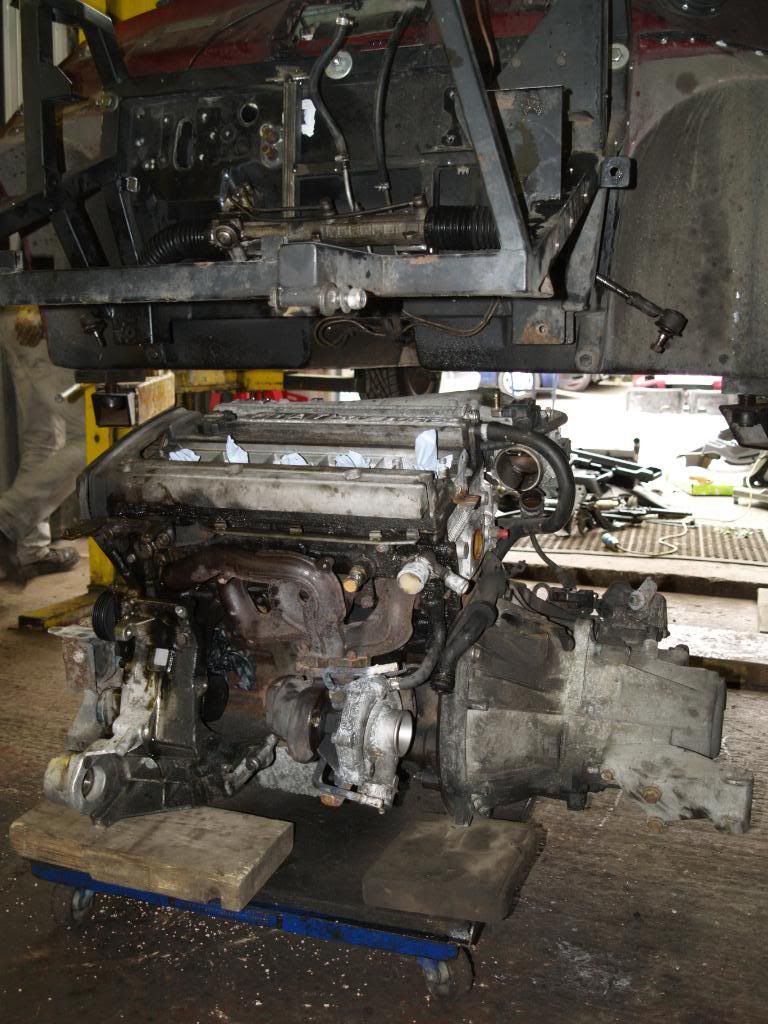 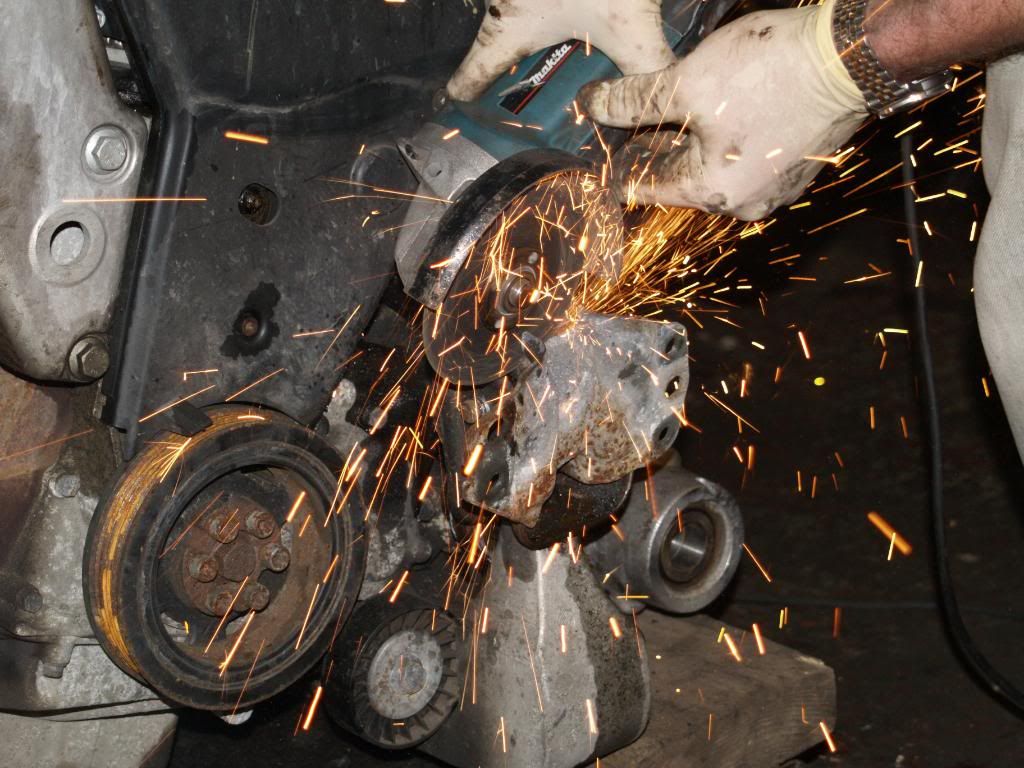 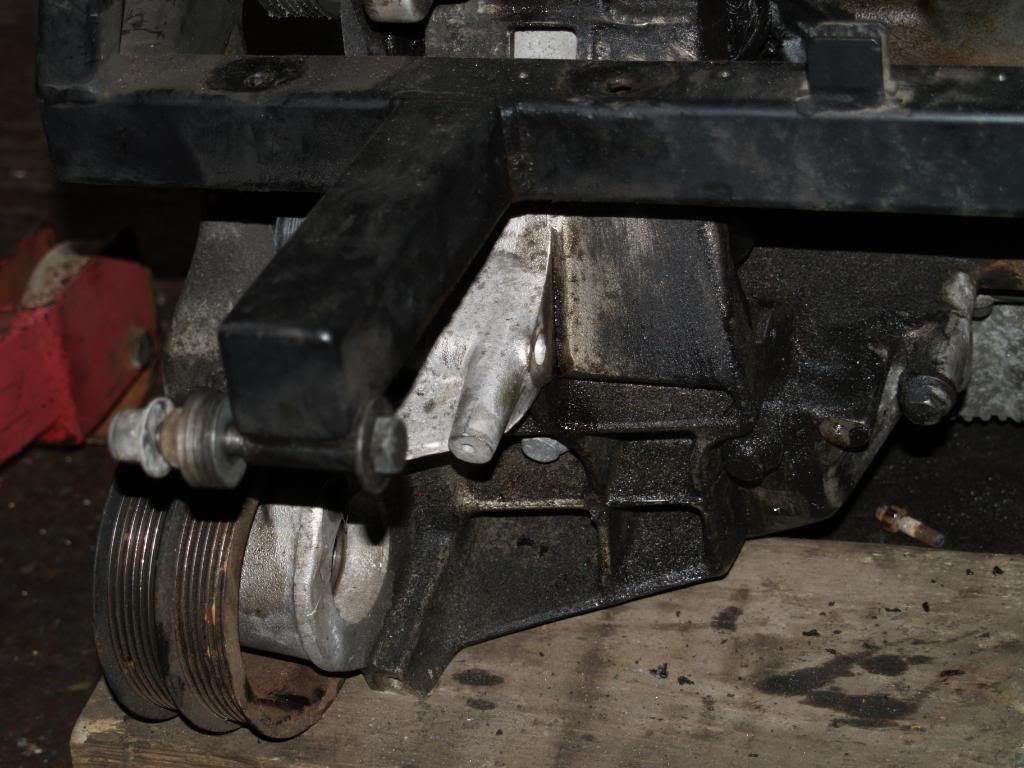 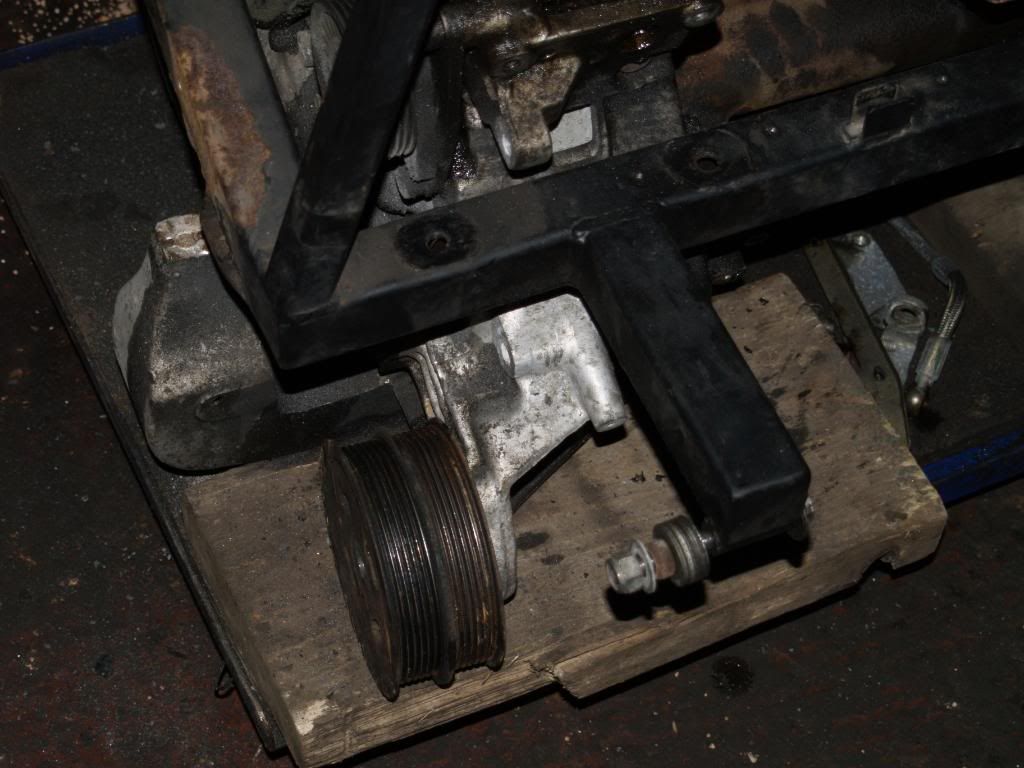 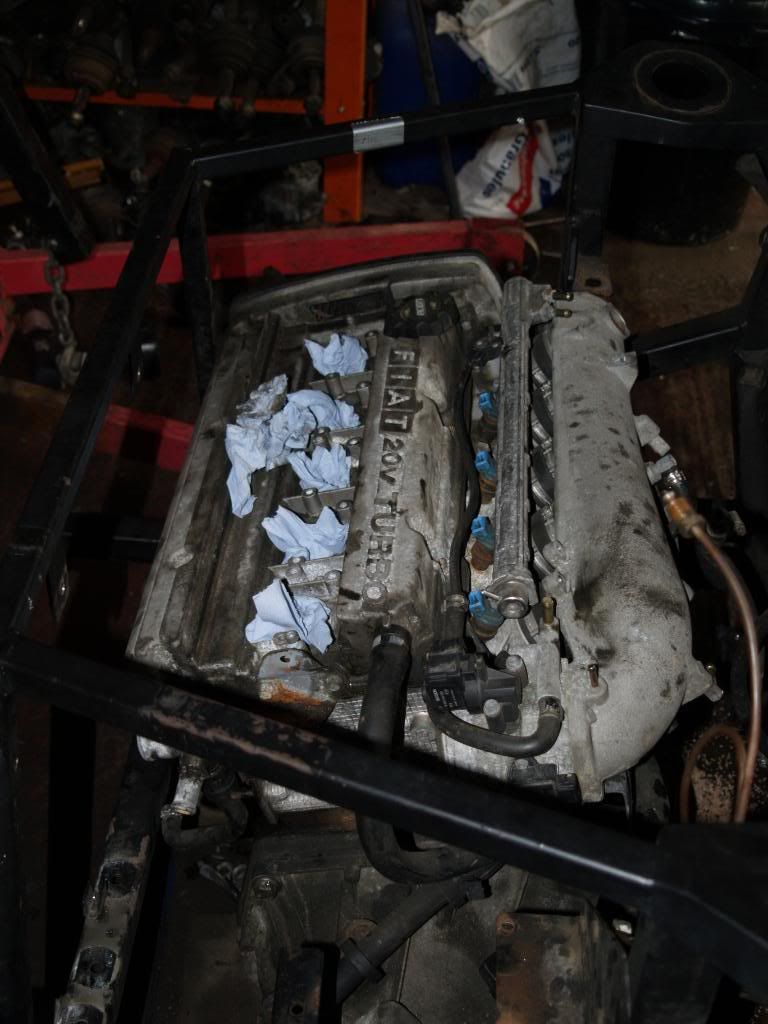 Day three - Monday Day three - MondayThe engine has been in and out a dozen times today while we modified, tacked, cut, welded, hit, bent, tacked, cut, and welded the engine cradle. This is a basically bent cube of steel that holds the engine off the floor and attached to the main body tub, locates the suspension and steering pickup points, holds the bonnet and ancillaries, and carries the acceleration and braking loads back to the tub. It's not the same shape as the 20vt engine... 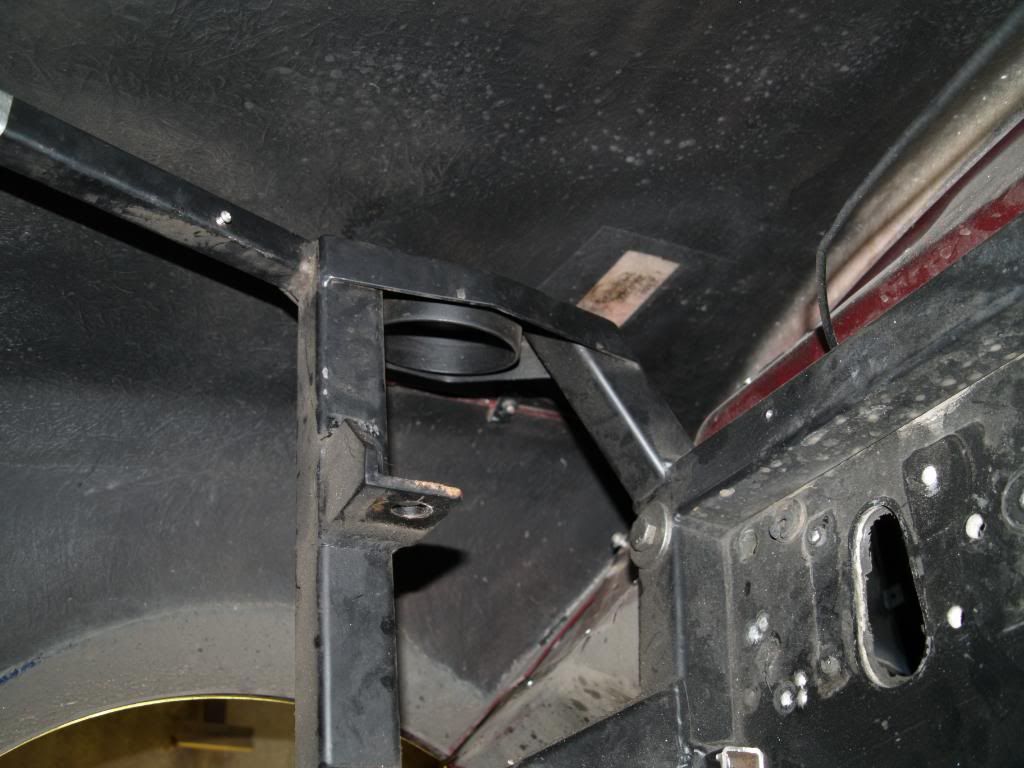 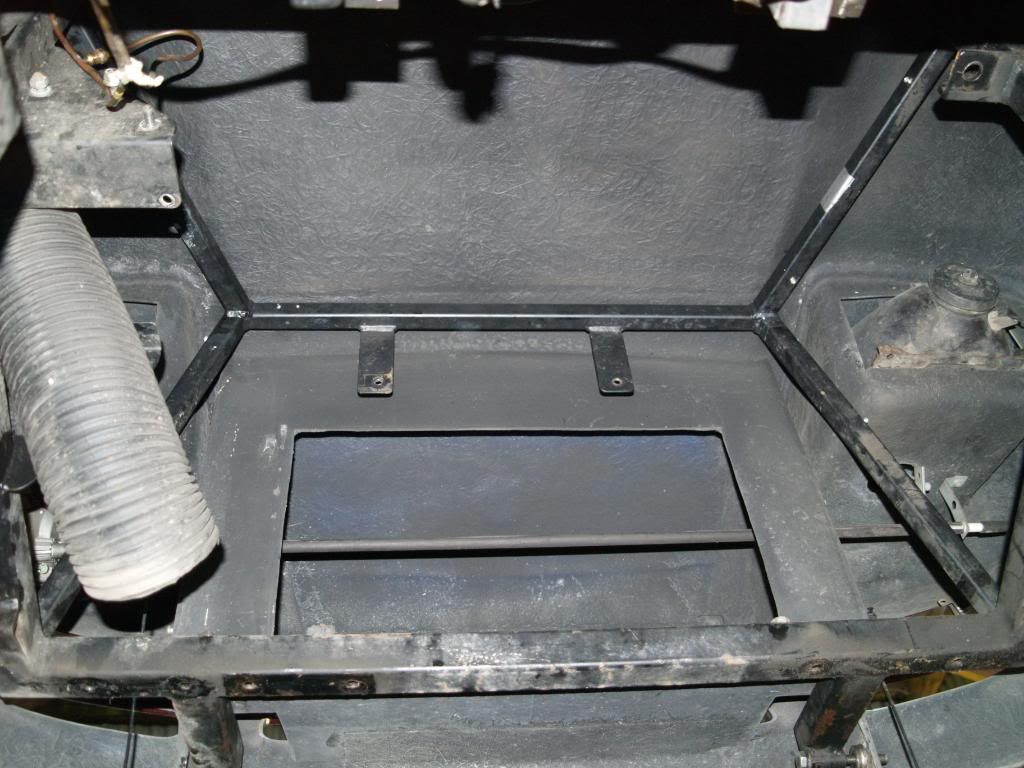 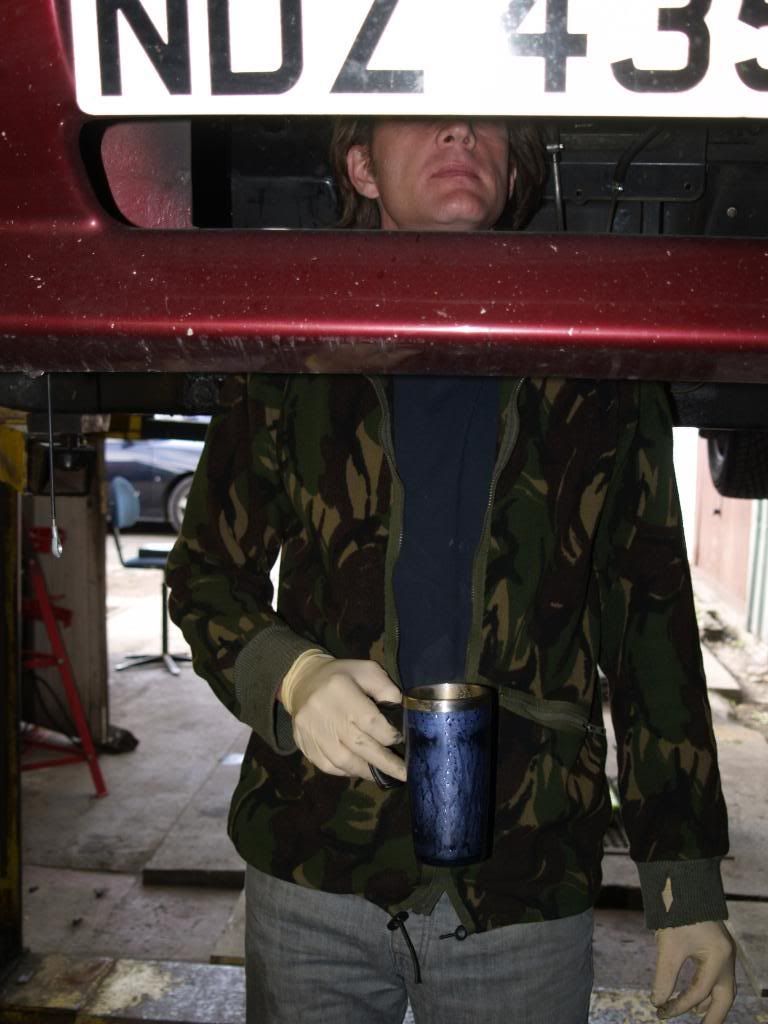 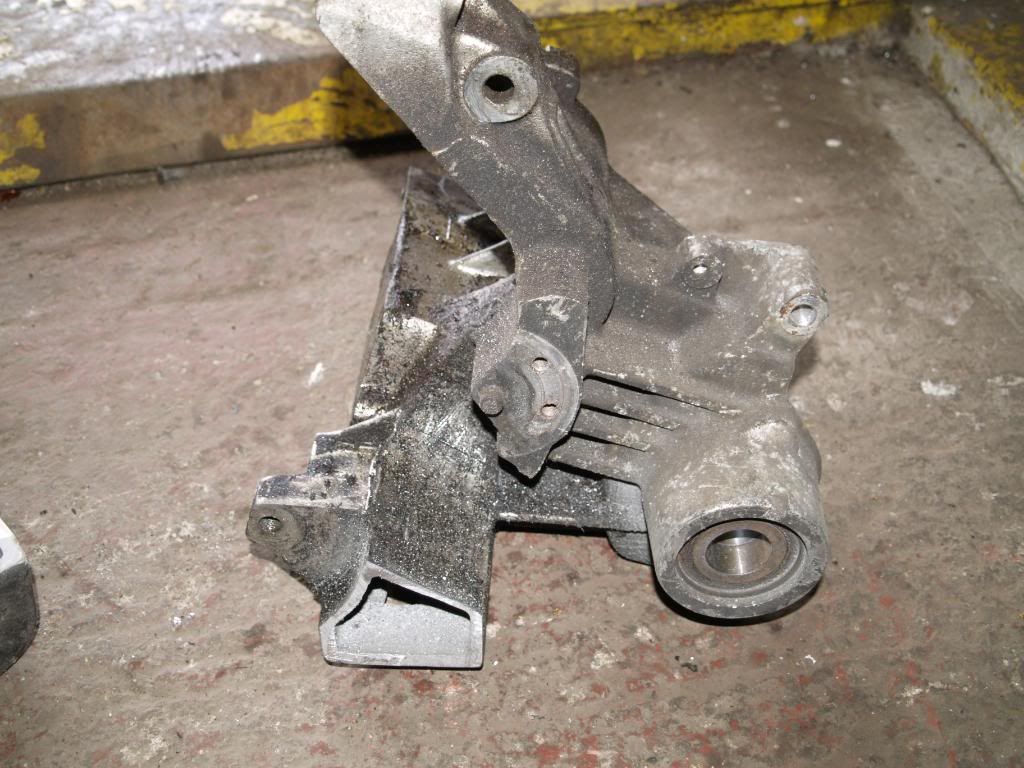 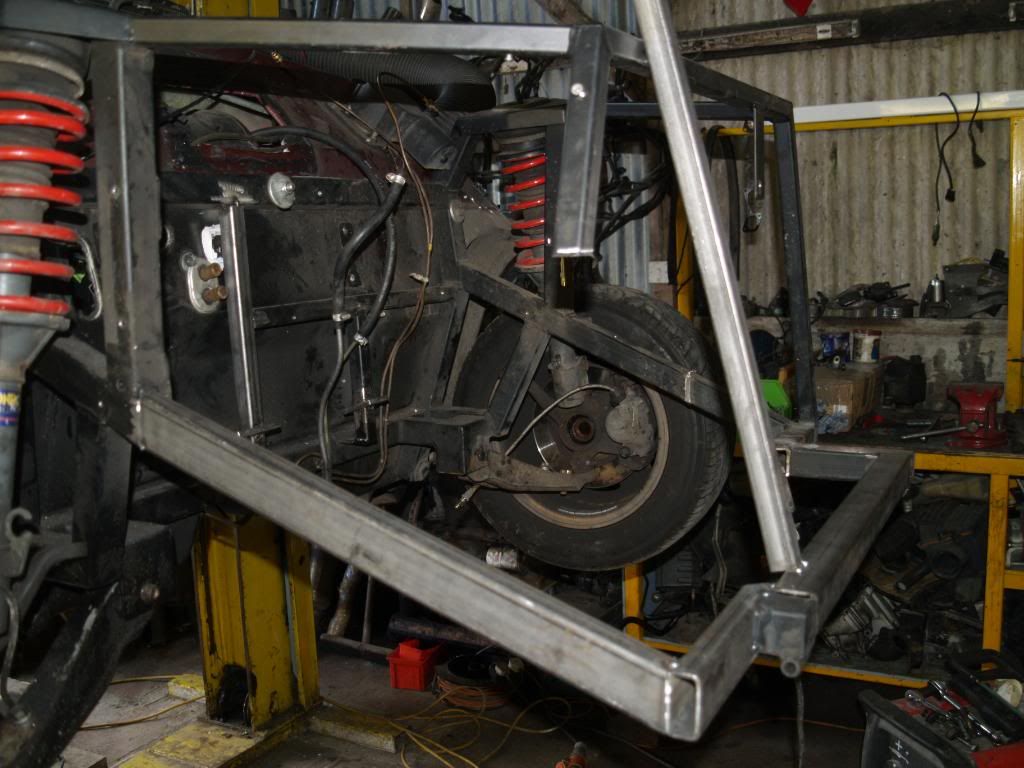 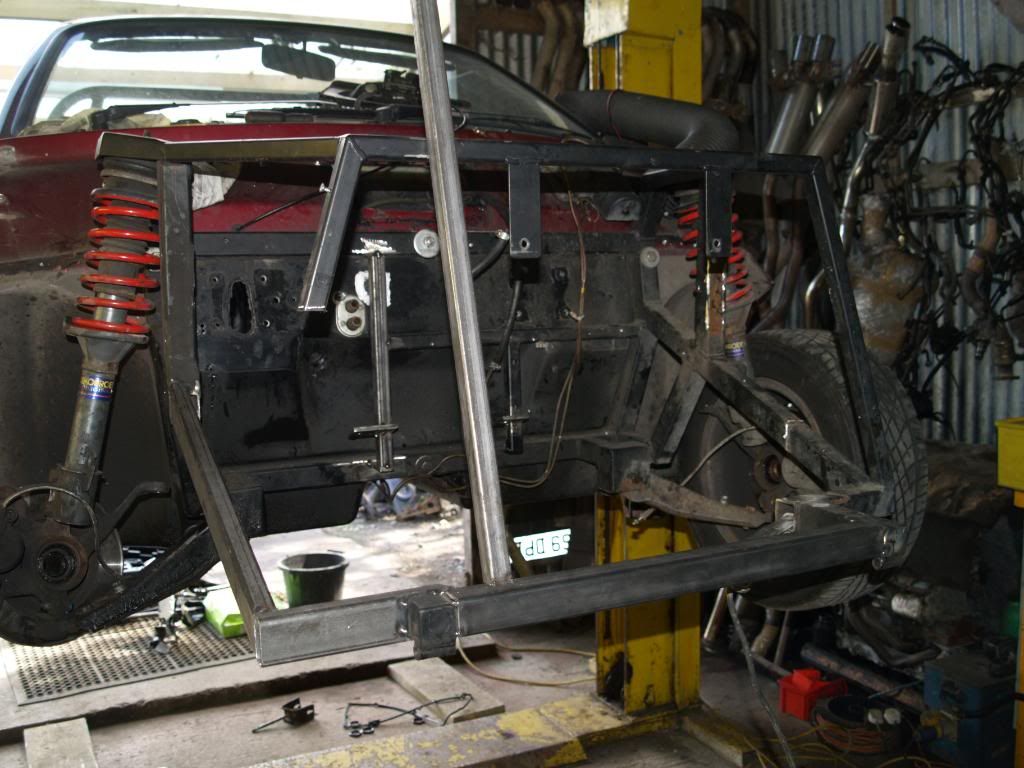 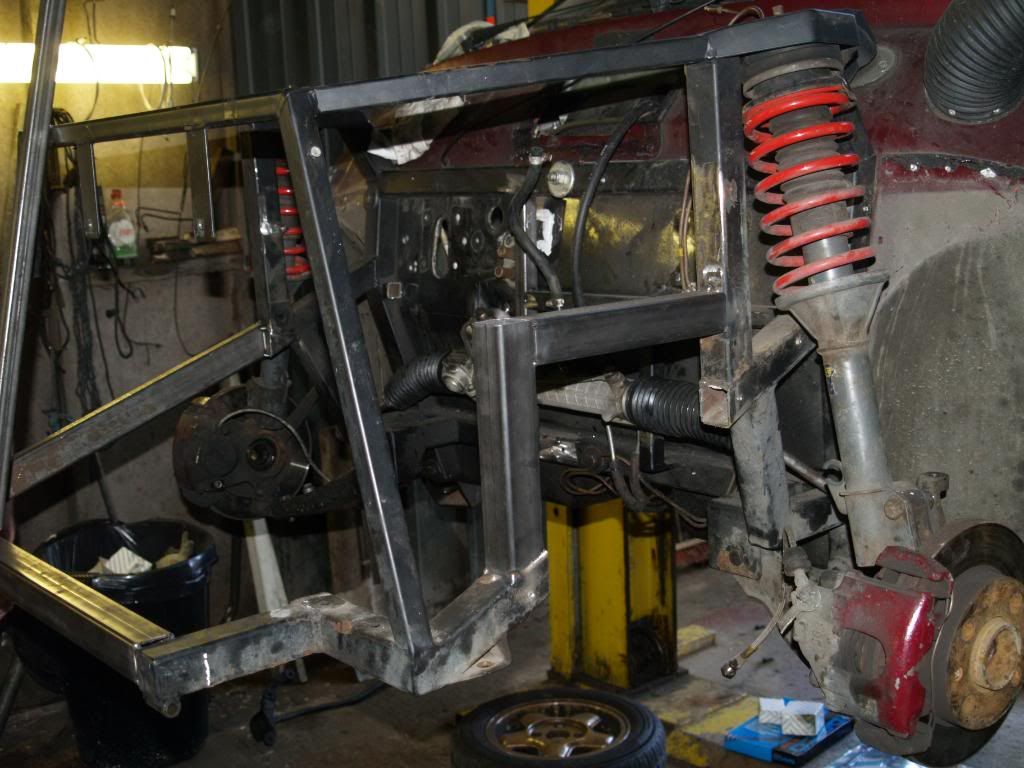 We've had to nibble away a bit at a time as we measure clearances to ensure that the alternator doesn't foul the front and the driveshafts don't foul the suspension arms; tacking in holding bars to maintain the shape accurately while we remove bits that are in the way and replace them with something more suitable. The engine is now in its final position, plus or minus half an inch, both vertically and horizontally. Still a little more work to do on the steering rack - I think it can be moved back a touch for more clearance around the gearbox - but the bonnet is on (temporarily) and nothing touches except the back of one headlamp moulding. We've chopped the front right engine mount off and are replacing it with a mount at the rear right, modified from the tie bar; we'll tie forward too from the top of the engine. The fuel pump and filter arrived, which is nice, but the filter came with the wrong size spigots, which isn't so nice - damn. Should be here on Wednesday. Day four - TuesdaySeems to have gone slowly but actually quite a lot done. One and a half engine mounts complete (we ran out of cutting disks!) the first of which was really complicated. Top rear engine support has been chopped in half and a plate welded to it, which bolts to the Ford top rear mount and picks up on the chassis over the driver's wheel. Normal front right support has been chopped off where the alternator pulley is; it gets in the way otherwise. Gearbox mount forward has a drop plate which will meet a Ford gearbox mount on a plate to the chassis; uses the existing pickup points. One support still to fabricate under the steering rack; and a torsion stay to come from the front right of the engine. The bonnet has been on and off a couple of times to make sure everything still fits. A minor problem discovered last thing - the cam cover can only be replaced by removing the engine... not acceptable, so we're having a think about it overnight. 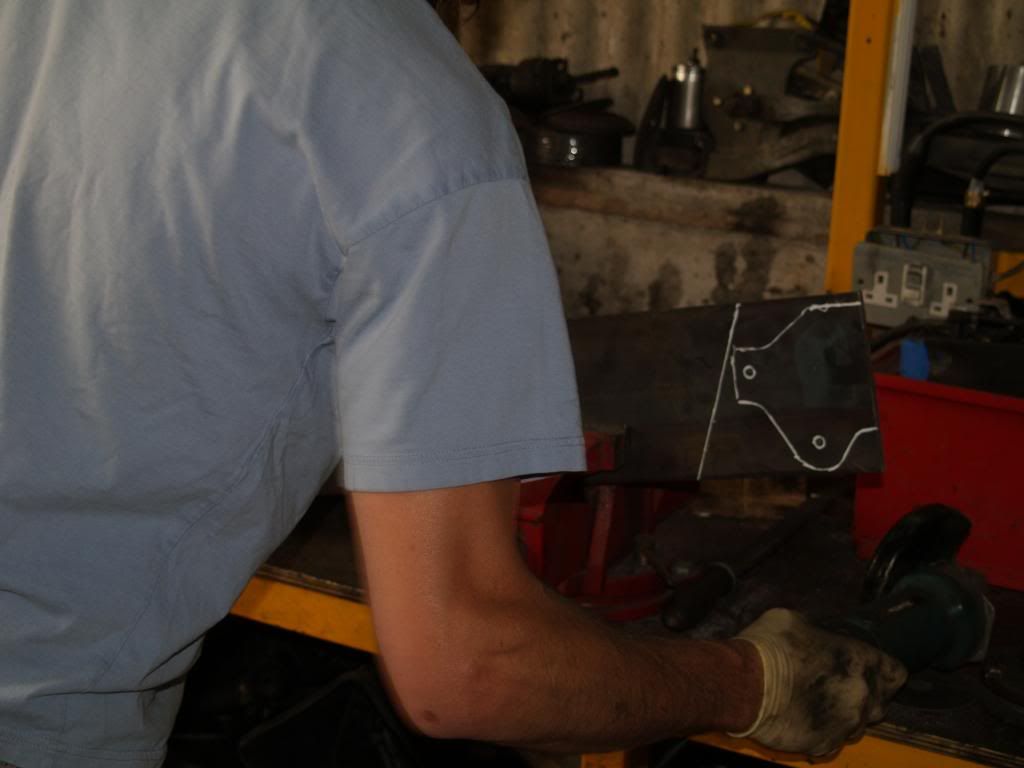 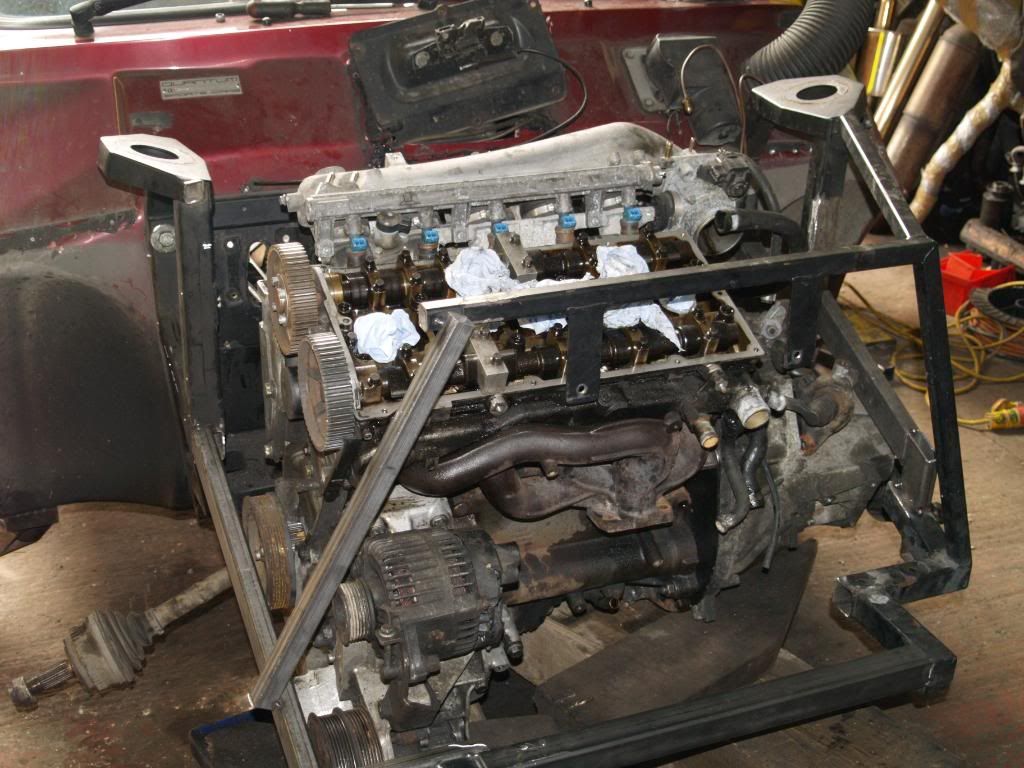 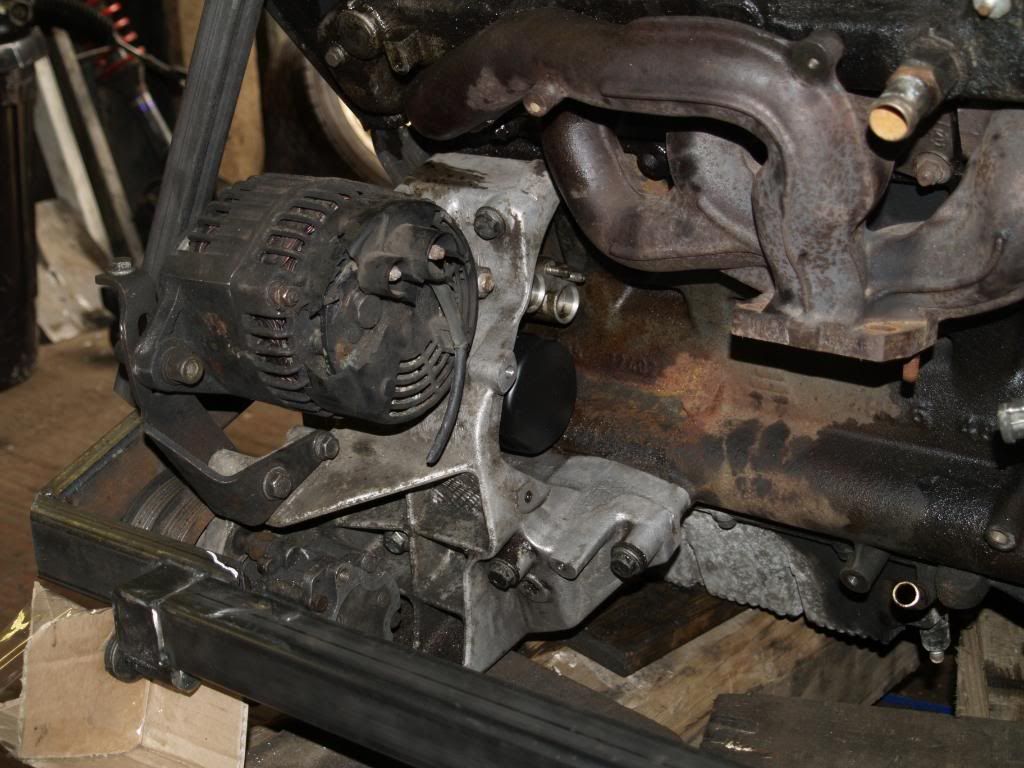 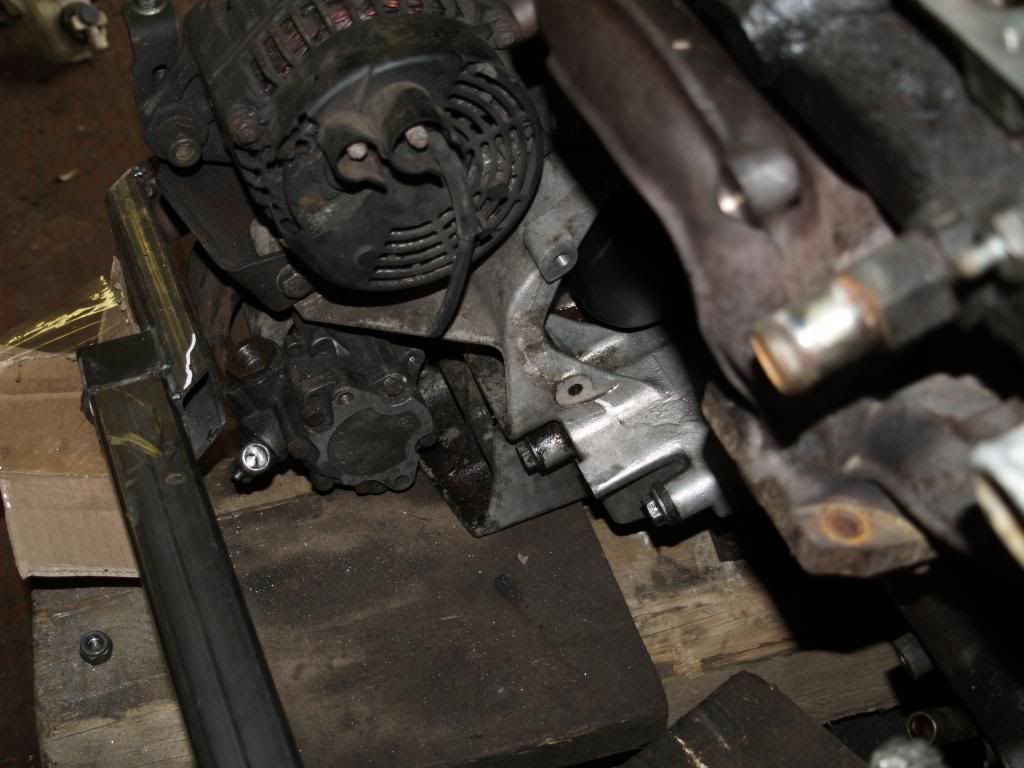 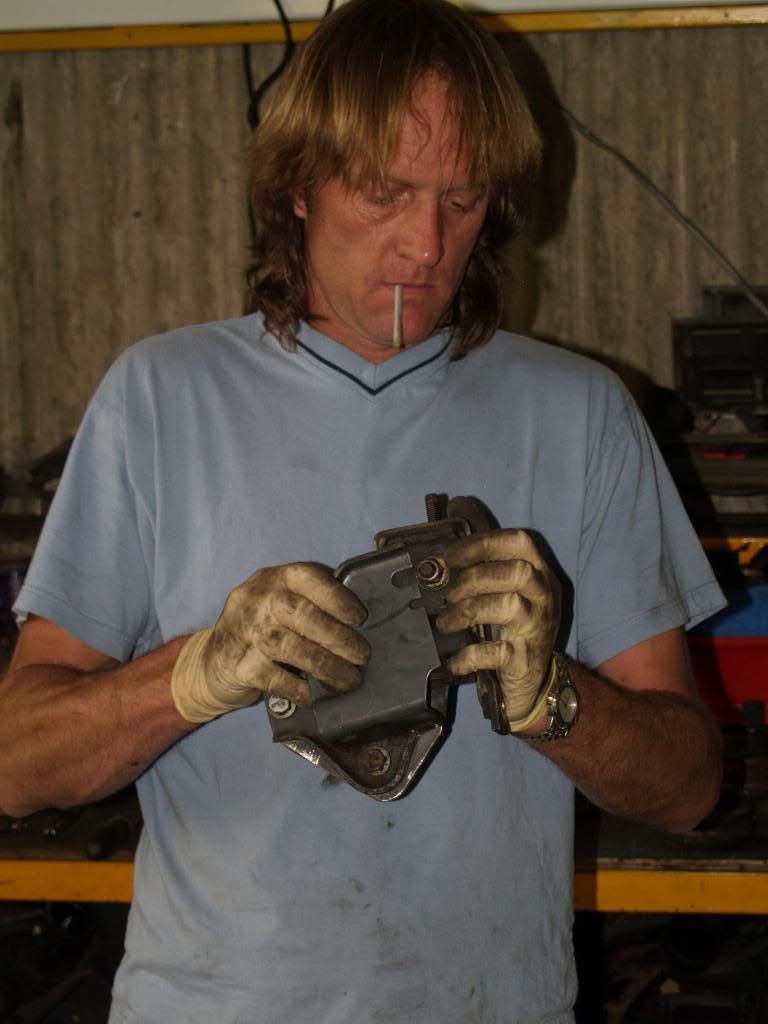 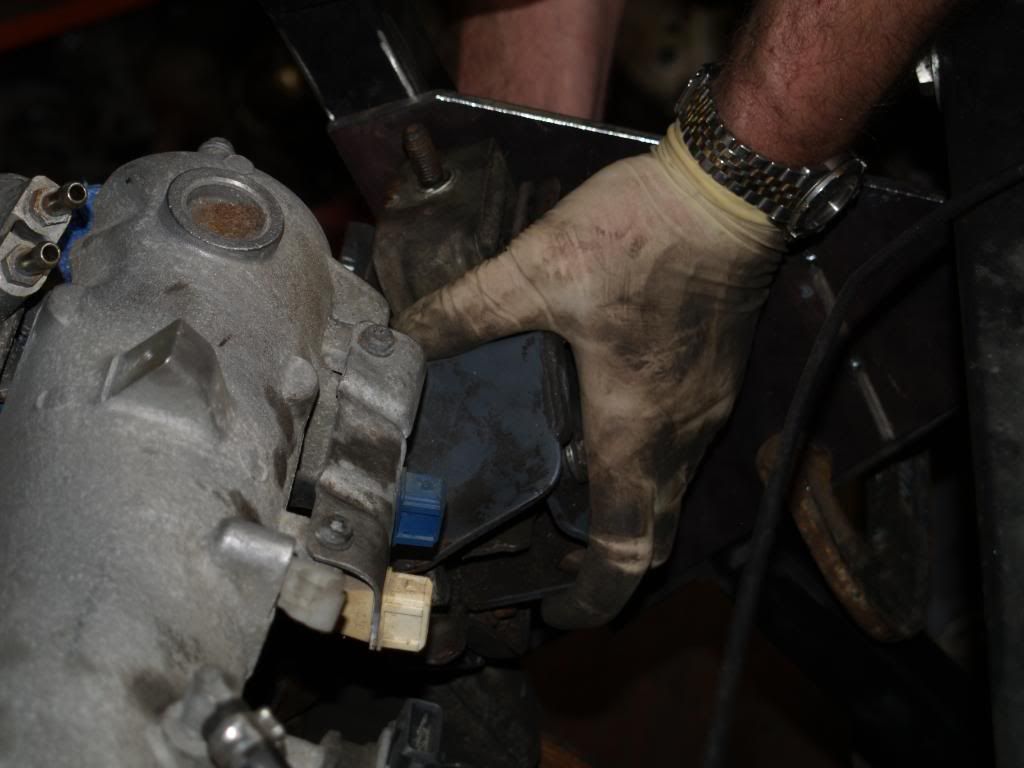 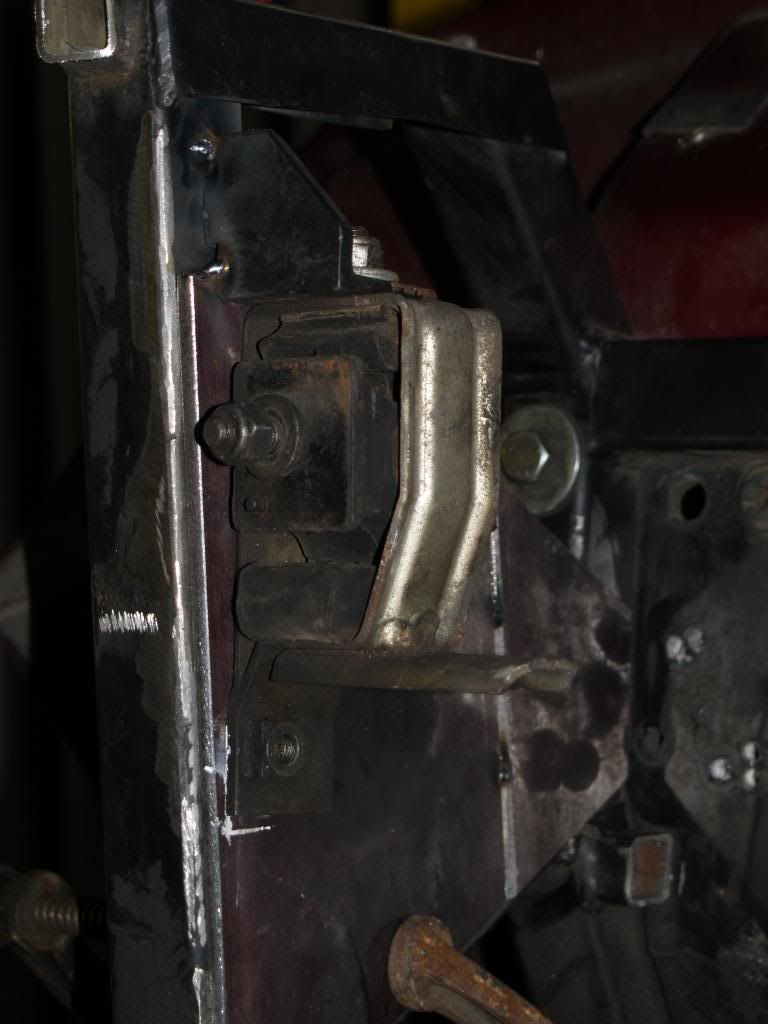 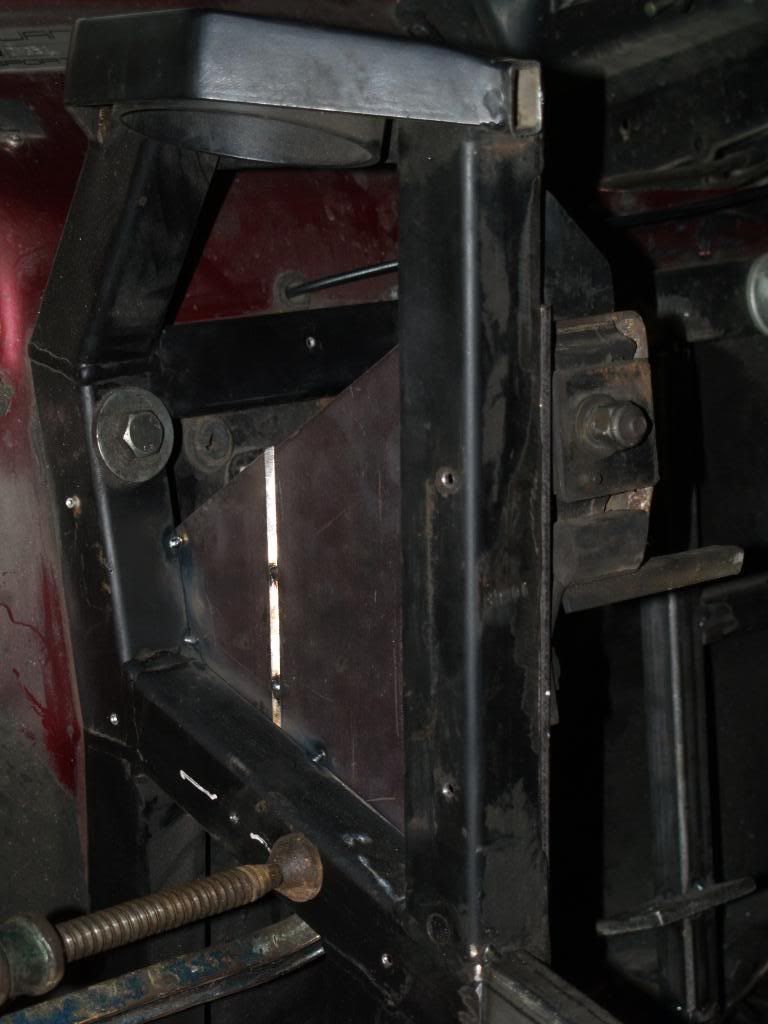 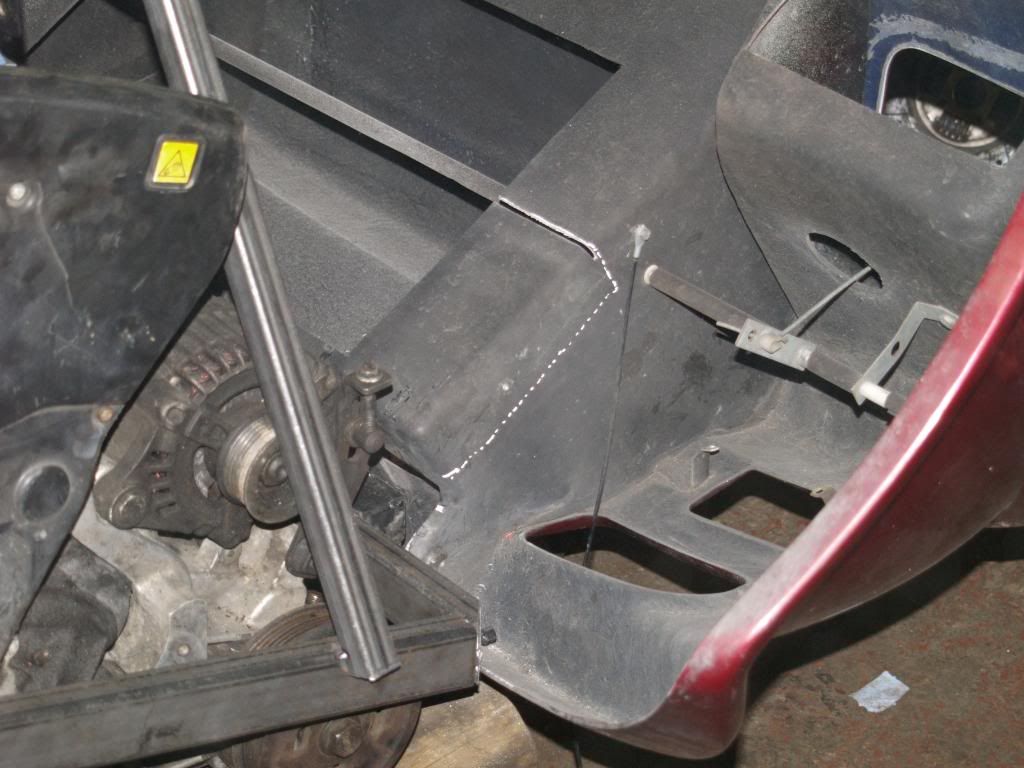 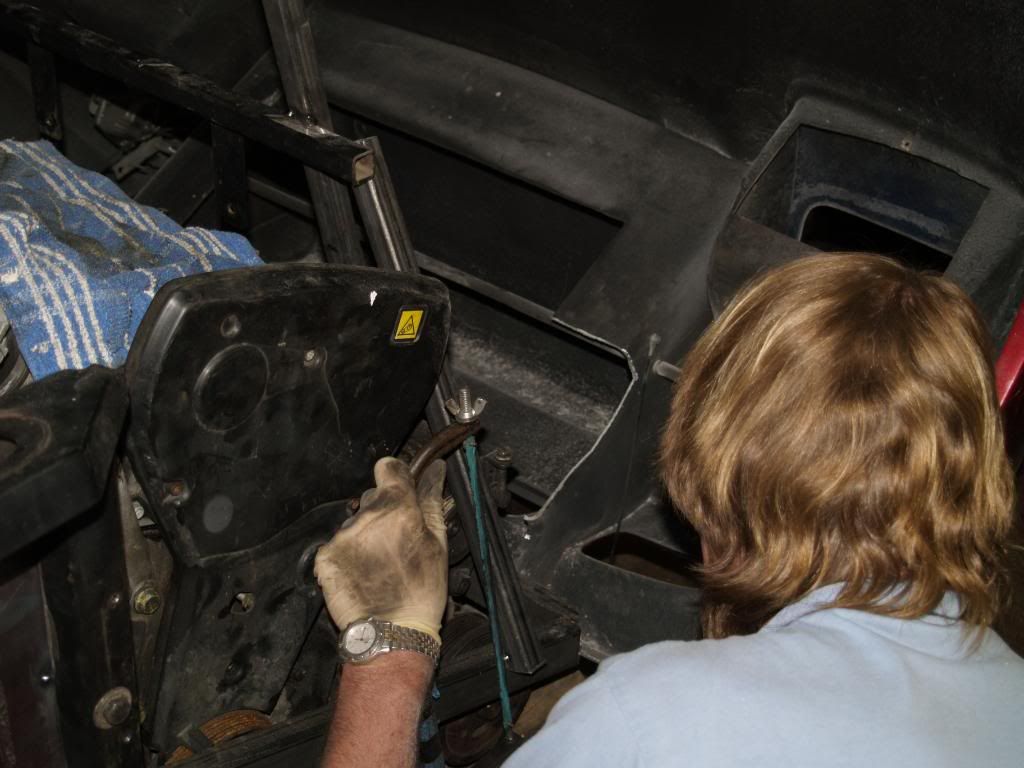 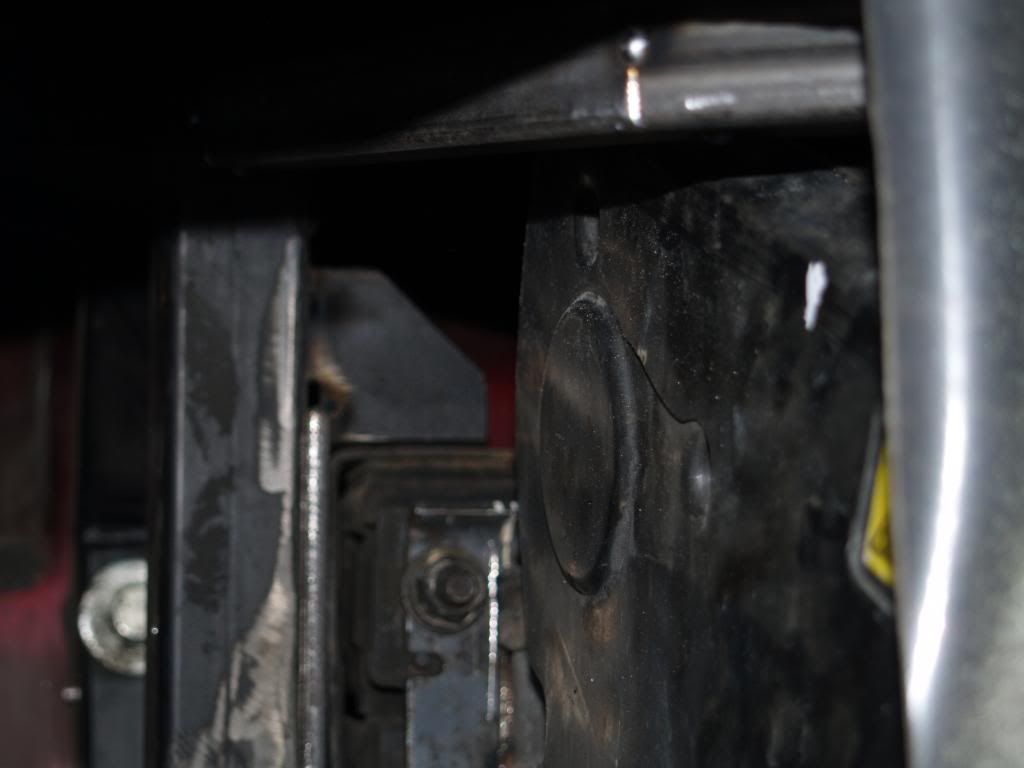 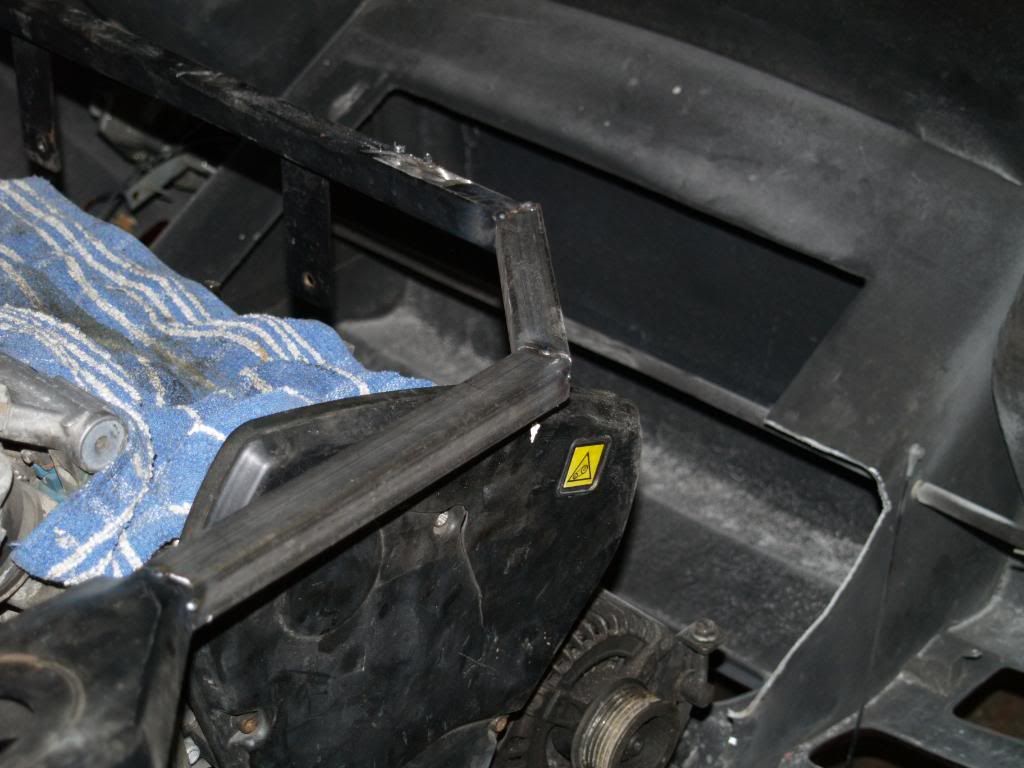 Day five - Wednesday Day five - WednesdayA little earlier today, as Joe is busy welding... Ordered all the service parts required to get it moving for both coupe and XR2 bits. Sorted out the issue with the cam cover, but that meant that the bonnet wouldn't shut... so a little more nibbled off from both the frame and the bonnet - which has now been fitted at least five times. Added a diagonal brace to take the braking and acceleration loads back to the tub, since there's now a more complex joint in that corner which we didn't trust too much. Completed the second engine support. Ordered a new radiator; the original Ford part has its holes in the wrong place and the Fiat part is too big. So we're having one special. Joe's finishing off the main frame welding - all that remains is the rear engine mount and a final decision on the steering rack mount - so we might paint that tonight. Made a template to fit the coupe pedal box in; we'll probably do that in the morning. Only tricky bit now is finding a way of picking up the suspension tie arms... we'll find a way! 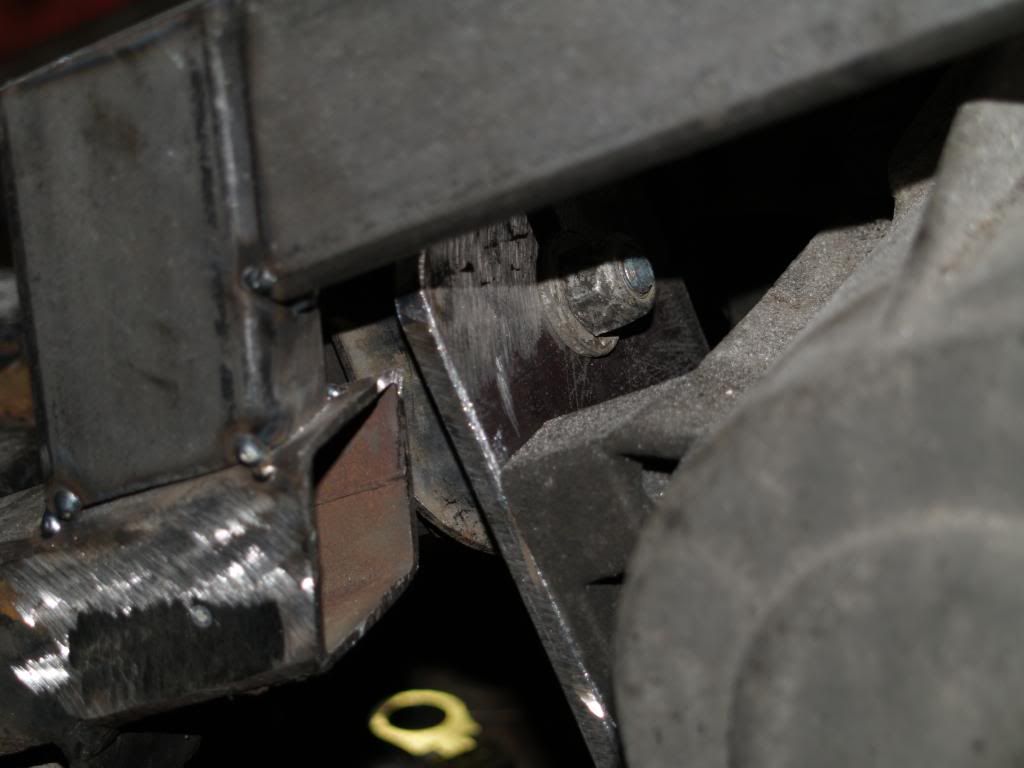 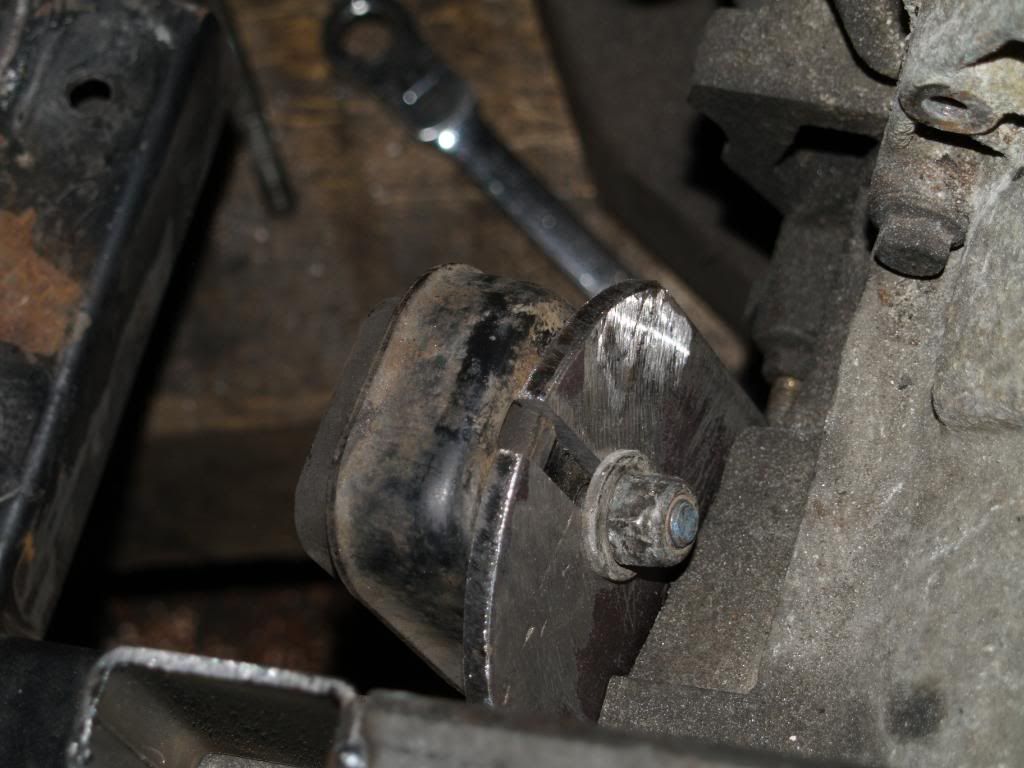 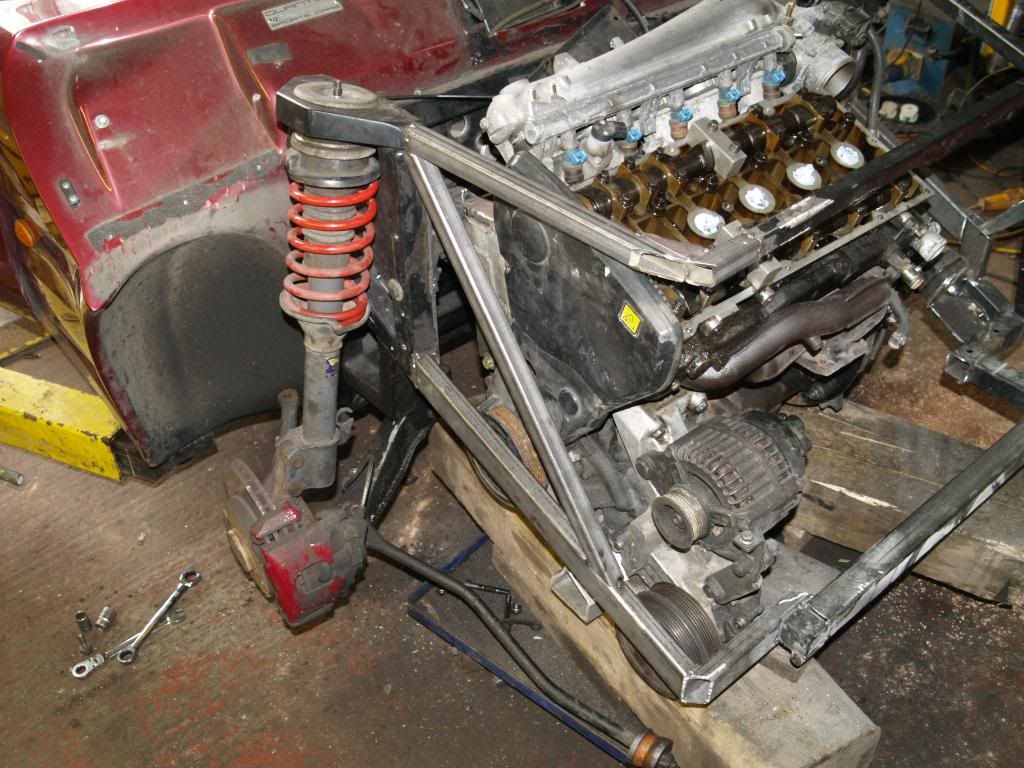 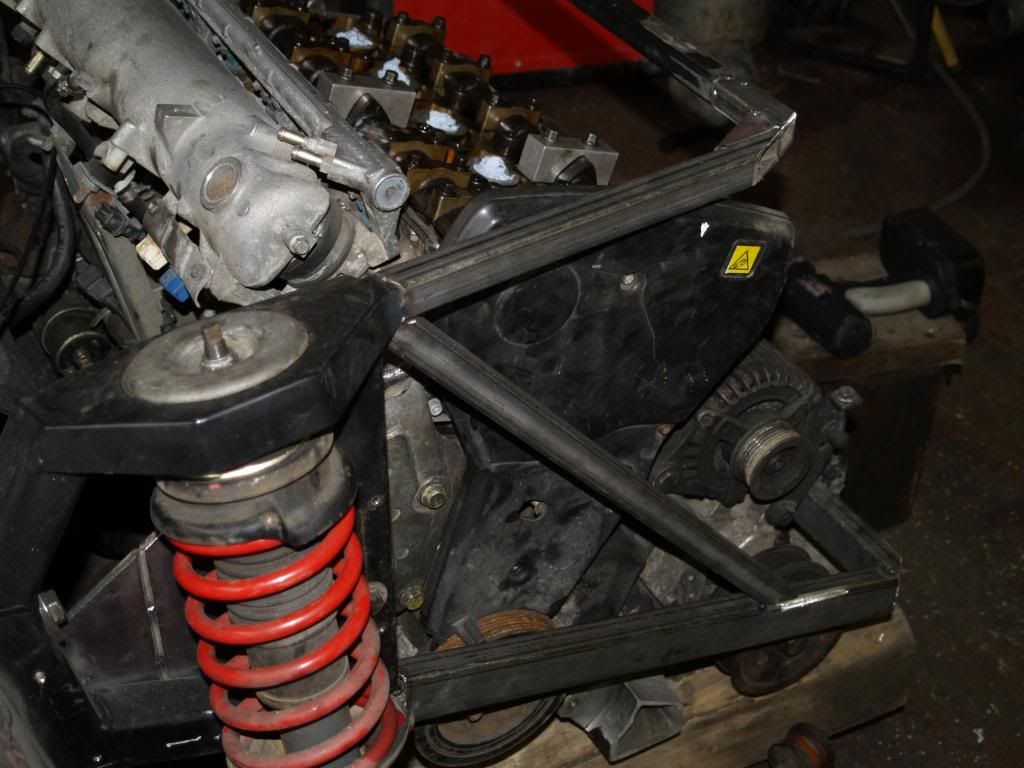 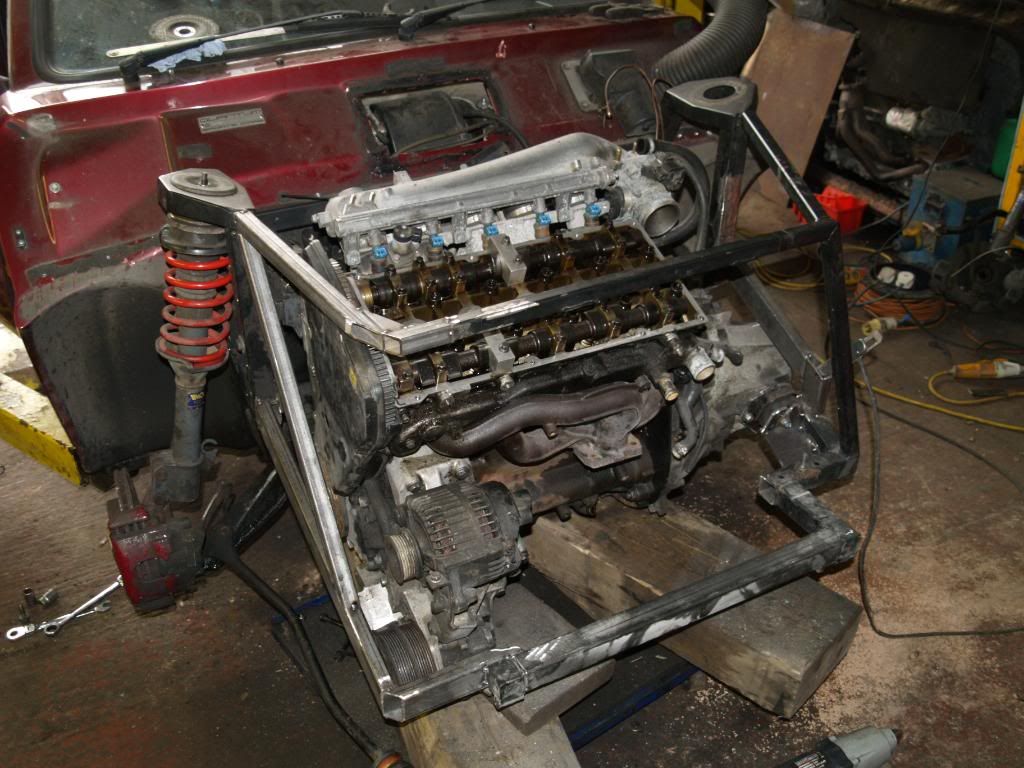 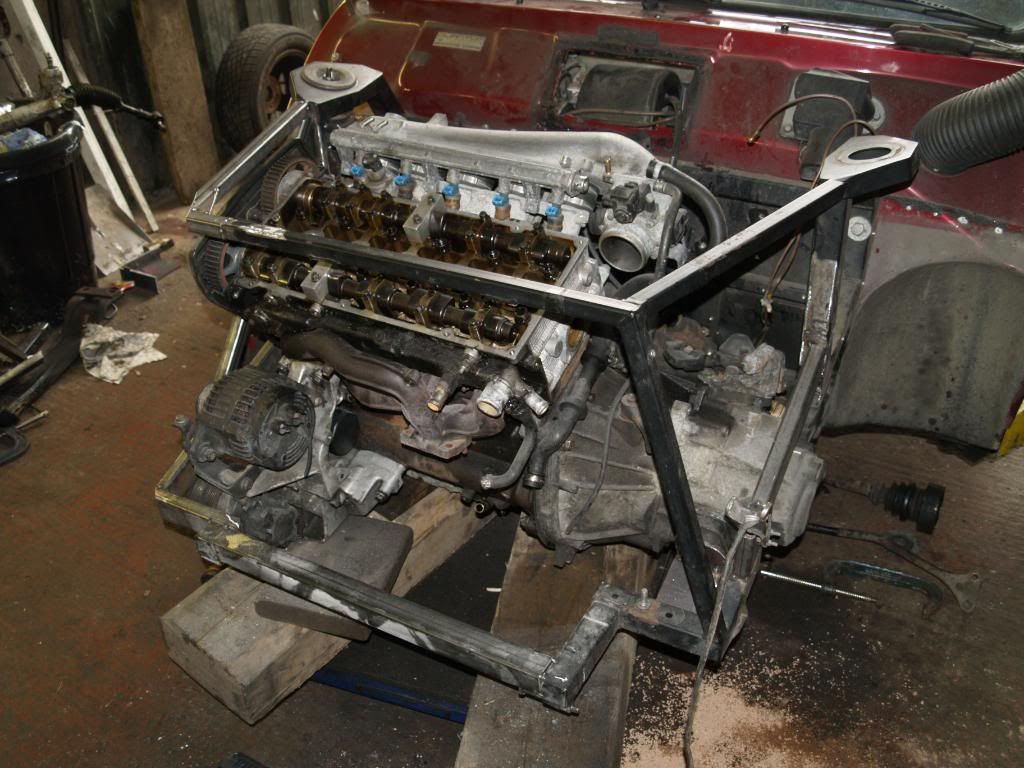 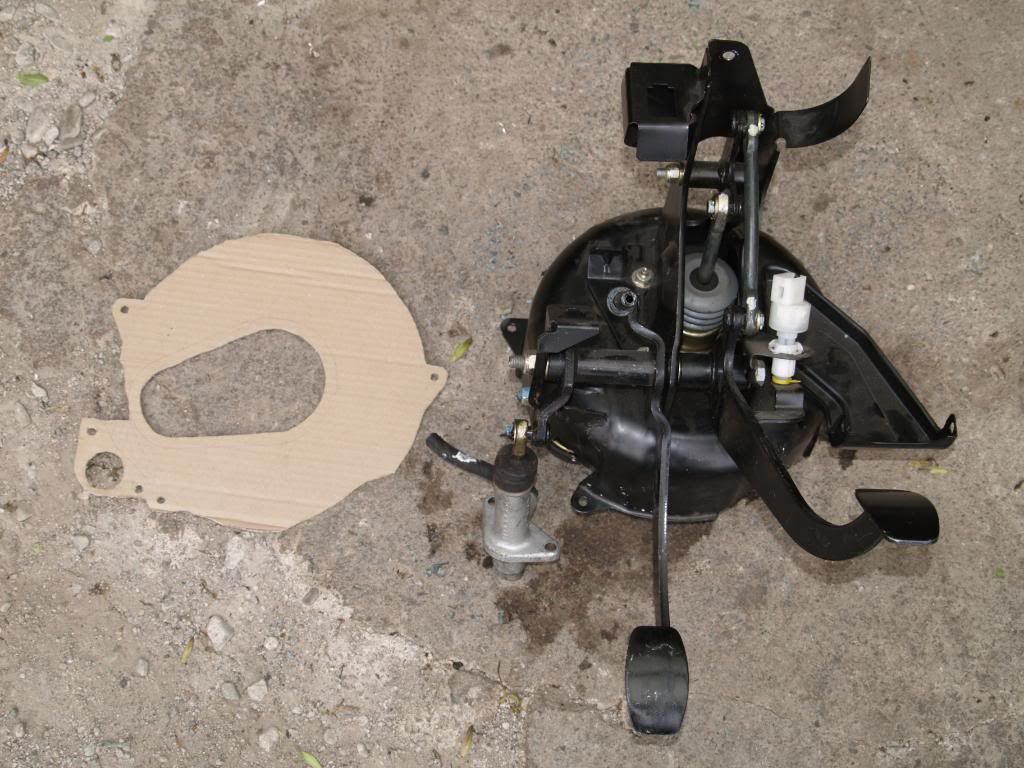 Day six - Thursday Day six - ThursdayRight... chopped out the front left gearbox mount (again!) and put in version three. Now the shear on the mount is much reduced, and it's moved the balance such that the engine hangs beautifully. The main problem was that it's hard to design an engine mount in the space available which acts to support the engine but also allows the engine to be removed downwards... Sorted out the centre rear engine mount - for once, a doddle. Used the remaining Ford mount and a block of 25*50 tube; the engine is now just where it should be. The nearside tie bar fits back without changes and doesn't appear to foul anything; even on full load there looks to be plenty of clearance around the gearbox. We've started re-forging the offside tie bar; that needs one bend straightening and the other bending further. Once that's done as a first approximation, we'll make the final chassis mode for it's fastening. We can't use the original plate as the power steering pump and alternator are in the way. We're a bit stumped to go further on that since we dropped the hubs off for new bearings pressing in; the nice man there offered me a set of XR2 brake discs for 20 quid, so I had 'em. They'll go on tomorrow along with track rod ends and outer CVs. Got the new radiator today - very nice: a little less tall than the coupe but wider and a bit thicker. Shiny shiny! Welding in the final bits in the chassis (except the tie-bar pickup) - the mount for the steering rack (which has changed a little since the first trial fit) and the rear engine mount which was only tacked in. 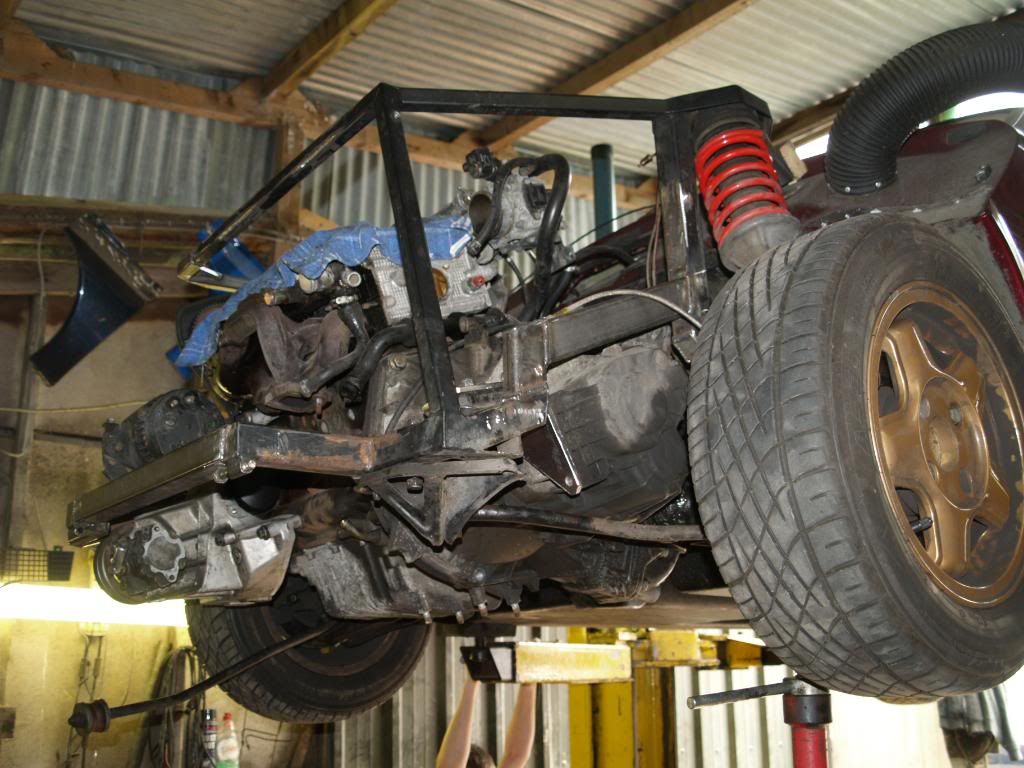 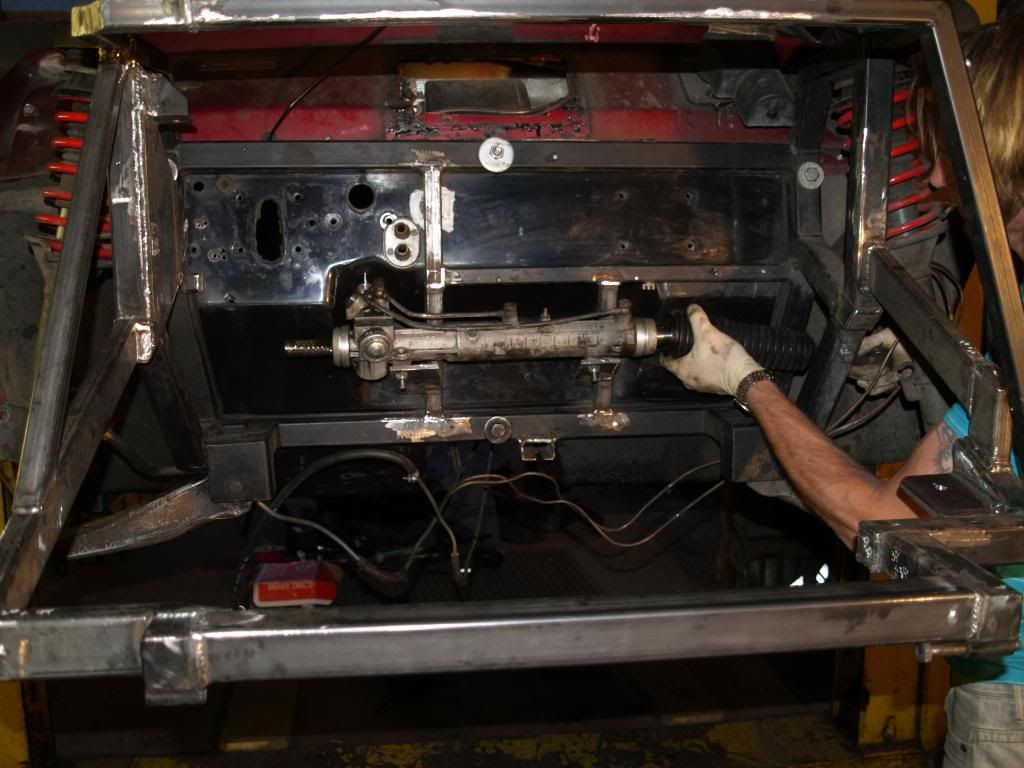 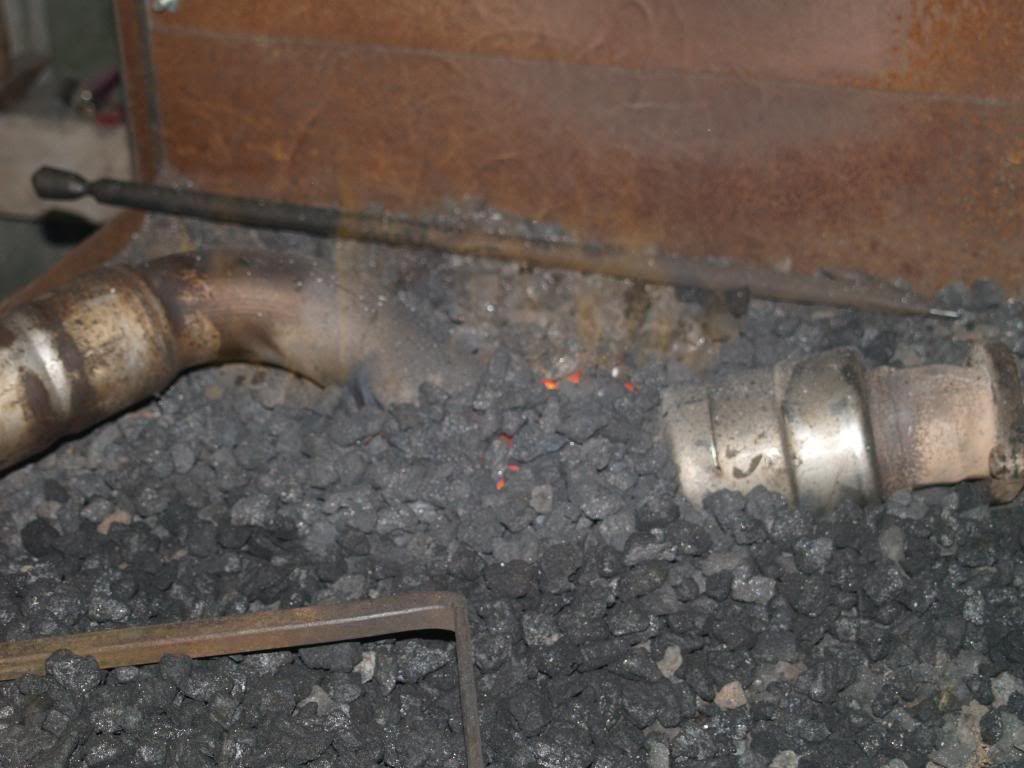 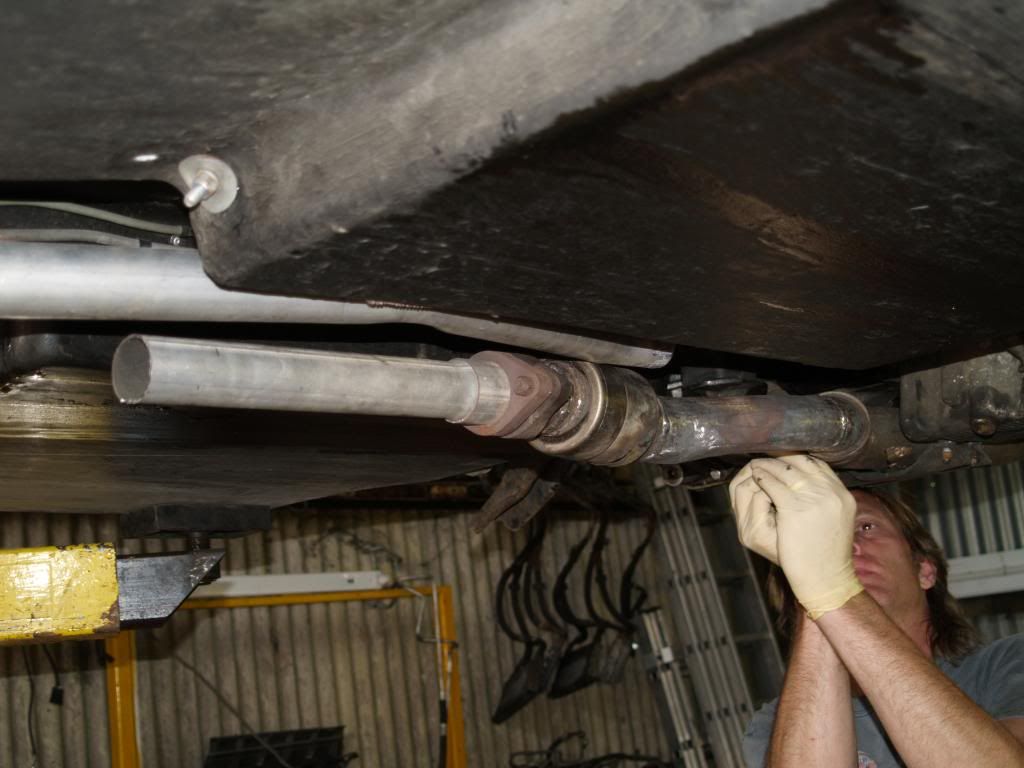 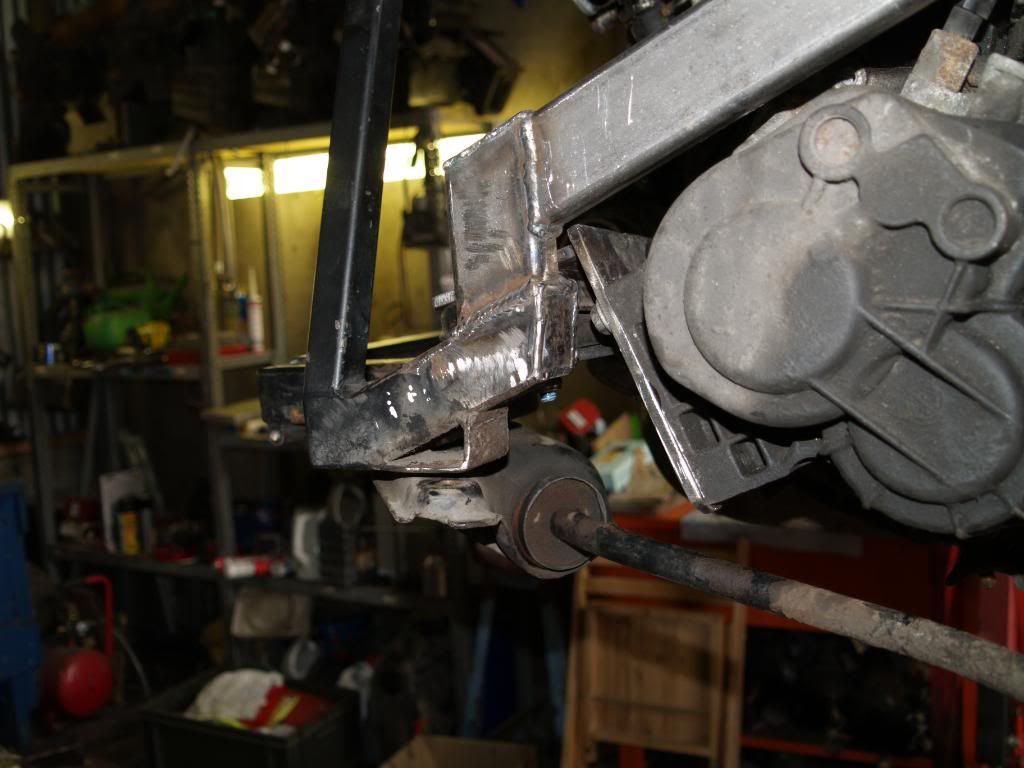 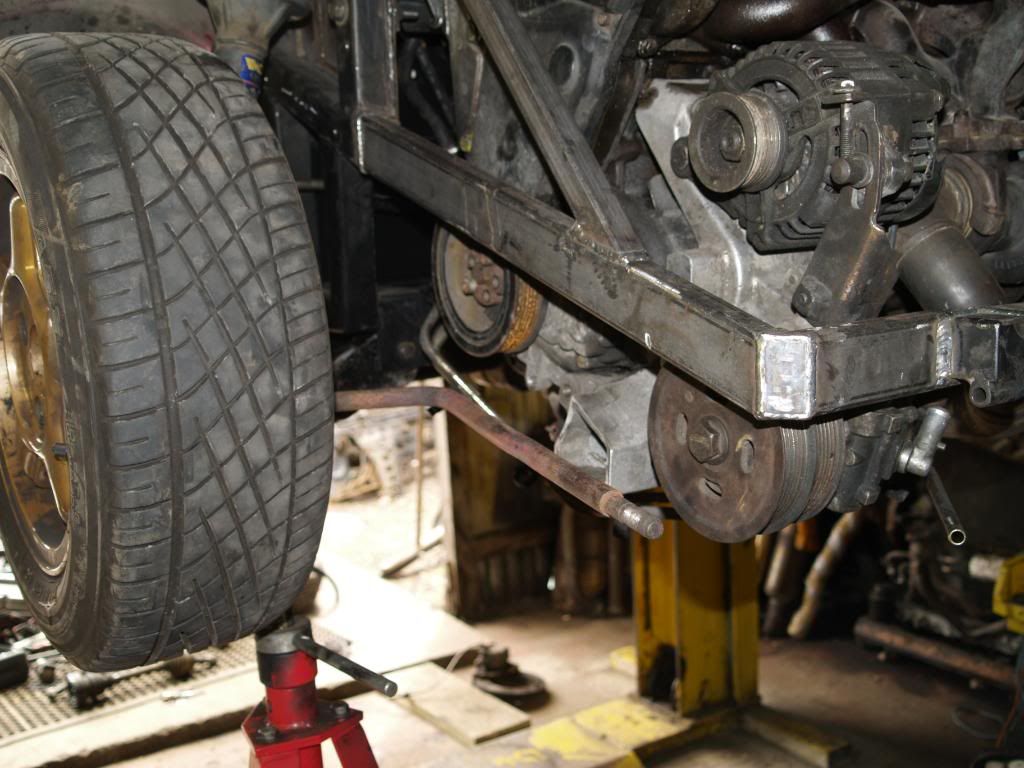 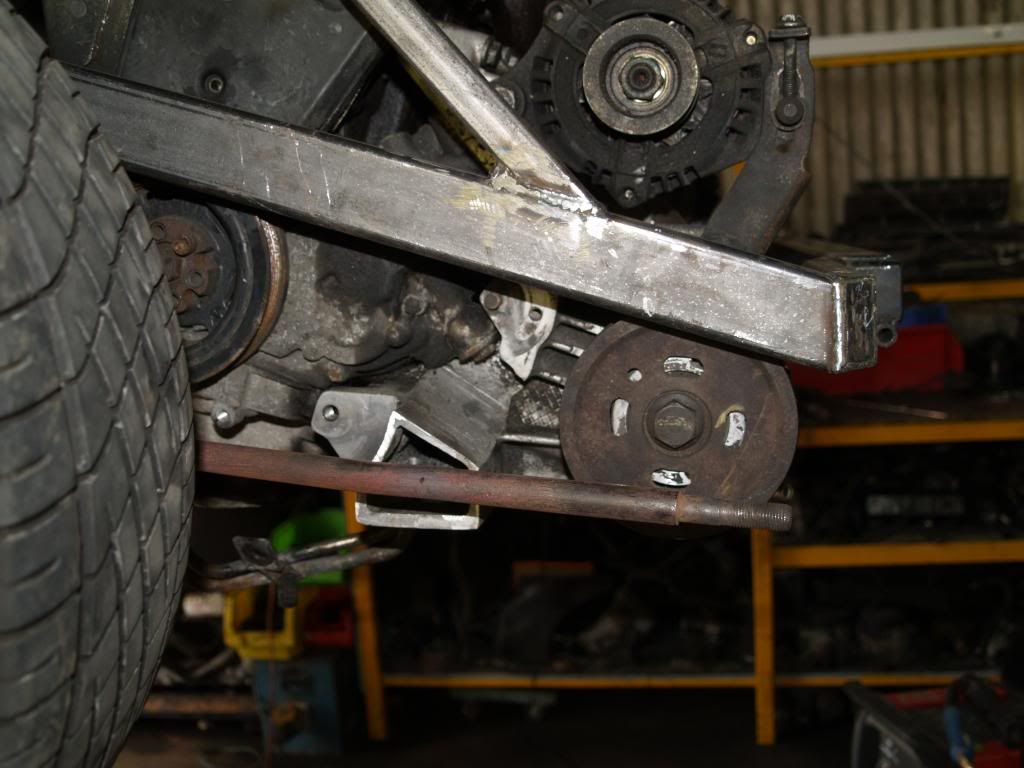 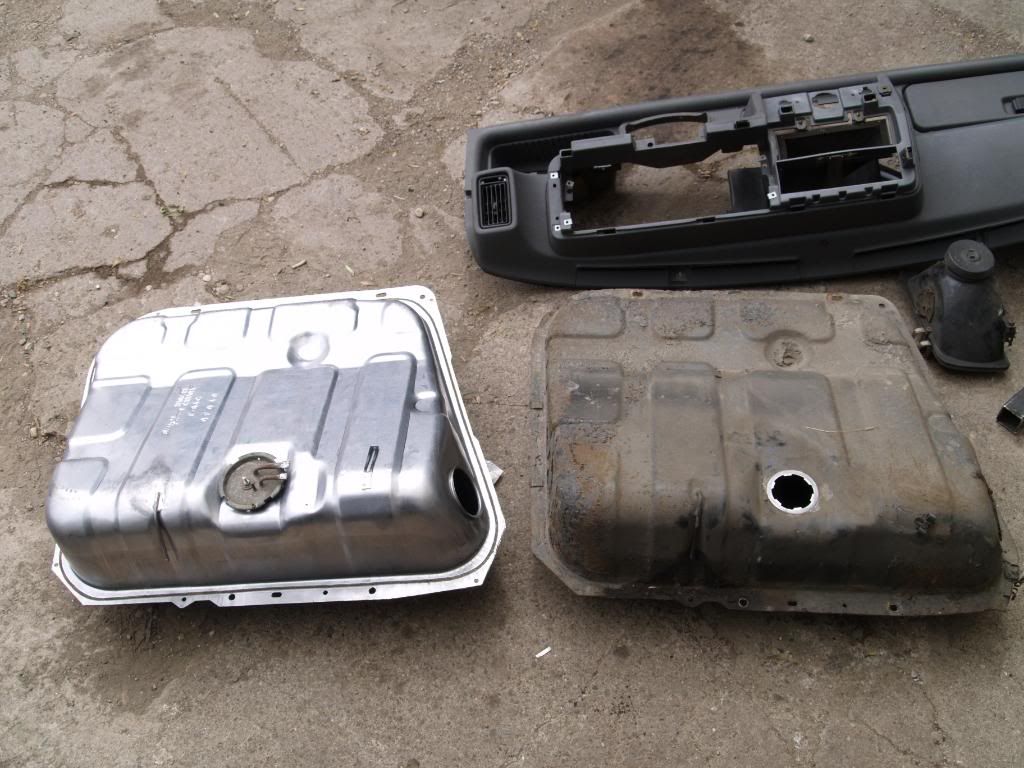 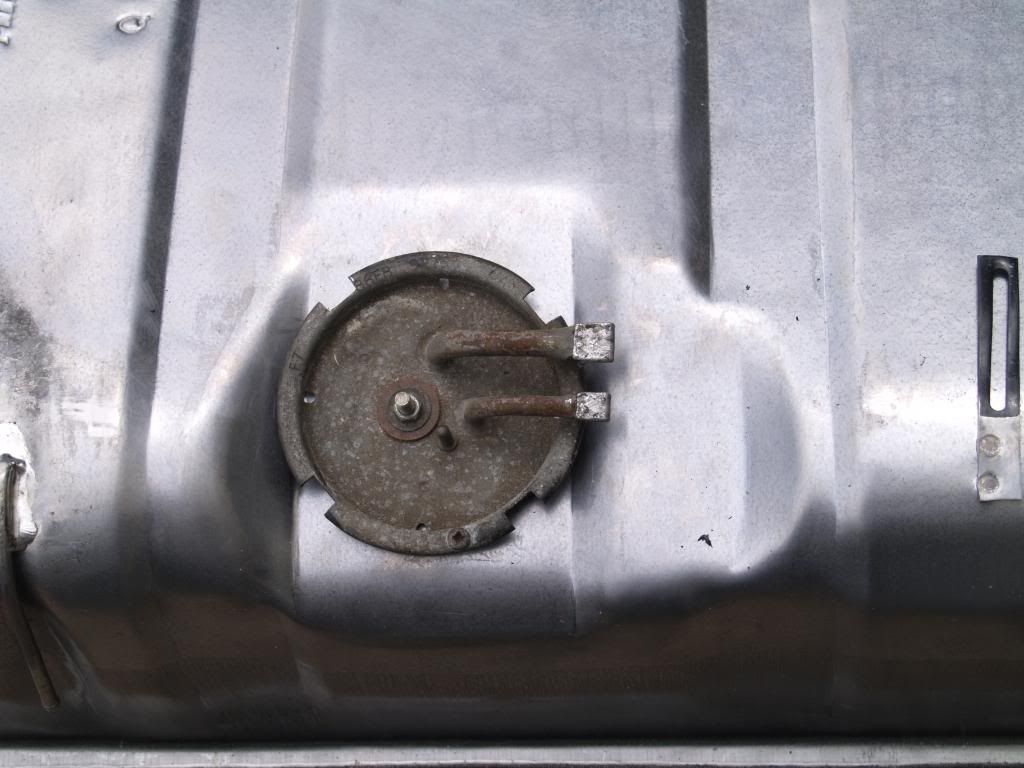 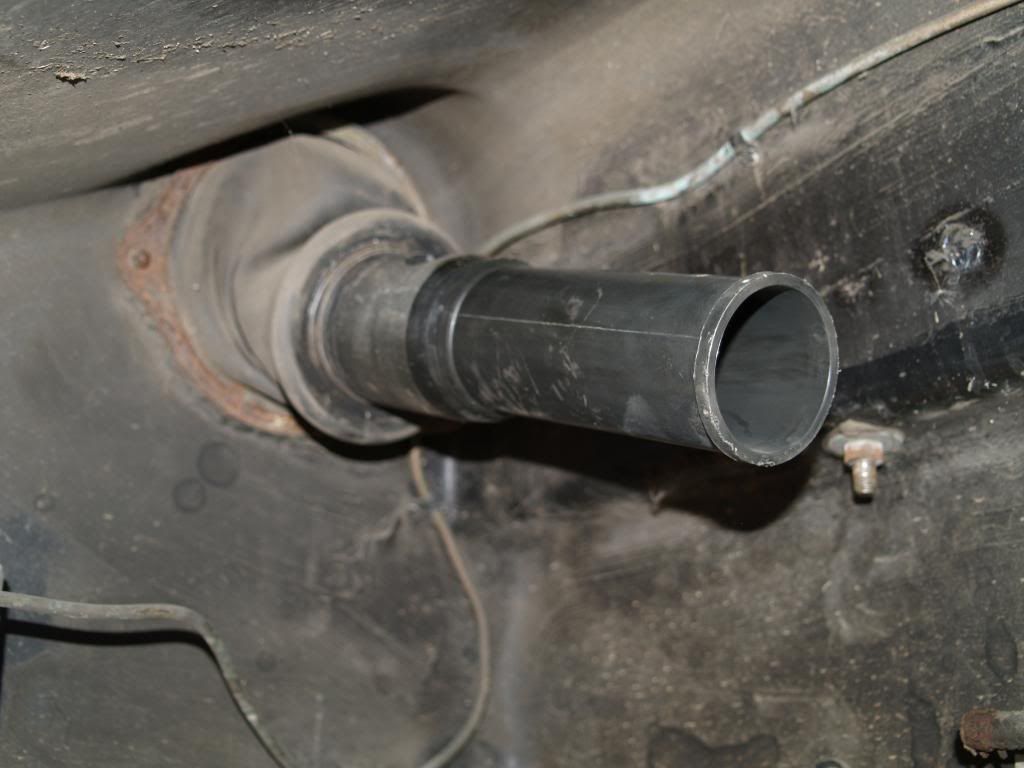 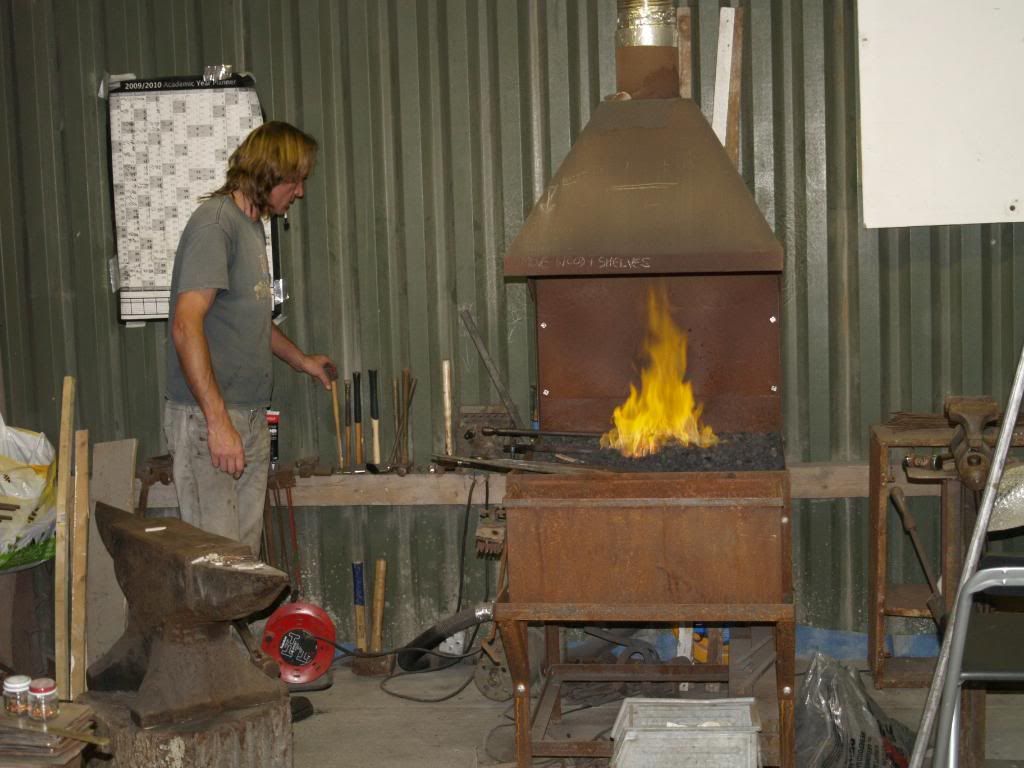 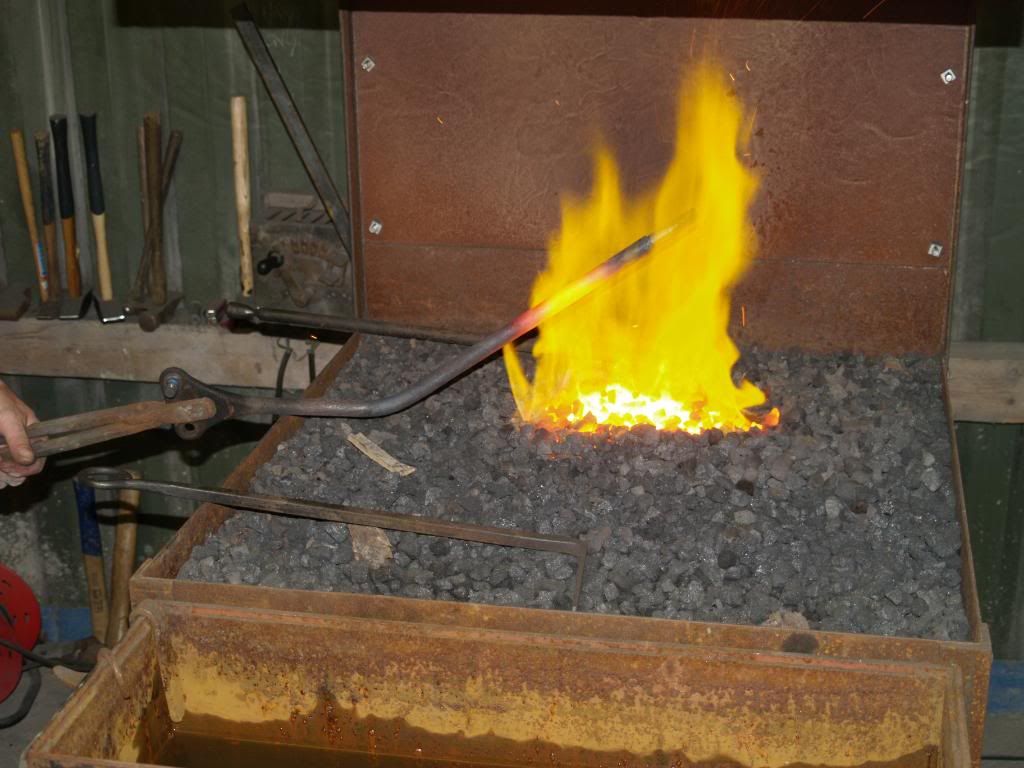 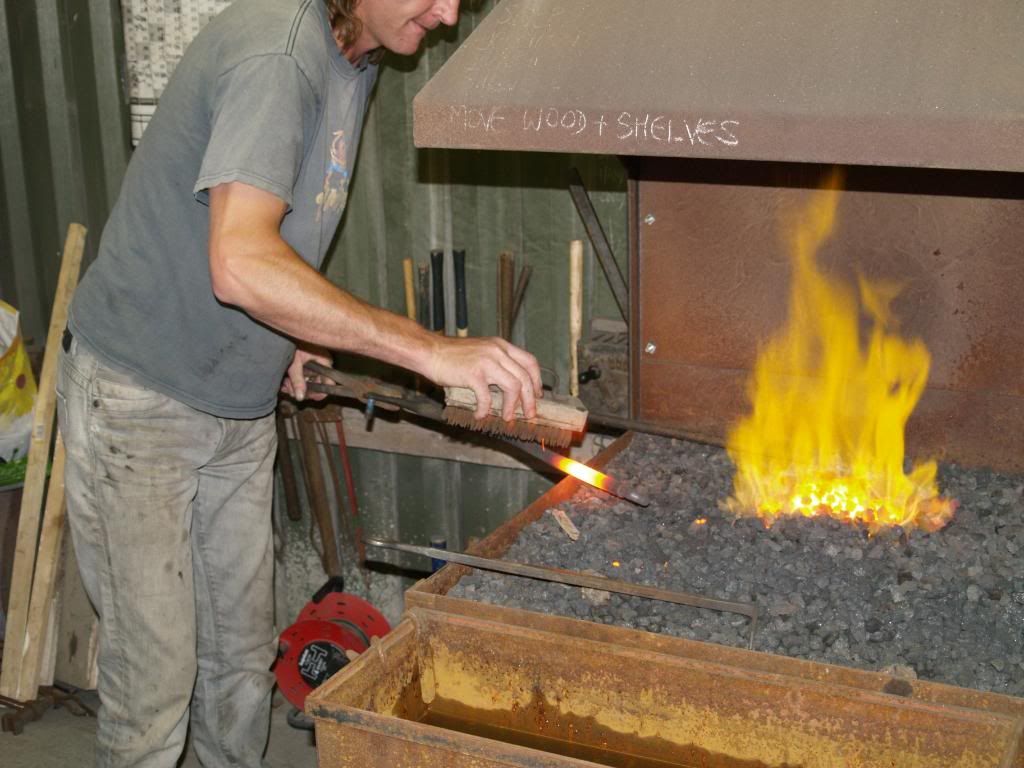 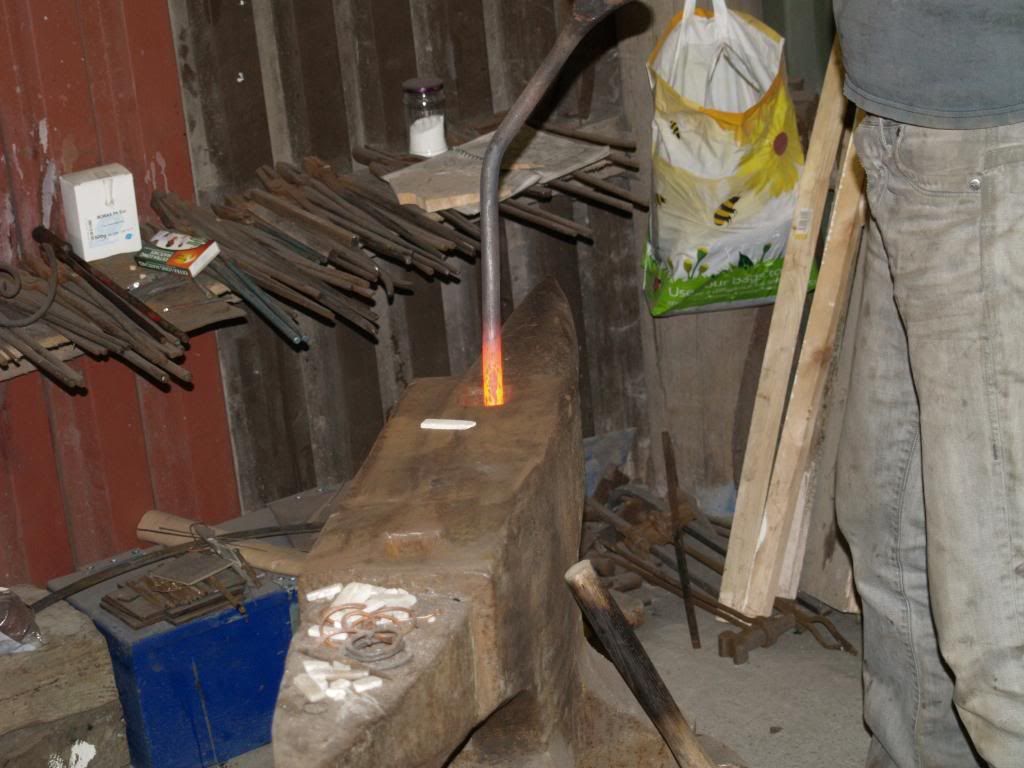 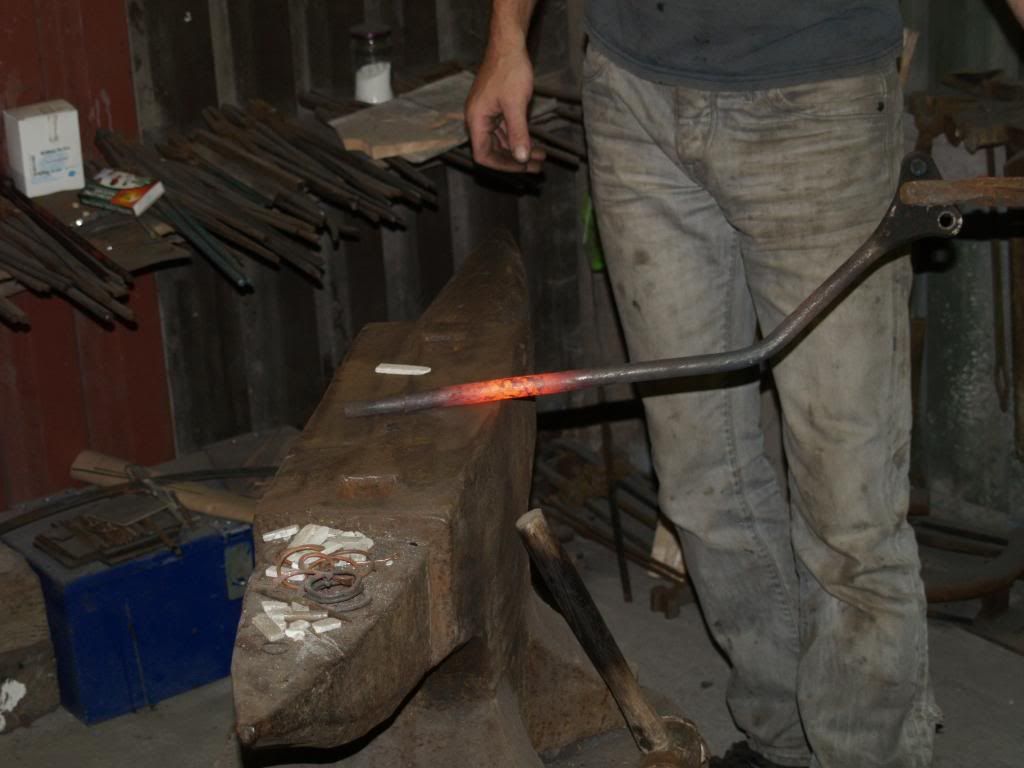 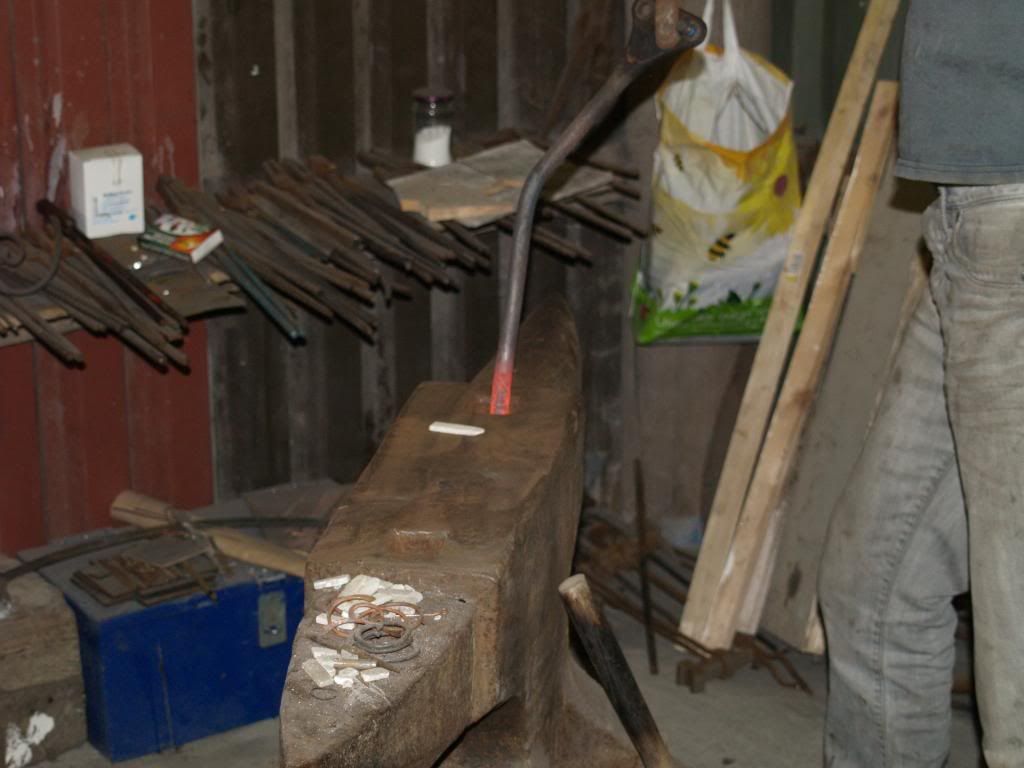 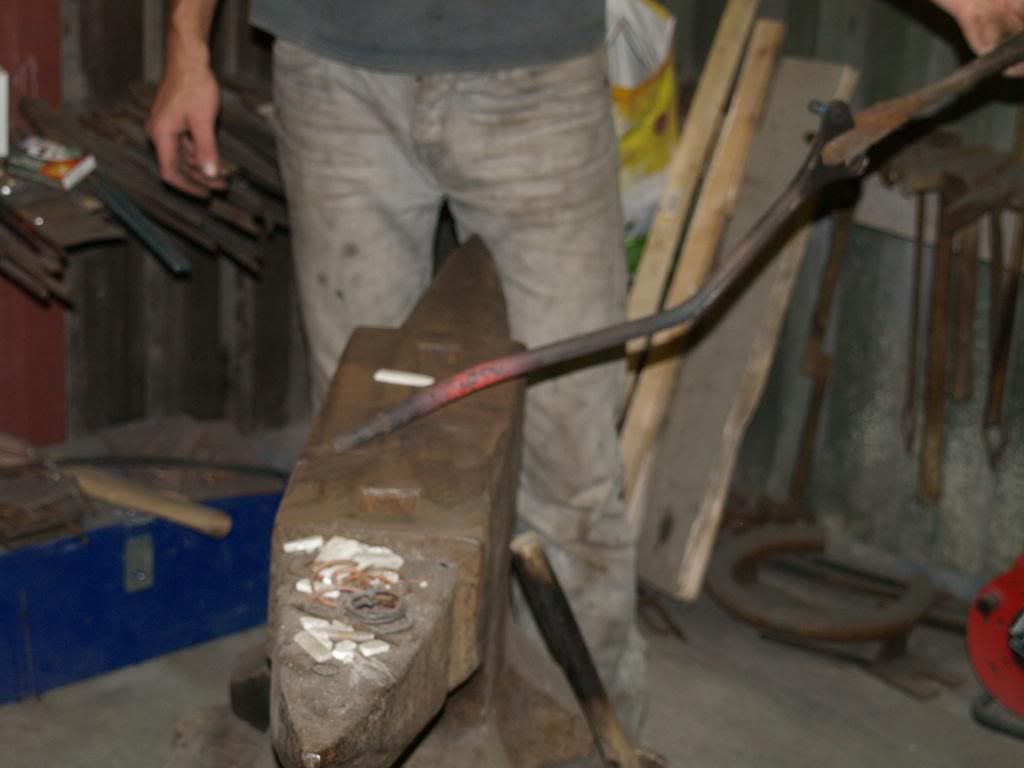 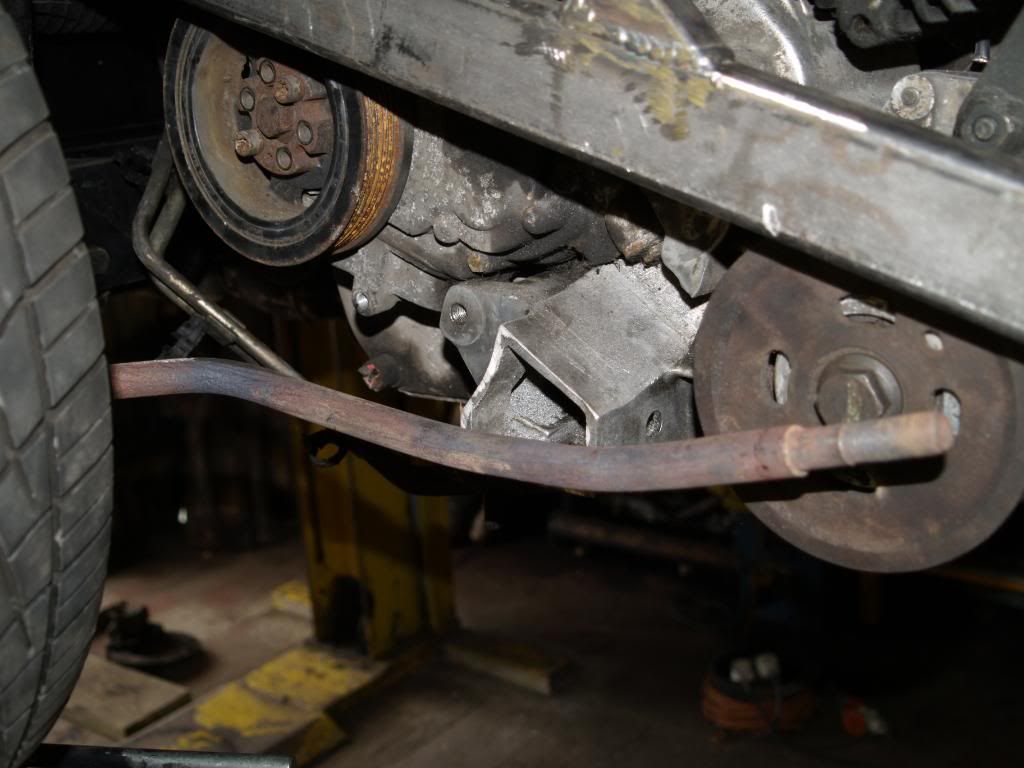 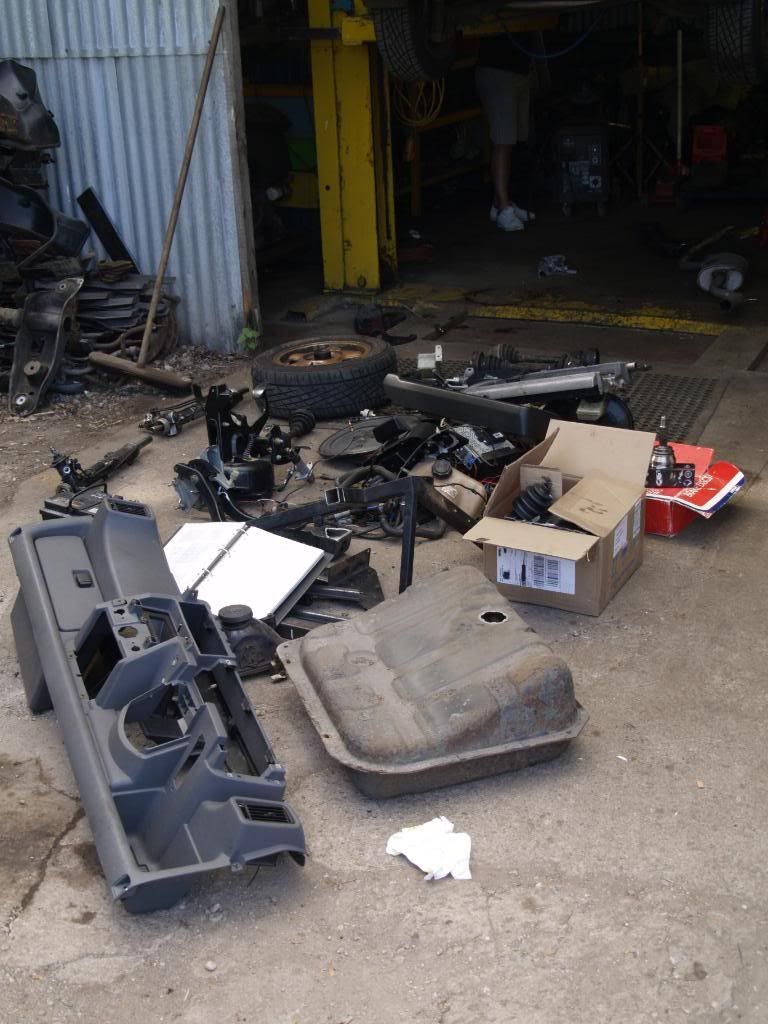 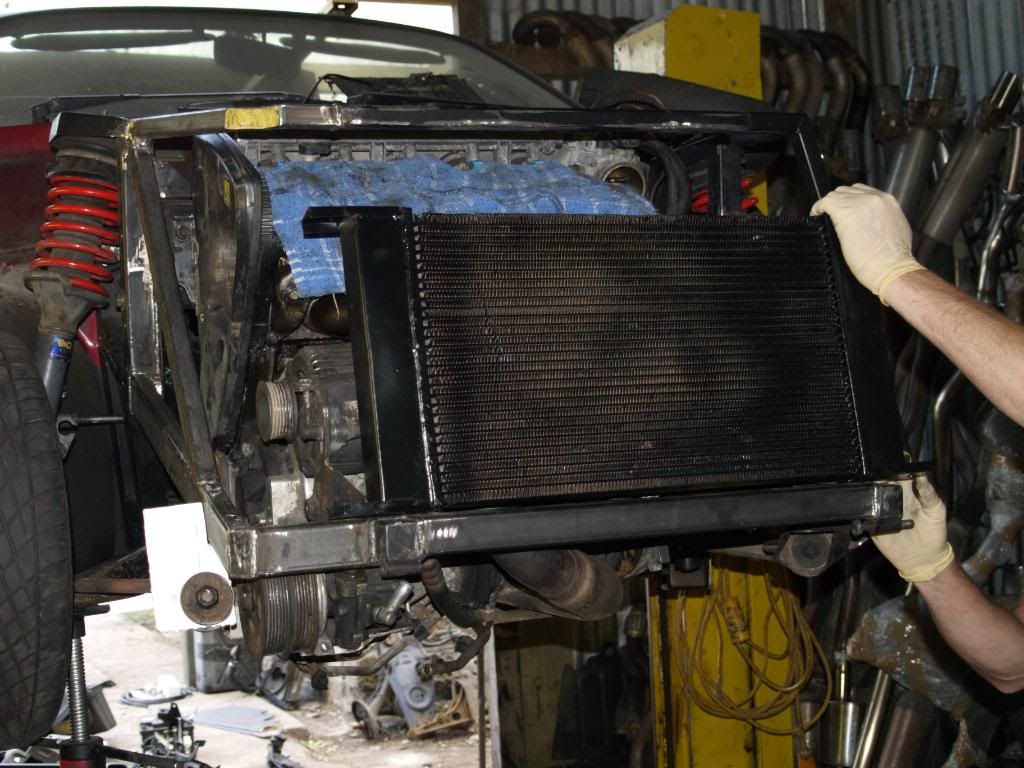 More later...
Last edited by barnacle; 26/09/2010 16:31.
|
|
|
 Re: Quantum Coupe - Neil and Joe's secret project!
[Re: barnacle]
#1131828
17/11/2010 17:04
17/11/2010 17:04
|
Joined: Dec 2005
Posts: 33,720
Berlin
barnacle
 OP
OP
Club Member 18 - ex-Minister without Portfolio
|
 OP
OP
Club Member 18 - ex-Minister without Portfolio
Forum Demigod
Joined: Dec 2005
Posts: 33,720
Berlin
|
Once again any photos will be grim, and they won't be updated until I get home - spending another three days at Joe's continuing this one!
Today we started by changing the alternator on the 16v, discovering that the thump up the rear has managed to crack the welds on the exhaust manifold (go figure - we can't see how), and that the bumper has responded well to heat and is not mostly the right shape again.
Er.
Oh yeah, the kit - We've established that even with the proper sized tyres on (the 195-55 are too big and will be replaced with either 195-50 or 185-55) the Focus wheels require spacers to clear the various important bits - rear trailing arms and front track rod ends touch the tyres and rim respectively. So I've ordered 10mm spacers for the back and 6mm for the front, which should sort it out - a snip at a fiver each (on average!).
The Mondeo V6 brake discs and callipers are on now; this needed the existing mounting holes on the hubs taking out from 10mm to 12mm but otherwise fitted without issue. They've got new 260mm discs with - until final build - second hand pads, but there's loads of room in there for the new pads, and the 280mm discs will also fit if these don't stop me sufficiently - that would require new discs, callipers, mounts, and pads. The originals were 240mm.
The drive shafts are measured and cut to have the Fiat inners and Ford outers; as I write Joe is Tig welding next door.
So tomorrow we start with the gear selection and finish the clutch brake and accelerator pedal connections, and the steering wheel; with that done we can start on the plumbing and maybe get the wee beastie running.
|
|
|
 Re: Quantum Coupe - Neil and Joe's secret project!
[Re: barnacle]
#1133061
19/11/2010 22:45
19/11/2010 22:45
|
Joined: Dec 2005
Posts: 33,720
Berlin
barnacle
 OP
OP
Club Member 18 - ex-Minister without Portfolio
|
 OP
OP
Club Member 18 - ex-Minister without Portfolio
Forum Demigod
Joined: Dec 2005
Posts: 33,720
Berlin
|
And the steering wheel was a head-bender - but we've finally got it in place, with rake and reach adjustment working and a complicated fabrication (well, really it's a flat plate with some bent bits and lots of holes, but they're really complicated holes and bends and it's taken most of the day to make it!). It's all properly braced to the bulkhead and the pedal box, and even with the weight of the wheel it's nicely stable.
It's a little off-centre, but nothing serious, and I can live with that, and just the right position to hold with one arm on the window-ledge.
Just one tiny problem: having mounted it, we measured the steering shaft, which was too long. So we worked out how much shorter it had to be, and Joe cut out the required length and TIG welded it back together. Fitted it into the rack and the column, and it's an inch short.
Damn.
We'll have to make another one. But at least the car now rolls on the correct wheels and can be steered - which makes it at simpler to move around the yard. At present though, the only things it would pass an MOT on are the handbrake, the wheel bearings, and the emissions (it has none!)
|
|
|
 Re: Quantum Coupe - Neil and Joe's secret project!
[Re: barnacle]
#1165152
02/02/2011 09:01
02/02/2011 09:01
|
Joined: Dec 2005
Posts: 33,720
Berlin
barnacle
 OP
OP
Club Member 18 - ex-Minister without Portfolio
|
 OP
OP
Club Member 18 - ex-Minister without Portfolio
Forum Demigod
Joined: Dec 2005
Posts: 33,720
Berlin
|
Here we go again - this time the intention is to get an MOT on Saturday. Apparently Anita will kill me if the car doesn't go in for it... she didn't say it had to pass, mind... 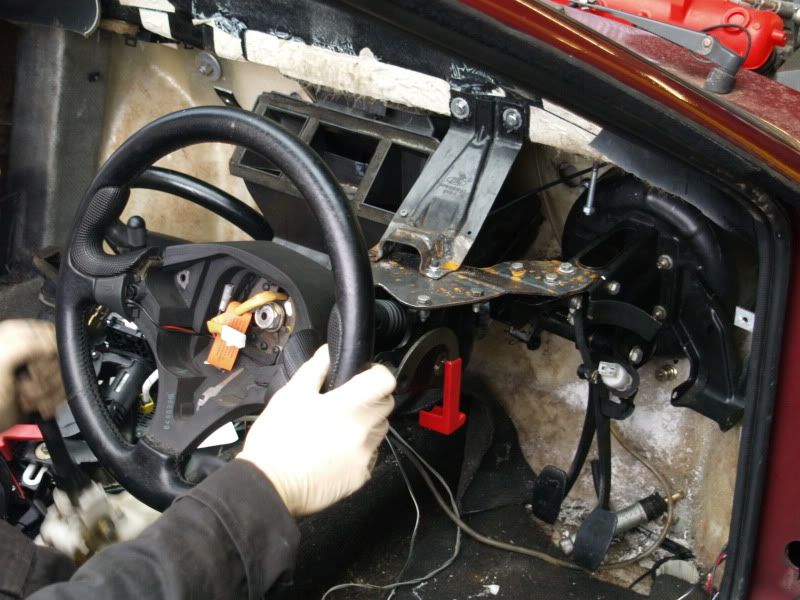 Joe has sorted out the steering column length, so that's now sorted. 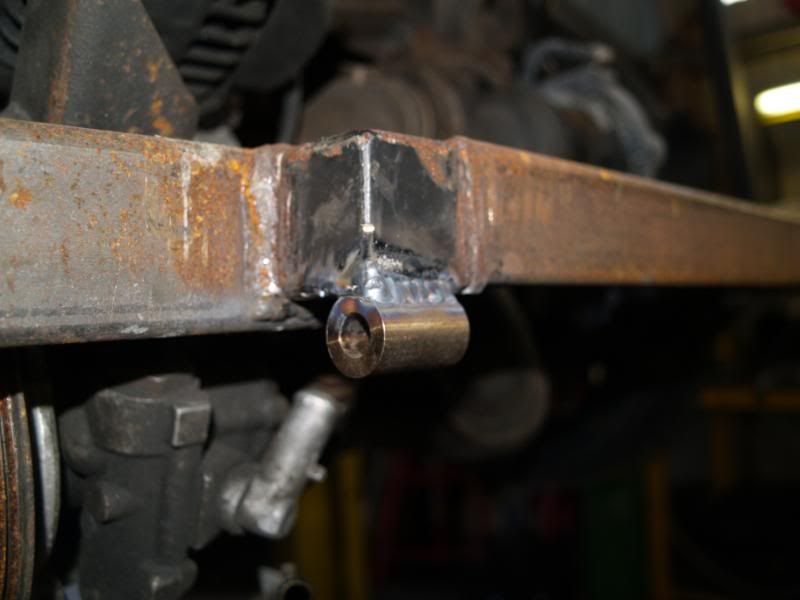 Yesterday we fitted the bonnet, which hasn't been back on the car properly since we started. We reinforced the hinge holes to stop the hinge pins wearing away the fiberglass (it's front-hinged and tips forward.) Good news is that there's no need to make holes in the bonnet; we got that bit right at least! We've had to remove the pop-down headlight motor linkage since it would have gone straight through the radiator, so the light covers just flap straight down at present; minor detail except that the flaps can't be removed since their hinges are moulded into the casting, and they'll flap up and obscure the lights if I brake hard... details, details. 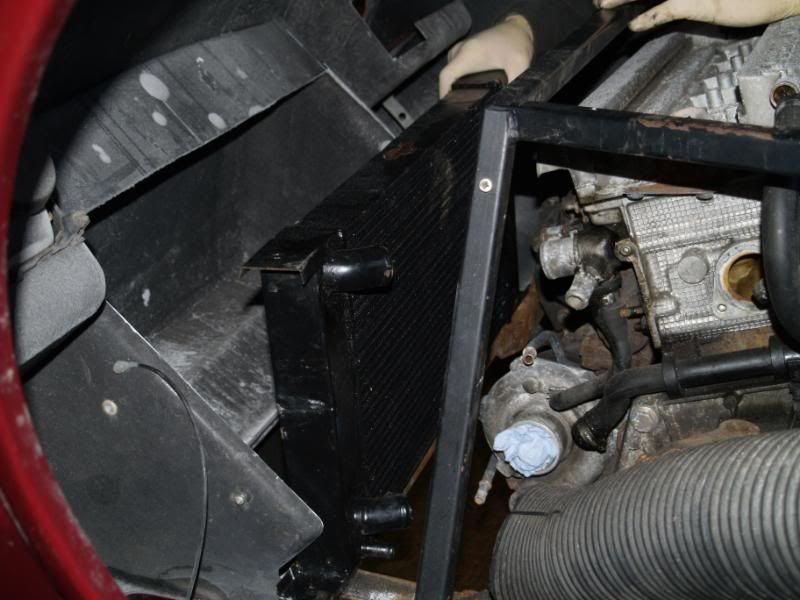 Got the new wheels - now there's sufficient clearance all around to deal with the gearbox and control rods, so full steering is available (= no MOT fail on that). The reduced offset though means the wheels stick out three quarters of an inch or so; I may have to fit a wheel-arch extension at the front - the back's OK. 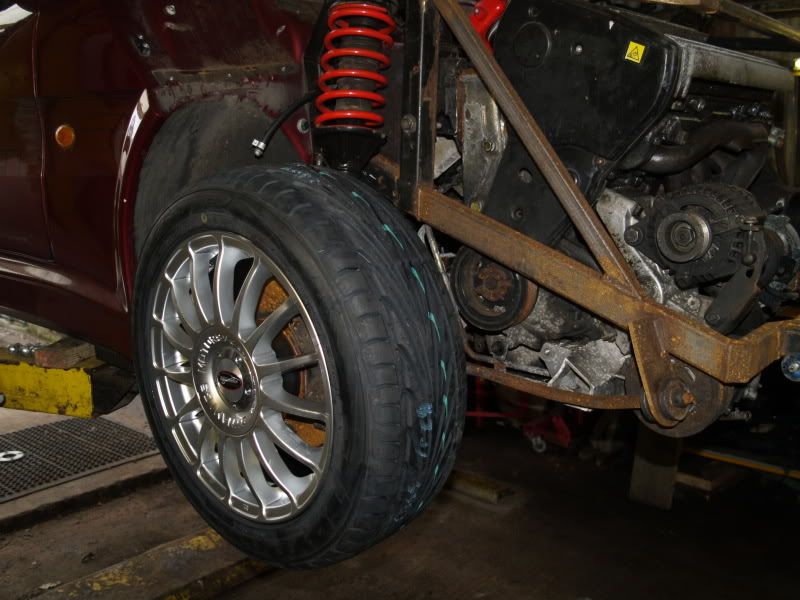 The radiator is mounted; just tidying the ties from the front of the engine frame. We've had to cut a large chunk of bonnet internal structure away, and we're keen to minimise that. 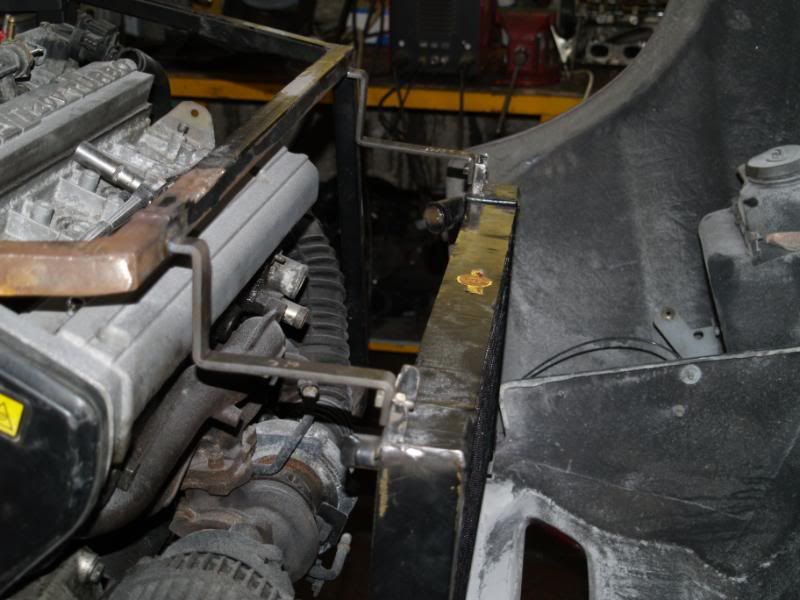 We've also had a look at the routing for the air intake stuff. The Fiat airbox won't fit, so I guess there's going to be a cone filter of some flavour. Damn; I hate them, but if that's the only option...
Last edited by barnacle; 05/02/2011 18:25.
|
|
|
 Re: Quantum Coupe - Neil and Joe's secret project!
[Re: barnacle]
#1166061
04/02/2011 08:31
04/02/2011 08:31
|
Joined: Dec 2005
Posts: 33,720
Berlin
barnacle
 OP
OP
Club Member 18 - ex-Minister without Portfolio
|
 OP
OP
Club Member 18 - ex-Minister without Portfolio
Forum Demigod
Joined: Dec 2005
Posts: 33,720
Berlin
|
Forgot to say yesterday that Joe's floor is also very yellow; a local gravitational anomaly caused the paint tin to leap to the floor, and resulted in a Jackson Pollock-like spatter effect... So, yesterday... 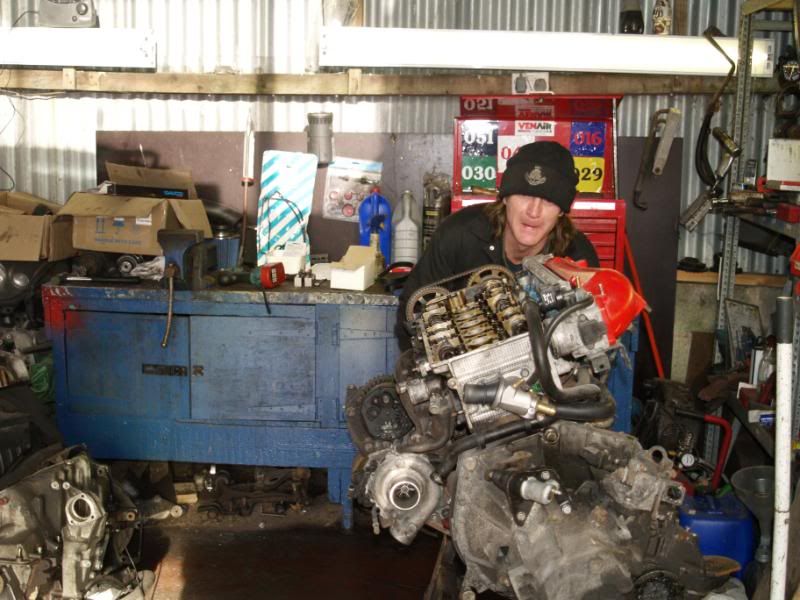 Engine belts, bits, and servicing complete. Pirtek man came and made some oil cooler pipes, but we're not very happy with them. 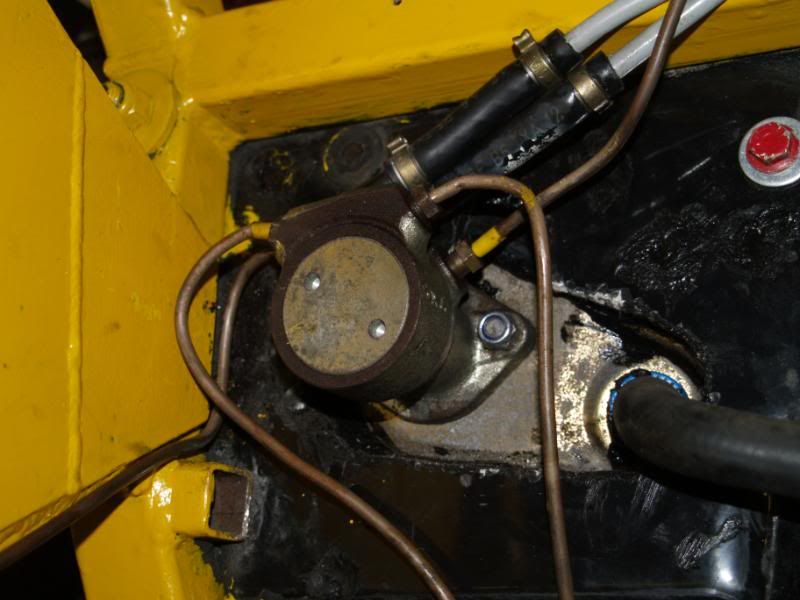 Brake pipes run fore and aft, port and starboard. 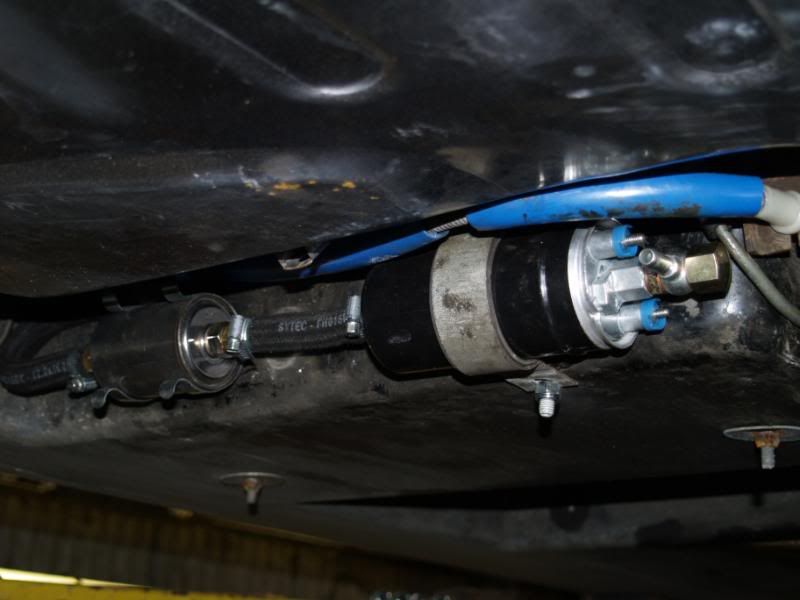 Fuel filter and pump fitted. Fuel pipes fore and aft. 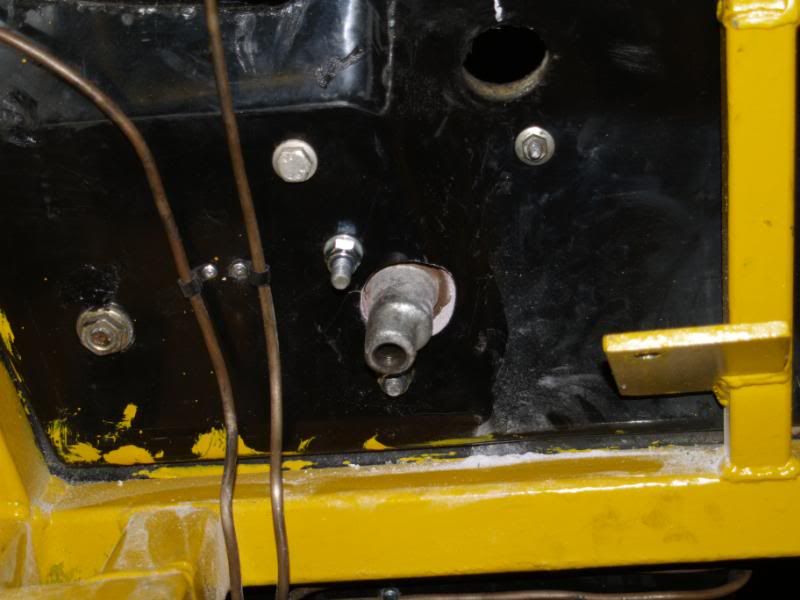 Clutch pedal and master cylinder fitted, after modifying the pedal so the actuating sprog is on the inside which meant we could get the master in without fouling the steering. 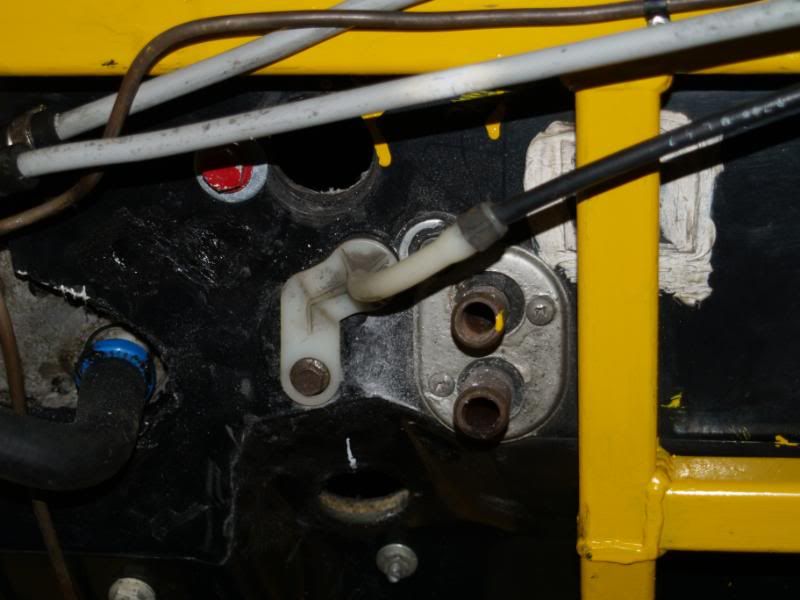 Accelerator pedal refitted, cable installed - the pedal might need some adjustment with a hammer to get the throw right. 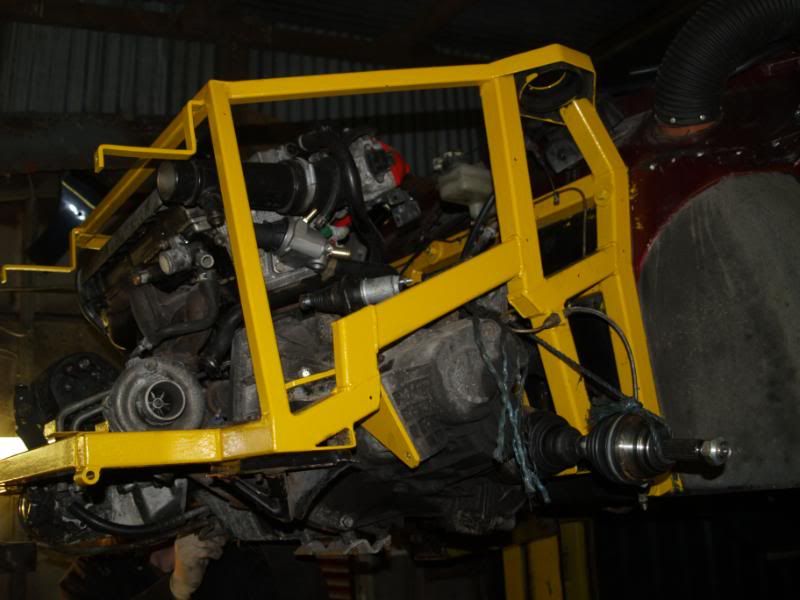 Engine back in car. Suspension back on car. Passenger side arch trimmed to suit new framework that side. Today: plumbing, heating, and wiring...
Last edited by barnacle; 05/02/2011 18:36.
|
|
|
 Re: Quantum Coupe - Neil and Joe's secret project!
[Re: barnacle]
#1166807
05/02/2011 18:48
05/02/2011 18:48
|
Joined: Dec 2005
Posts: 33,720
Berlin
barnacle
 OP
OP
Club Member 18 - ex-Minister without Portfolio
|
 OP
OP
Club Member 18 - ex-Minister without Portfolio
Forum Demigod
Joined: Dec 2005
Posts: 33,720
Berlin
|
Two days to report here, and not many pictures. Unfortunately Joe's lad had to go to the hospital which curtailed activities early. 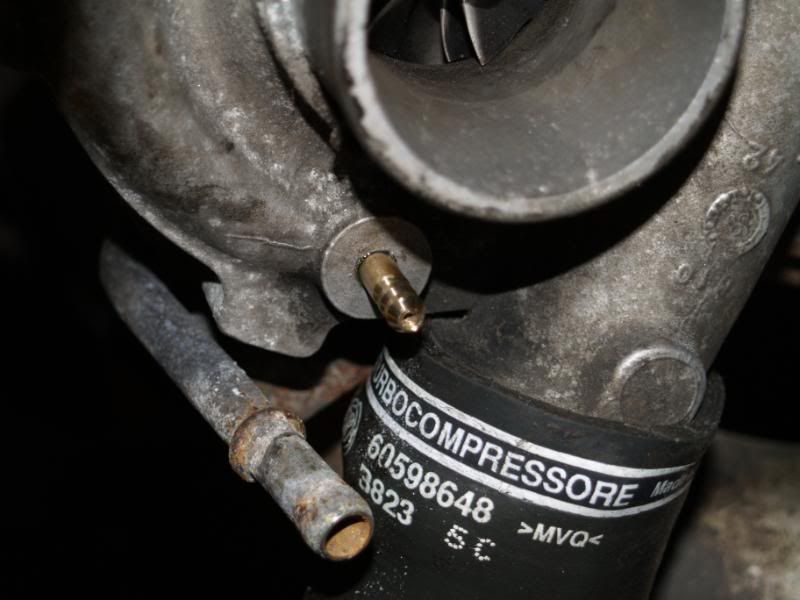 Turbo pickup required a new spigot inserting. 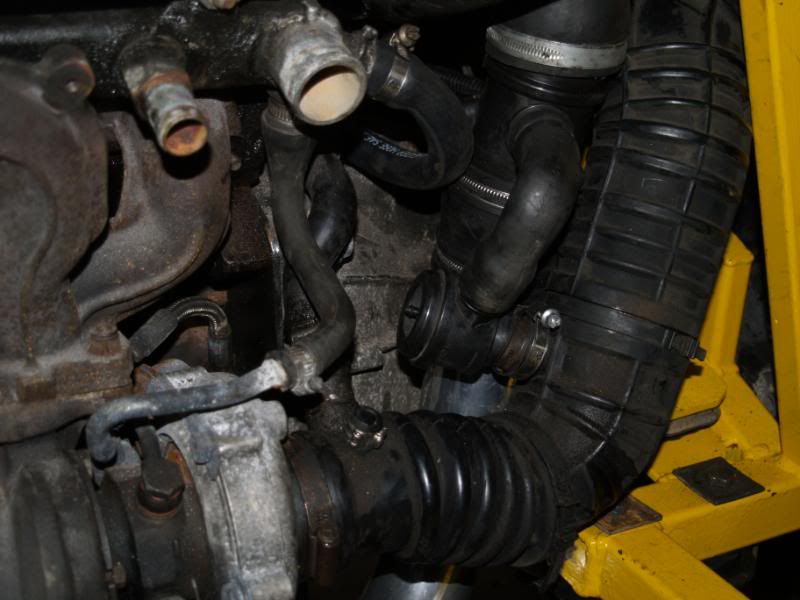 Induction plumbing, boost valve, MAF sensor fitted. 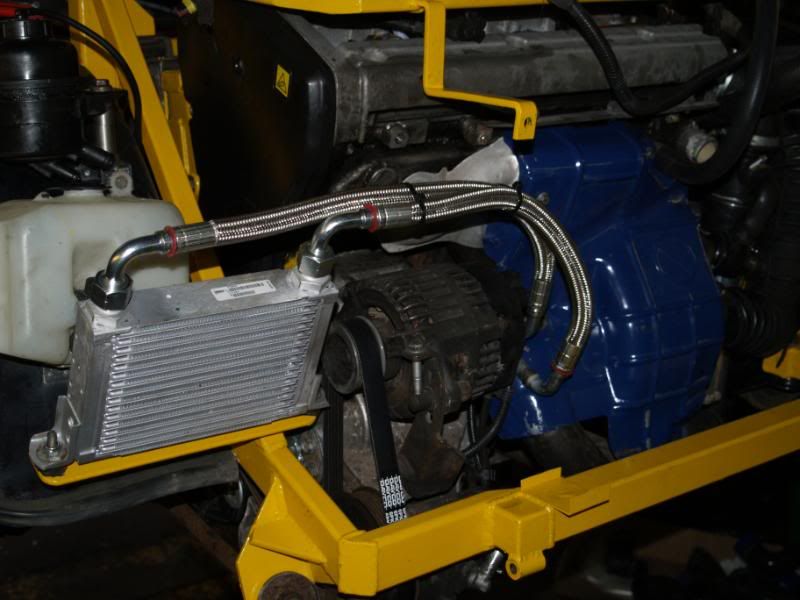 Oil cooler on new improved Pirtek pipes, which required minor modifications to the radiator. 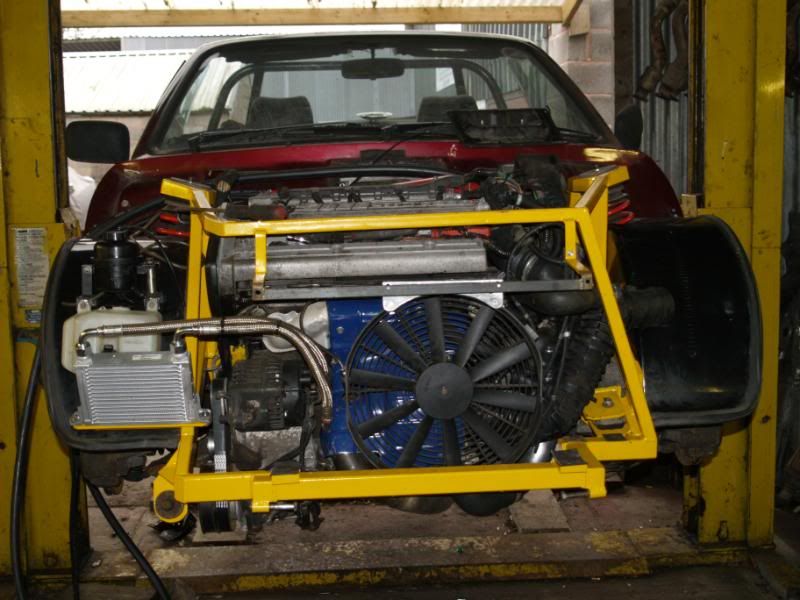 Engine and suspension back in place, never to be removed again! Slimline fan mounted on extra bracket, still in need of yellow. Also done, sorry no photos: cabin heater plumbing, all the rest of the engine plumbing except the main radiator pipes (need a couple of connector pipes), the oil plumbing all round, gearbox dipstick, power steering except one pipe (need a size we didn't have), all engine wiring, worked out where the holes to the cabin need to be, bled clutch and brakes fitted gearchange 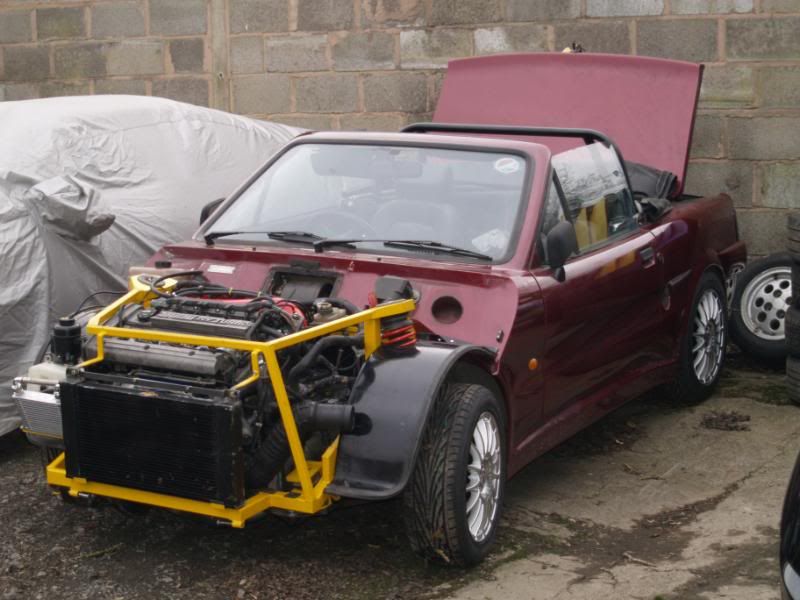 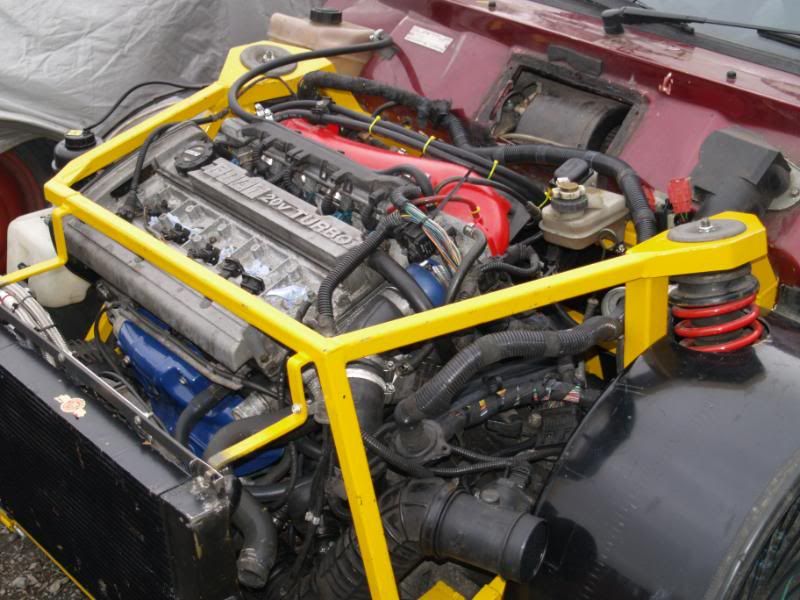 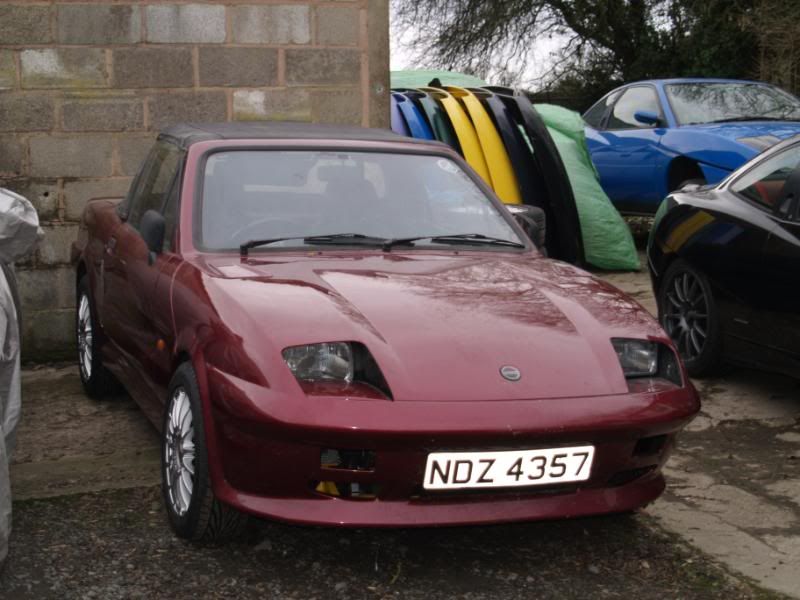 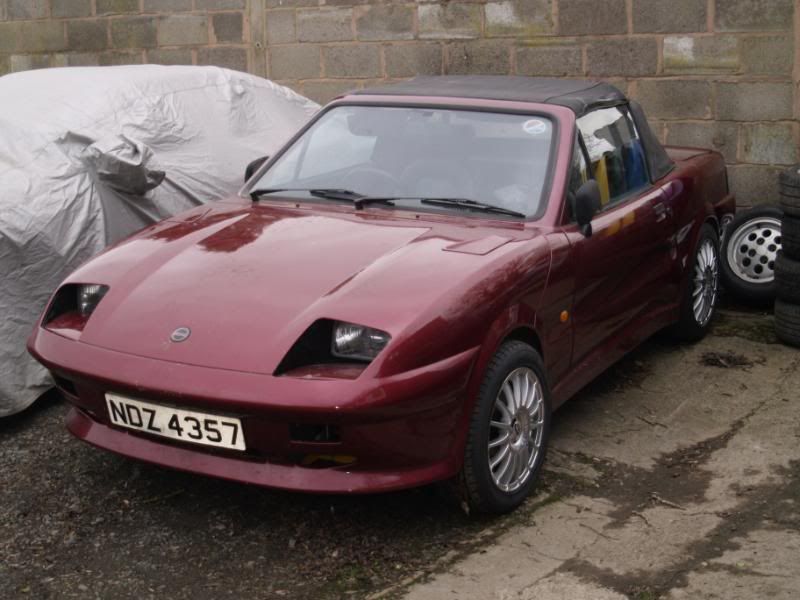 Looks innocent enough in there... And here we rest; frustratingly just a few hours from running. Aye well, next time!
Last edited by barnacle; 06/02/2011 20:36.
|
|
|
 Re: Quantum Coupe - Neil and Joe's secret project!
[Re: barnacle]
#1168380
08/02/2011 21:15
08/02/2011 21:15
|
Joined: Dec 2005
Posts: 33,720
Berlin
barnacle
 OP
OP
Club Member 18 - ex-Minister without Portfolio
|
 OP
OP
Club Member 18 - ex-Minister without Portfolio
Forum Demigod
Joined: Dec 2005
Posts: 33,720
Berlin
|
Half a day today, seeing as the sun was shining nicely. 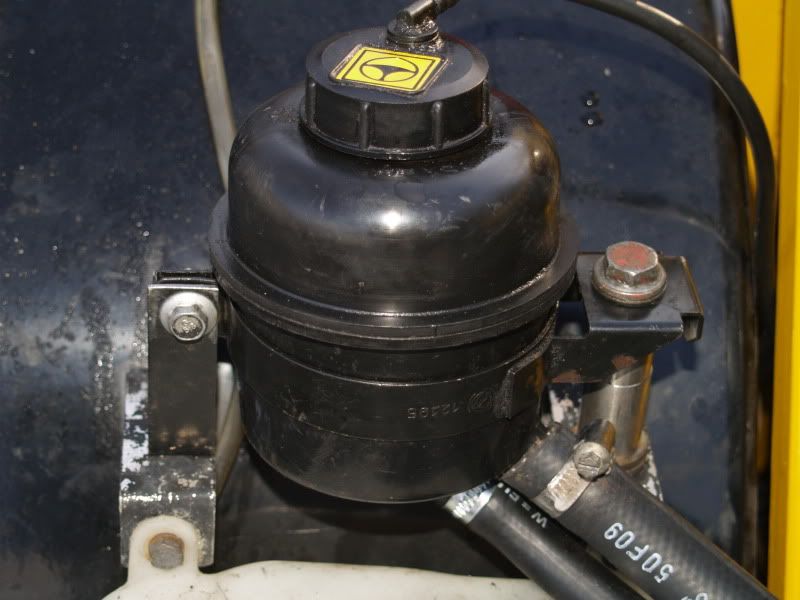 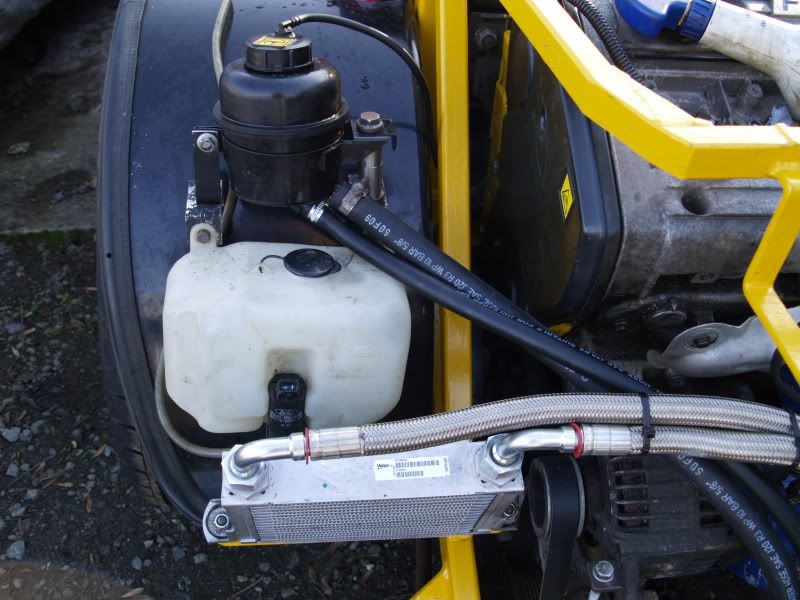 Power steering reservoir piped in nicely and mounted. 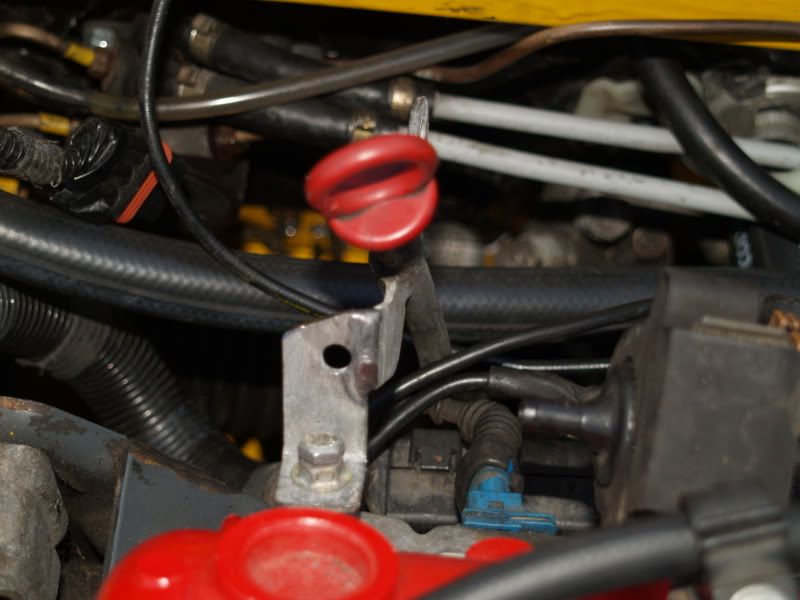 Dipstick guide carefully bent to go around all the bits that Fiat don't believe in - the new engine mount and the power steering pipework. New mount fabricated to keep it all steady. 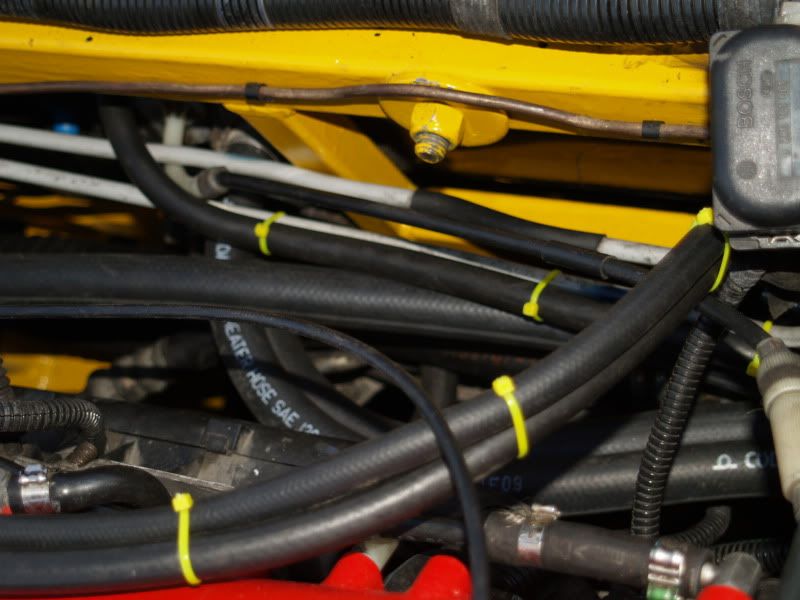 Down the back of the engine: fuel go and return, cabin heater go and return, power steering go and return, brake master feeds, clutch master feed, water header tank, and speedo cable. 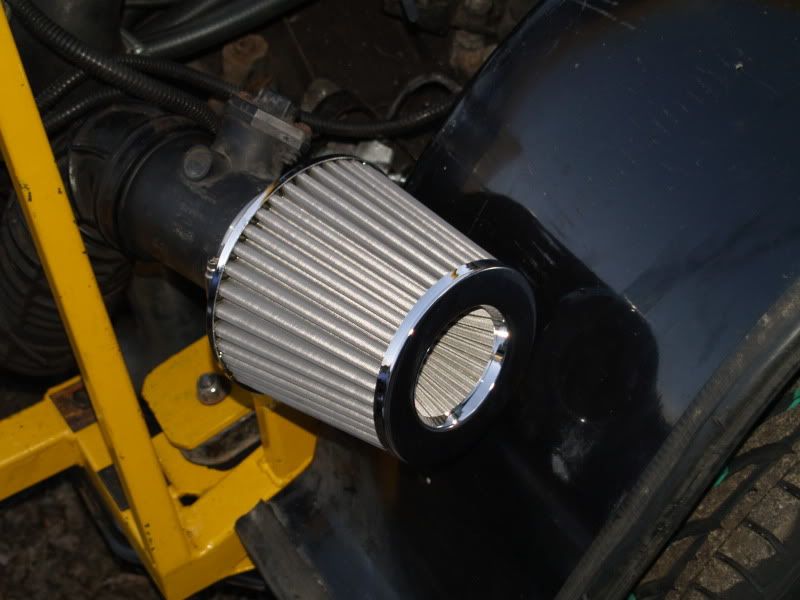 Nasty filter from Halfords. It's going to have to go, but it will get us working. 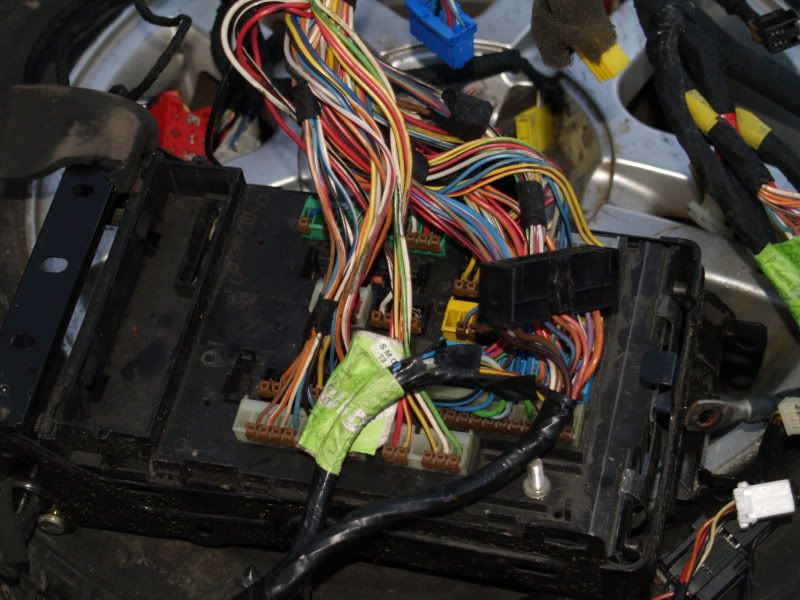 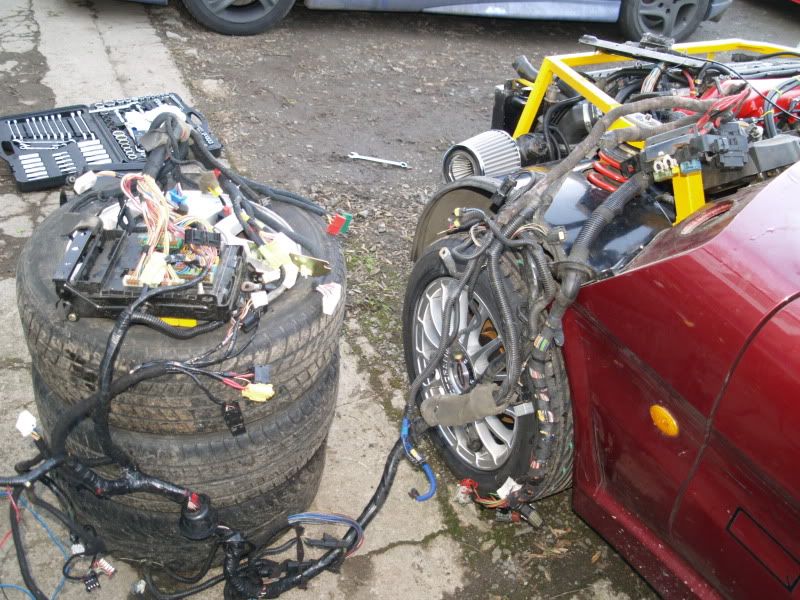 Turns out that there are at least two different fuseboxes, three different main looms, and the ones we had didn't fit together. So we had to strip out a complete loom from a single car. 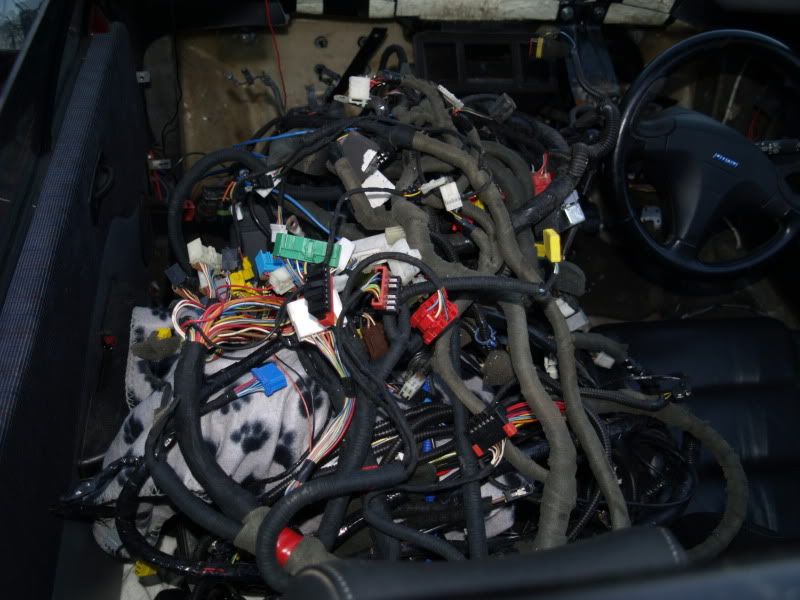 It's possible Anita might want it installing a little more neatly...
|
|
|
 It lives! My creature lives!
[Re: barnacle]
#1172833
17/02/2011 22:34
17/02/2011 22:34
|
Joined: Dec 2005
Posts: 33,720
Berlin
barnacle
 OP
OP
Club Member 18 - ex-Minister without Portfolio
|
 OP
OP
Club Member 18 - ex-Minister without Portfolio
Forum Demigod
Joined: Dec 2005
Posts: 33,720
Berlin
|
Overhead the clouds hung; dark, heavy, and pendulous. As the storm built, lightning flashed and thunder echoed from the mountains.
"More power, Igor!" I cried, as we defied the elements. "Life, give my creature life"!
"Yeth, Mathter," replied Igor, scampering across the roof and adjusting the lightning collector.
And with a final crash of thunder, every window in the place shattered and the monster came to life!
For reasons known only to Fiat, the rear loom plugs into the fuse box. The front loom plugs into the fuse box. The instrument loom plugs into the fuse box. But the fuel pump relies on a tiny plug between the rear loom and the instrument loom. Go figure.
So - I drilled holes to let the ECU loom (driver's side of engine to passenger footwell) and the engine rear loom (passenger side of the engine to driver's footwell) through into the passenger side, and poked them through.
An old battery was massacred (with the acid disposed of and neutralised in an environmentally friendly manner) to provide a couple of power posts. The negative post is bolted to the engine bay framework; the positive is held on the metalwork using part of the battery casing - this way the existing loom just tag straight on where they expect to. The battery will be on the 'seat' behind the passenger and will connect onto the same terminals. For now, jump leads do the job.
There are still some bits and bobs to finish. The loom needs completing to manage the lights and suchlike; I need to think about the interior lighting (I think I can use the existing door switches to trigger the auto lights etc and the same under-seat controller to manage the windows). The existing ford loom needs attaching to do the rear lights and the fuel pump extending.
Fluids stayed where they should be; no leaks until we filled the gearbox - when drip drip drip we discovered that the passenger side drive shaft wasn't fully home (I reckon Mario pulled it out when I wasn't looking) and a good thump sorted that out.
We ran the engine up to temperature; the fan isn't working yet, so that's one to chase, but the oil pressure's good at temperature and it doesn't get out at the oil cooler.
We took a moment to brew up and say 'woohoo'.
So the car should be with me in Hemel next time Joe comes this way - looking good for Brooklands!
|
|
|
 Re: It lives! My creature lives!
[Re: barnacle]
#1176378
24/02/2011 17:48
24/02/2011 17:48
|
Joined: Dec 2005
Posts: 33,720
Berlin
barnacle
 OP
OP
Club Member 18 - ex-Minister without Portfolio
|
 OP
OP
Club Member 18 - ex-Minister without Portfolio
Forum Demigod
Joined: Dec 2005
Posts: 33,720
Berlin
|
Ok, the Quanturbo is now at home, having hitched a lift with Joe - but it did get off the lorry and down the drive under it's own steam, so I'm counting that as a plus.
On the negative side - turns out we made the tiny passenger side driveshaft *too* tiny, and it was popping out on full stretch. So that's come out and gone back to Joe's for an extra 20mm putting in. (Well, either the APC man came, or somebody stole it in the ten minutes I was out picking up Anita!)
So I thought I'd start out on the electrics...
Hooo boy... Start at the front, that's nice and easy. H4 3-connector bulbs, three connectors on the loom, big bag of the proper connectors (same as the widget) so no problems there. Plug in the first one, I have light. Woohoo.
Um, I have light whether the ignition is on or off. I have light whether the lights are turned on or off. Or whether the fuses and relays are present. Or whether the connector is in the back of the fusebox... whenever the battery is connected, I have dipped beams. I don't have an indication on the dash for dips, mains, or side; I do get a flash and indication and main beam when I pull the stick. All the relays make the right noises.
Somewhere in the offside dipped light circuit there's a permanent connection to the unswitched positive circuit, and I'm blowed if I can find it. It's got dark now, but I've just unwrapped a very sticky sticky tape from the loom; I'll chase further tomorrow. The circuit diagrams say there's a join in that side somewhere; I haven't found it yet and it doesn't say where it is, but I'm very suspicious of it.
This is particularly galling as there was an issue with the - yes - offside dipped beam on the original loom...
Bah.
|
|
|
 Re: It lives! My creature lives!
[Re: barnacle]
#1177056
26/02/2011 06:44
26/02/2011 06:44
|
Joined: Dec 2005
Posts: 33,720
Berlin
barnacle
 OP
OP
Club Member 18 - ex-Minister without Portfolio
|
 OP
OP
Club Member 18 - ex-Minister without Portfolio
Forum Demigod
Joined: Dec 2005
Posts: 33,720
Berlin
|
Well, it seems the problem was that a relay had been inserted in a socket that expects to have the delay controller for headlight washers. That's powered by the dipped beam, hence the connection.
So on Monday I can get on with the rest of the front-end electrics, and removal of cables un-needed. I reckon there's ten or twenty kilos of unnecessary weight there: ABS, Airbag, Aircon, alarm, sunroof, heater ecu (I just need a power feed to use the ford stuff), aerial and booster wiring and no doubt plenty more.
Memo: don't cut the windscreen washer, windscreen motor, and horns...
|
|
|
 Re: It lives! My creature lives!
[Re: barnacle]
#1178620
01/03/2011 17:02
01/03/2011 17:02
|
Joined: Dec 2005
Posts: 33,720
Berlin
barnacle
 OP
OP
Club Member 18 - ex-Minister without Portfolio
|
 OP
OP
Club Member 18 - ex-Minister without Portfolio
Forum Demigod
Joined: Dec 2005
Posts: 33,720
Berlin
|
Some good progress today: - resolved the headlight issue (including one broken bulb) - fitted the sidelight and indicator units (if my No More Nails hasn't decided not to set, in which case I'll have to get busy with the epoxy and glass fibre) - wired the front indicators and sidelights (two broken bulbs, one broken fuse) - wired the windscreen wiper inc. intermittent and dual speed - wired the windscreen washer pump - wired the horn, but it turns out that where I had intended to mount it fouls the bonnet - it's very very tight under there, so I need a rethink. I might end up extending cables and sticking it on the radiator shroud, part of the bonnet. - tested the fan for direction and power, but not yet switched it from the ECU until I get the driveshaft back on the gearbox So bar the wiring from the aircon and theft alarm which I need to remove, or at least tag up out of the way, it's about done under the bonnet. 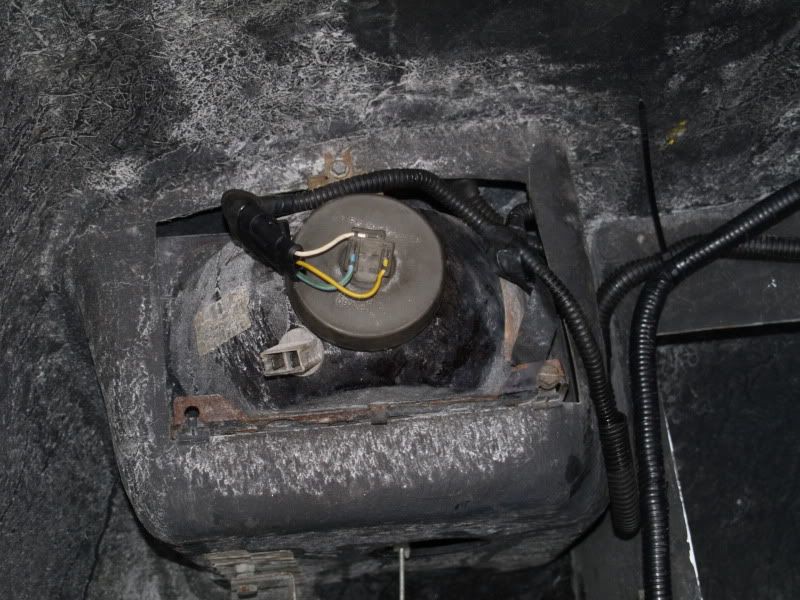 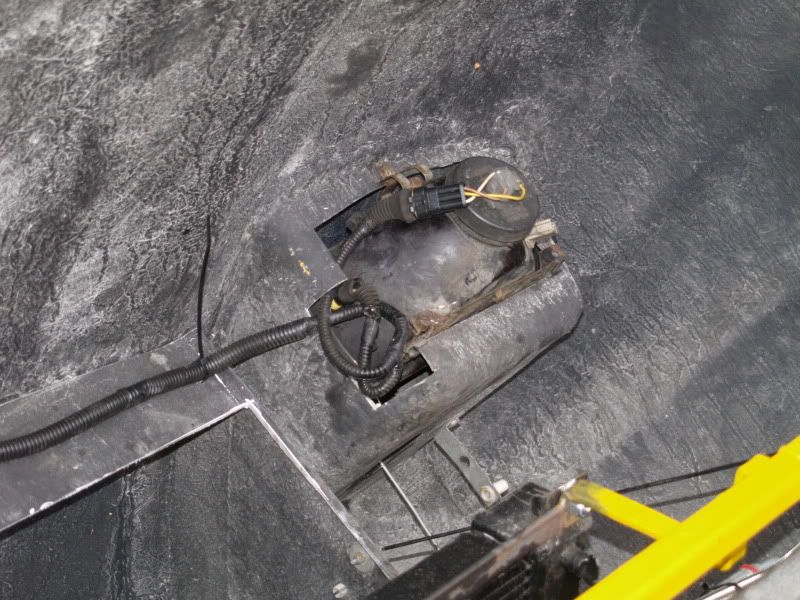 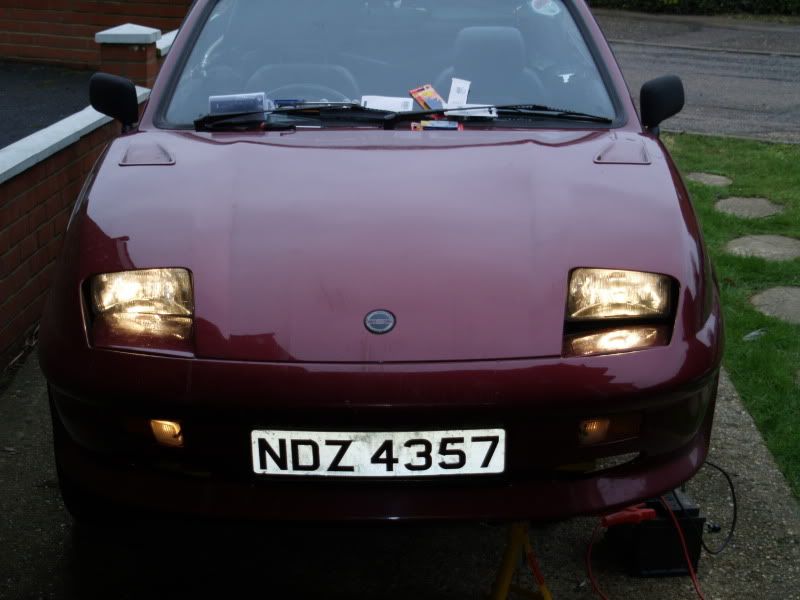 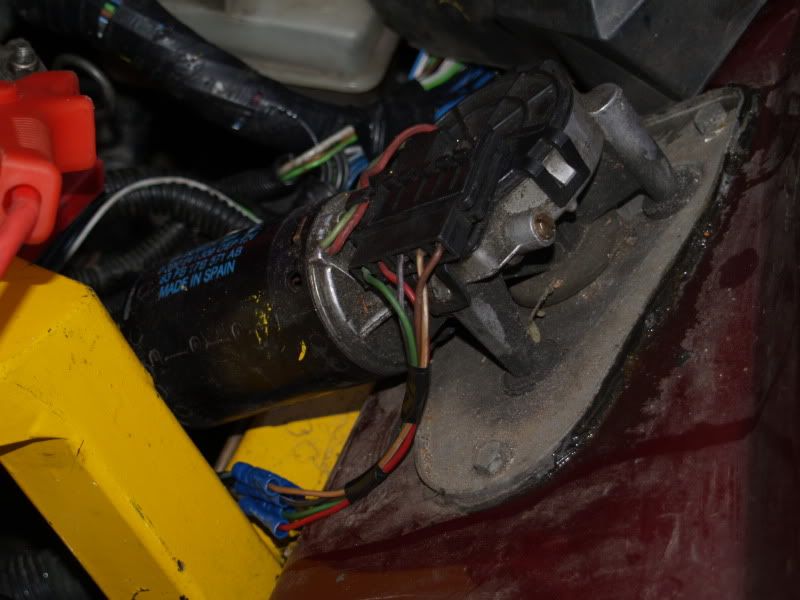 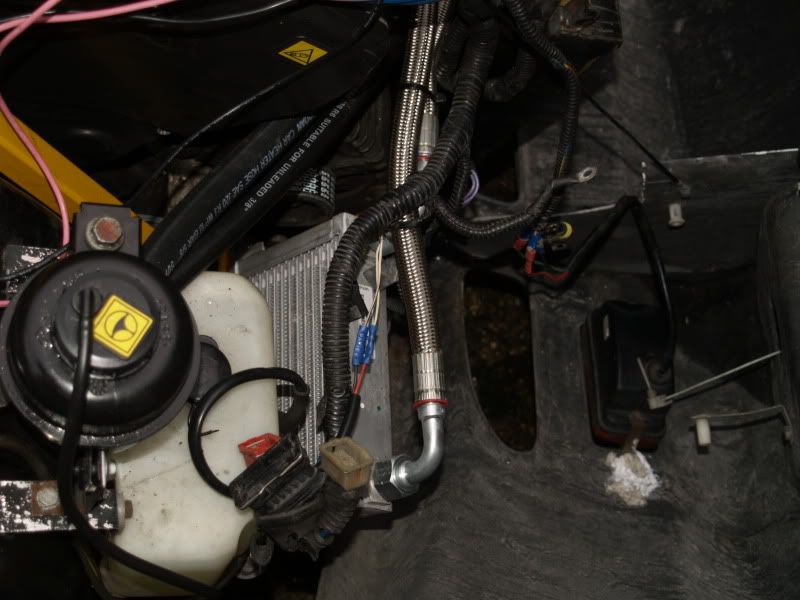 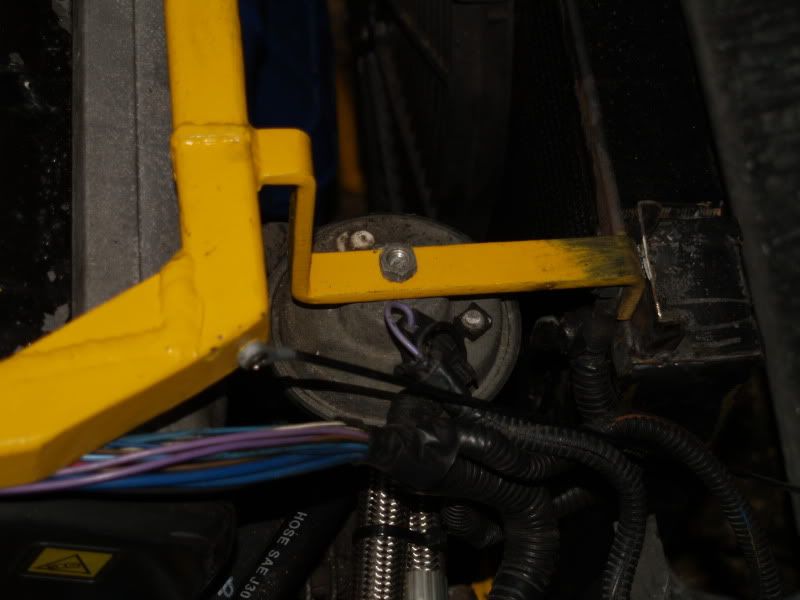 26 days till the MOT runs out...
Last edited by barnacle; 01/03/2011 22:05.
|
|
|
 Re: It lives! My creature lives!
[Re: barnacle]
#1179382
02/03/2011 18:44
02/03/2011 18:44
|
Joined: Dec 2005
Posts: 33,720
Berlin
barnacle
 OP
OP
Club Member 18 - ex-Minister without Portfolio
|
 OP
OP
Club Member 18 - ex-Minister without Portfolio
Forum Demigod
Joined: Dec 2005
Posts: 33,720
Berlin
|
So today... decided that the fat lump of cables for the aircon were getting in the way, so stripped them back to the bulkhead and just took forwards the indicator, sidelight, horn, and washer squirt - much neater and smaller now. 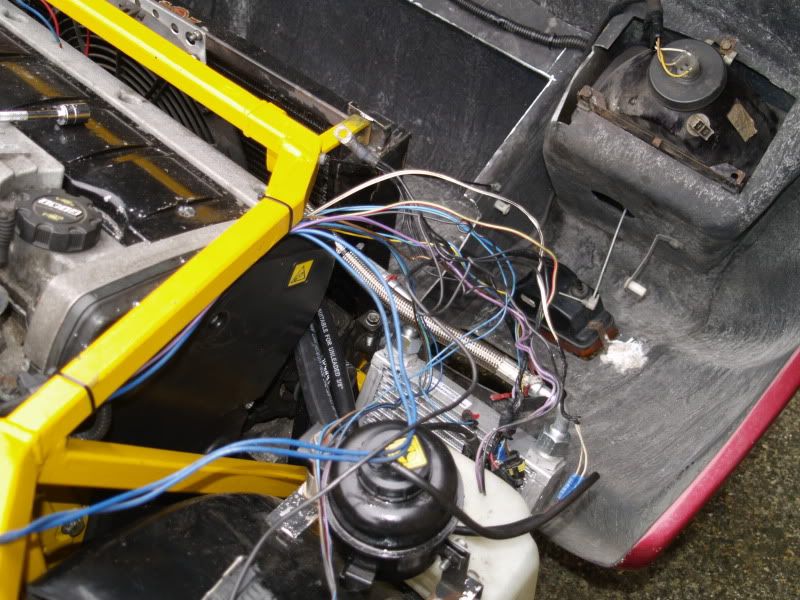 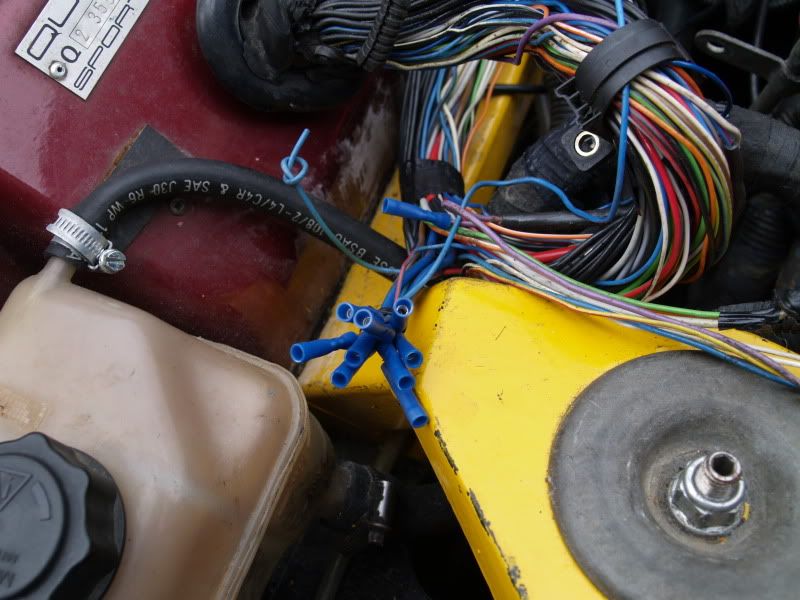 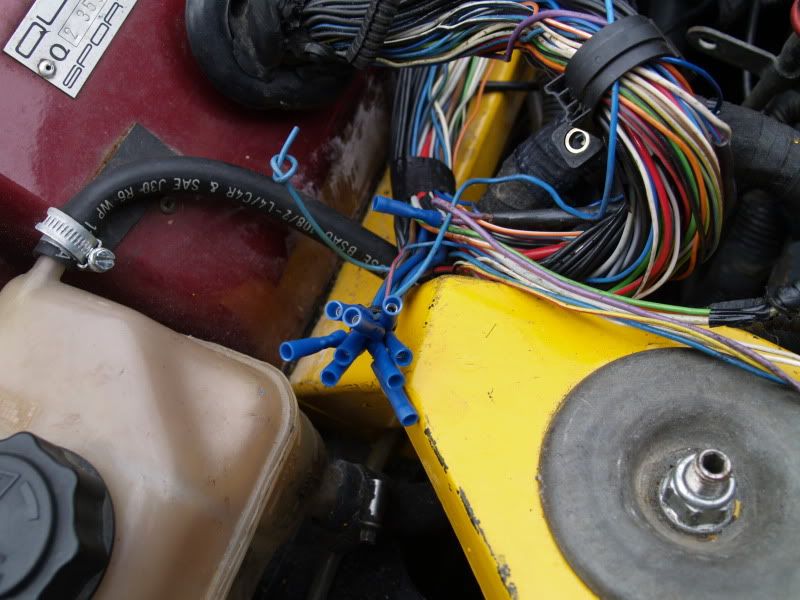 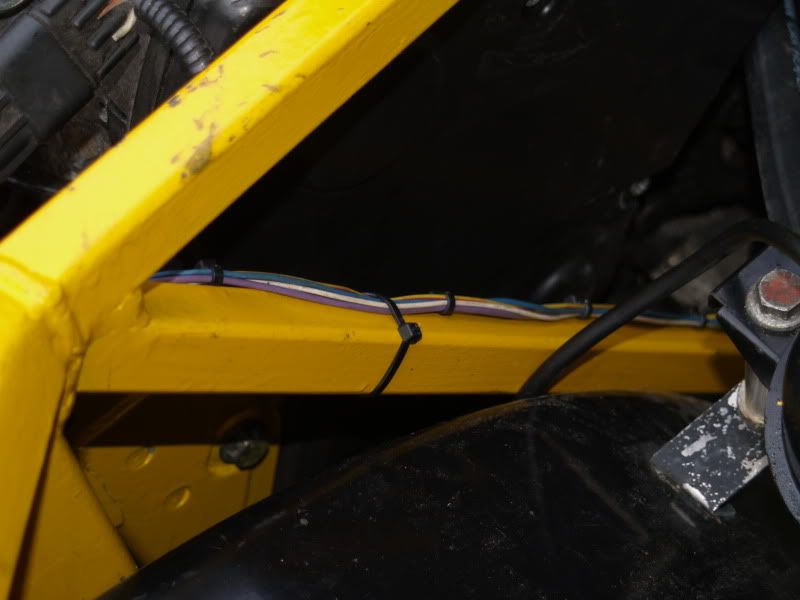 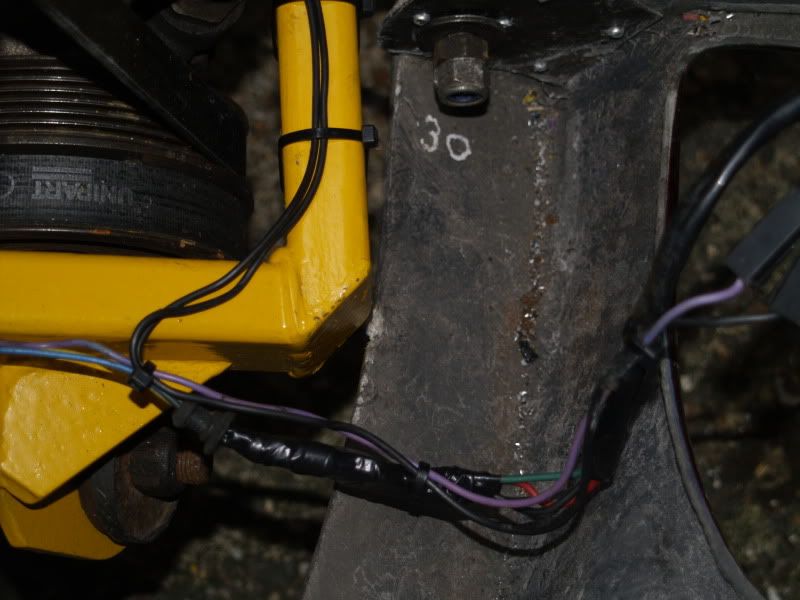 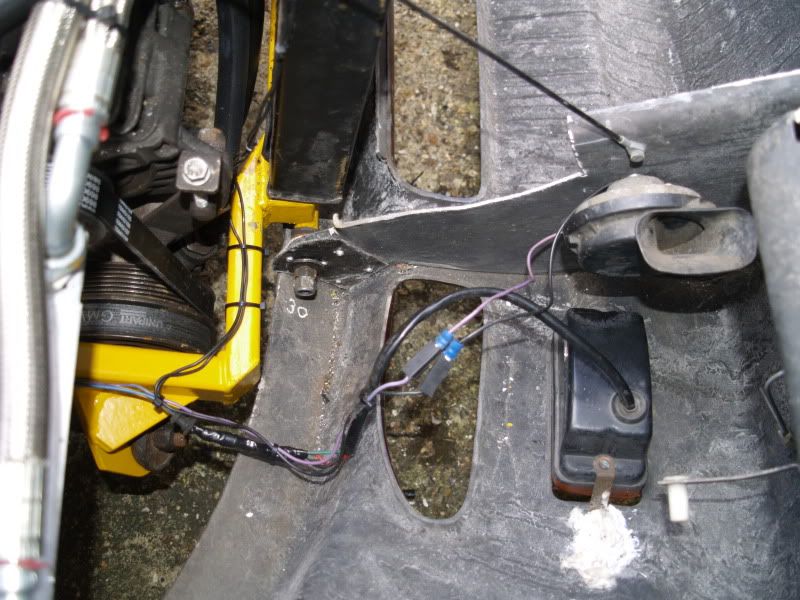 Then started on the cabin. First, find a place to put the fusebox... 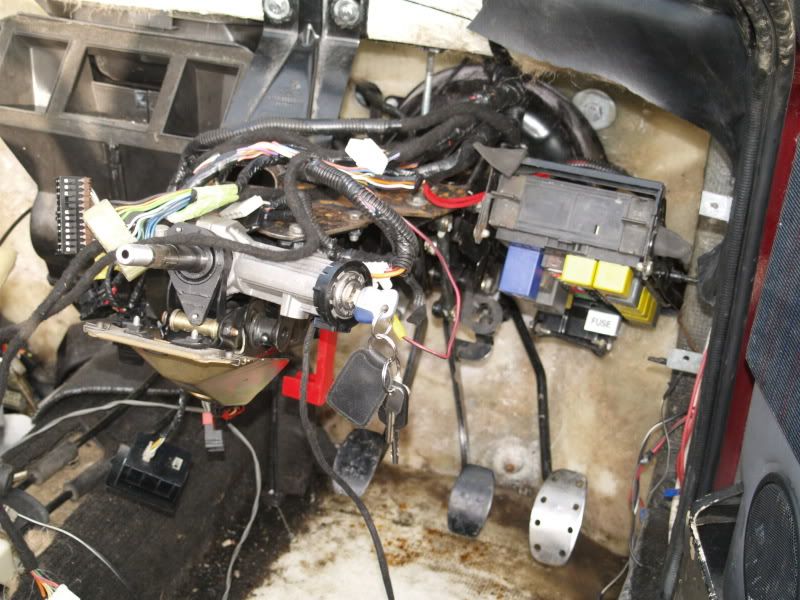 Next, remove the bits of ford fascia that get in the way: 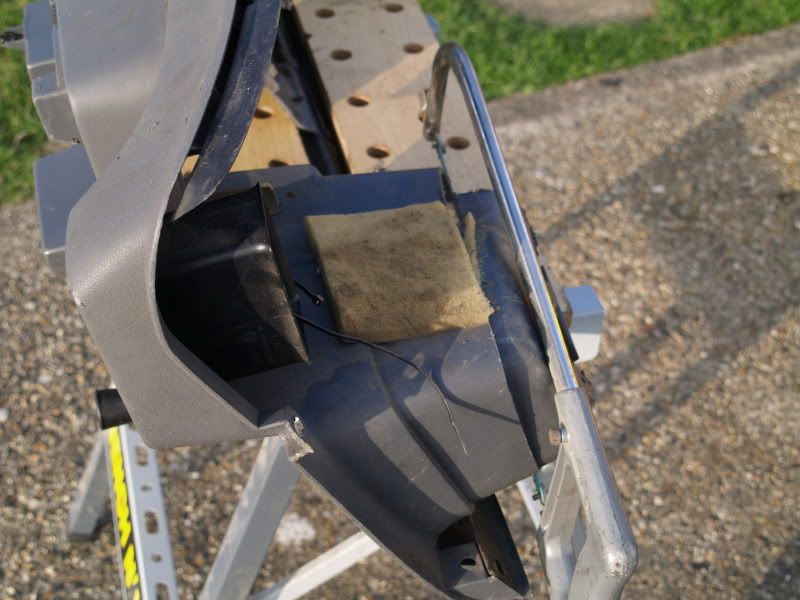 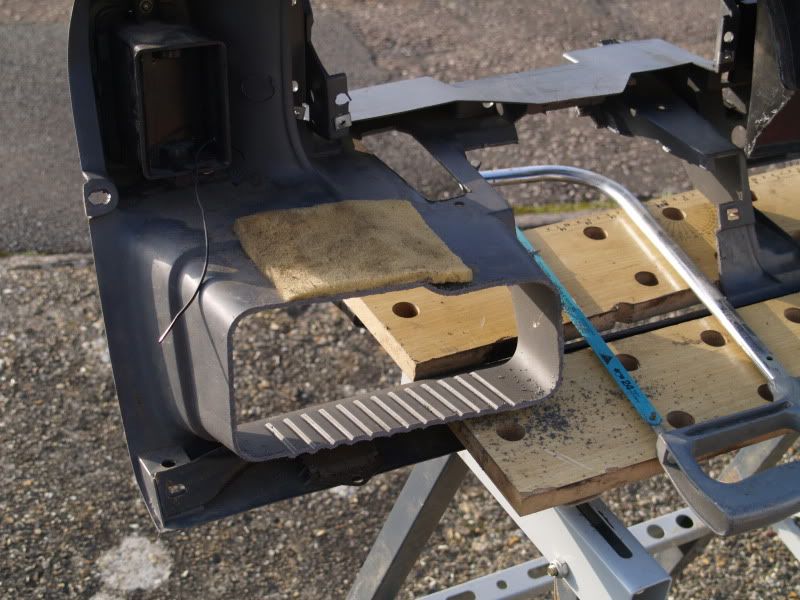 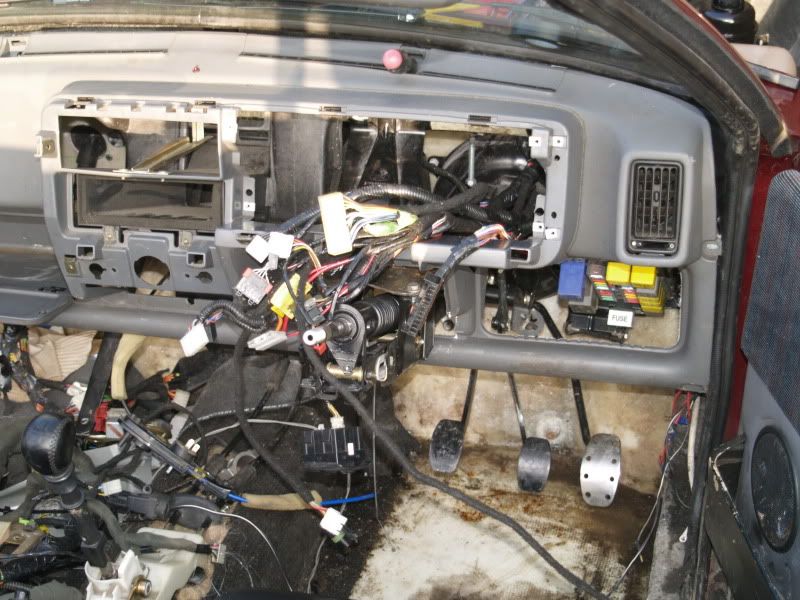 There's still quite a lot of wire which doesn't have anywhere to live yet, and I'm not at all sure how the ventilation is going to work, if at all... 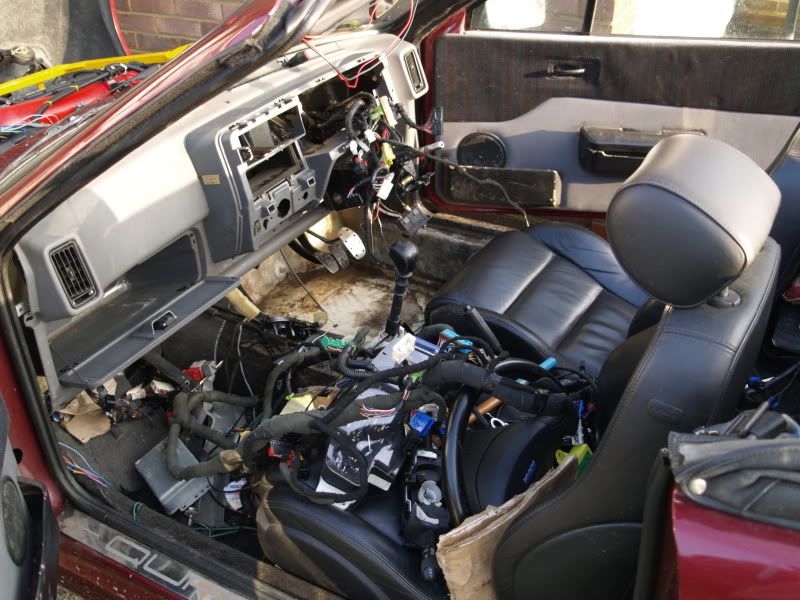 But after taking away all the extra volume provided by the sound padding on the internal loom, it seems to hide quite nicely above the fusebox. Still not quite sure where the heap of random relays and timers and diode packs will live, but it's starting to look hopeful. 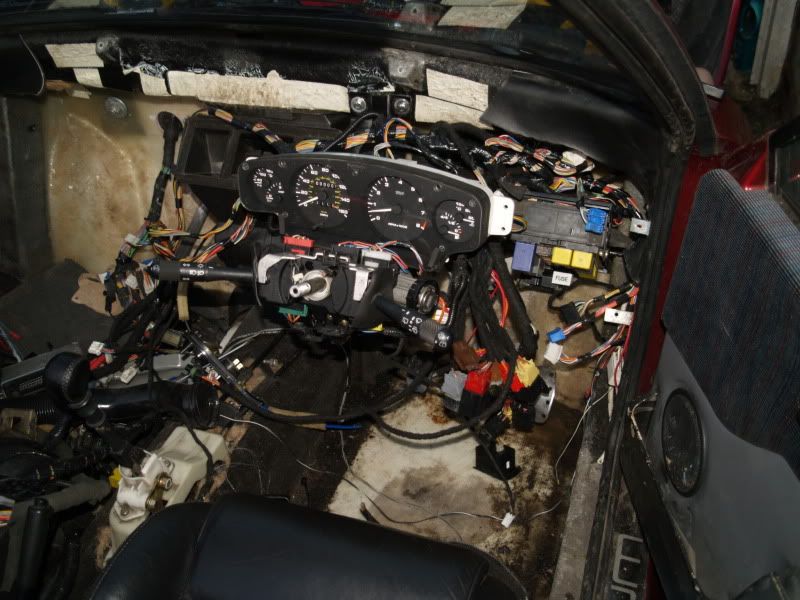 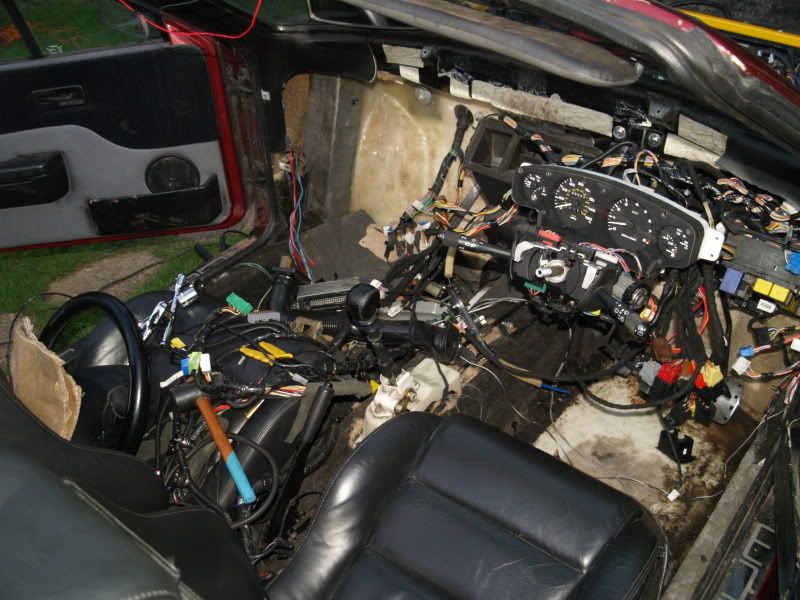 I also took the time to take the instrument pack to bits and reset the milometer to zero. There doesn't seem to be a lot of point in claiming 157,000 miles on this one...
|
|
|
 Re: It lives! My creature lives!
[Re: barnacle]
#1180575
04/03/2011 17:45
04/03/2011 17:45
|
Joined: Dec 2005
Posts: 33,720
Berlin
barnacle
 OP
OP
Club Member 18 - ex-Minister without Portfolio
|
 OP
OP
Club Member 18 - ex-Minister without Portfolio
Forum Demigod
Joined: Dec 2005
Posts: 33,720
Berlin
|
|
|
|
 Re: It lives! My creature lives!
[Re: barnacle]
#1182574
08/03/2011 19:34
08/03/2011 19:34
|
Joined: Dec 2005
Posts: 33,720
Berlin
barnacle
 OP
OP
Club Member 18 - ex-Minister without Portfolio
|
 OP
OP
Club Member 18 - ex-Minister without Portfolio
Forum Demigod
Joined: Dec 2005
Posts: 33,720
Berlin
|
A good day's work which has resulted in almost all circuits complete: All external lights are now working, though I haven't tested the fog or hazards yet; I need to work out which Ford switches to use. Speakers all round - radio seems to be dead, though. Internal lights working including the door triggers and proper delayed lights. Electric windows working both sides - though I still need to sort out the centre console. ECU cables sealed through the bulkhead, and the ECU mounted. Like an idiot, I managed to find a place where once fastened, I couldn't get the connector on... doh. 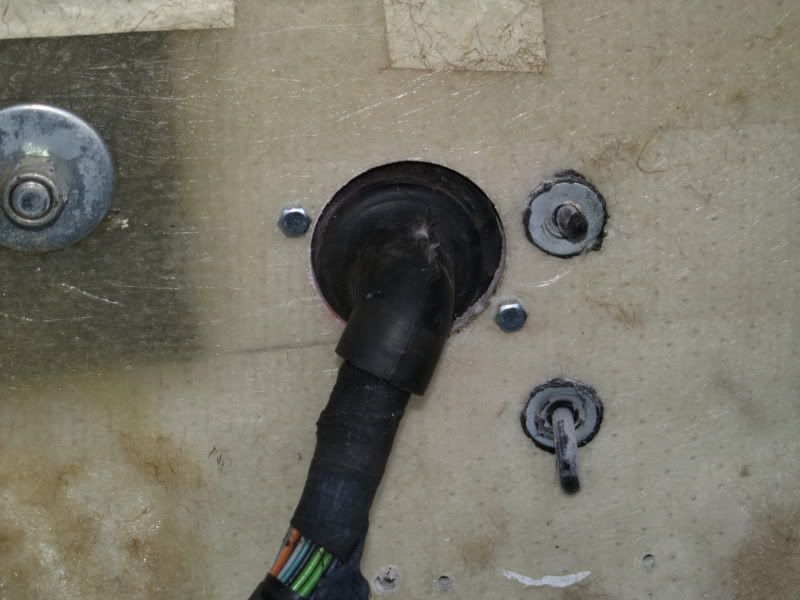 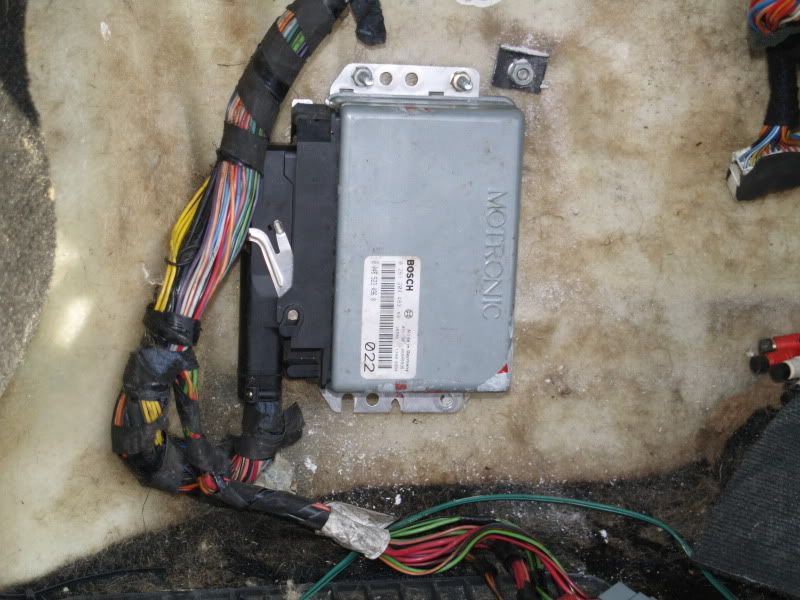 This much wire left over - mostly from the Ford, but there are some bits of leftover Fiat, too 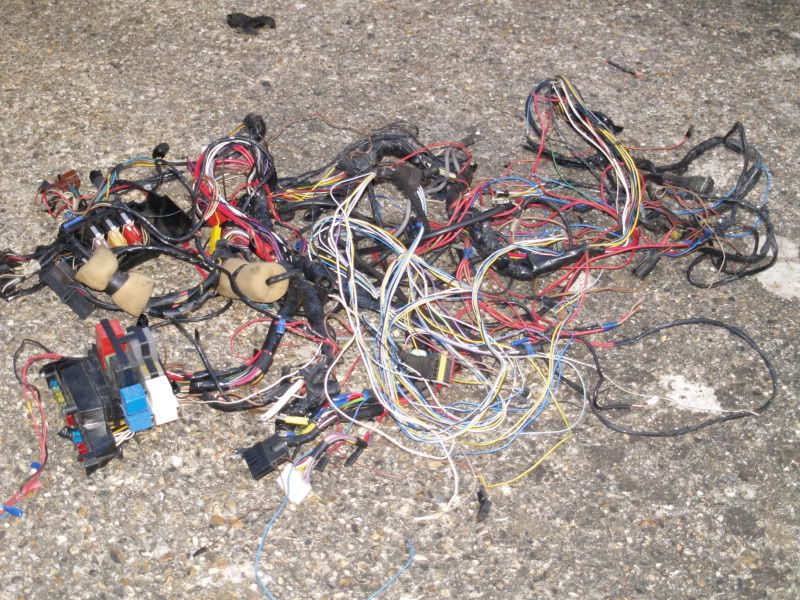 And the footwells are much clearer now a lot of the deadwood has been removed and tidied away. 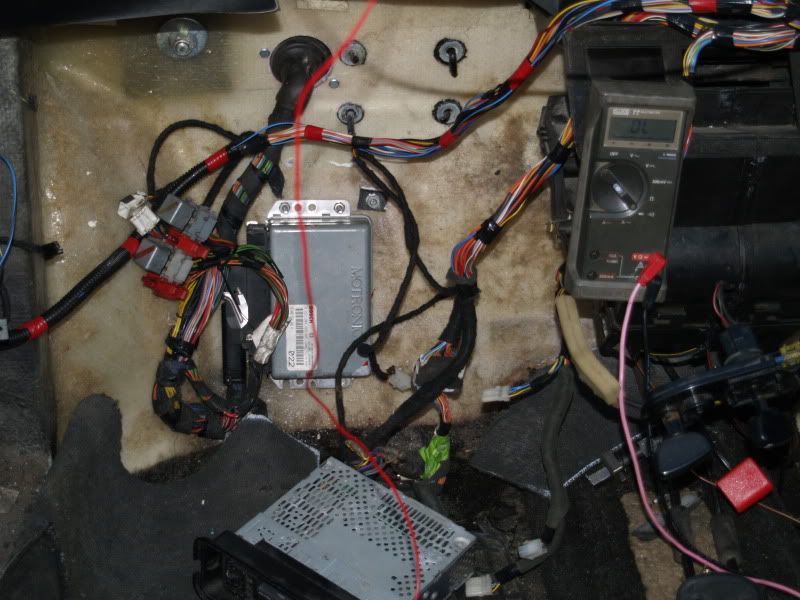 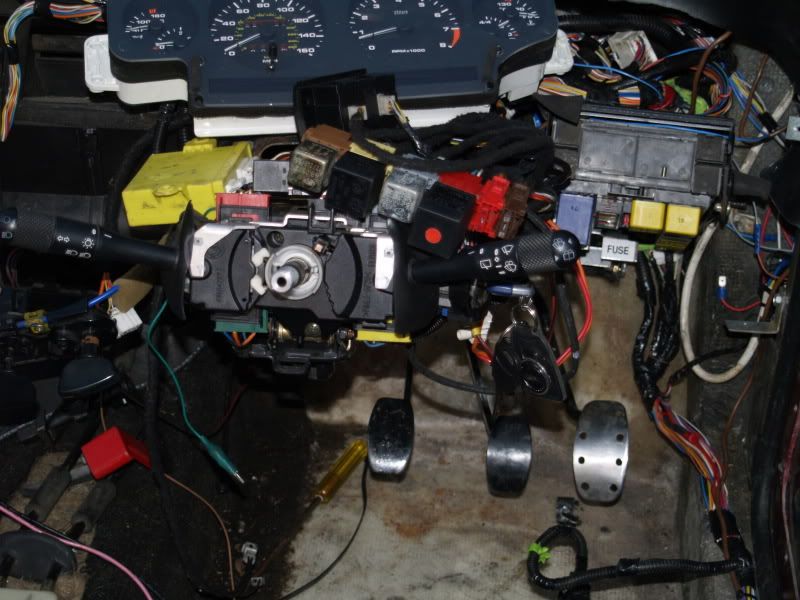
|
|
|
 Re: It lives! My creature lives!
[Re: barnacle]
#1183038
09/03/2011 17:56
09/03/2011 17:56
|
Joined: Dec 2005
Posts: 33,720
Berlin
barnacle
 OP
OP
Club Member 18 - ex-Minister without Portfolio
|
 OP
OP
Club Member 18 - ex-Minister without Portfolio
Forum Demigod
Joined: Dec 2005
Posts: 33,720
Berlin
|
In a touch of genius, I spent half the morning 'repurposing' a Ford switch to be a Fiat hazard warning switch. That requires a red light, and the lights in there were a choice of pink or blue incandescents, so I stuck a couple of LEDs in. I need to make a cover with a nice label, but it does the job. Only issue is that it also flashes red when I indicate left... Looking at the wiring diagrams I can't see why it doesn't do that on the coupe. Very odd, but probably not a show-stopper. The fog light took ten minutes. It's push-pull for on, push-pull for off, until I can be bothered to make it a momentary switch, but that's not an issue. Found a way to supply the heater fan; the coupe supplies permanent volts and lets the heater ECU sort it out; I have just a three way switch to the dropper resistor. But the ABS system supply wasn't doing anything... Got the cables for the battery terminated - three quid for four terminals fitting, great value if only for the entertainment of watching two grown men argue about why you should use a 25mm^2 tag on 25mm^2 cable, and which way the valve goes on the hydraulic terminating tool... - and run through to the boot. Car starts and runs fine with the battery there, though I suspect there's a few tenths of a volt dropped on the circuit. I need to fabricate a frame to support the battery tray, and that's it for the electrics. Just got to get the dash in now! 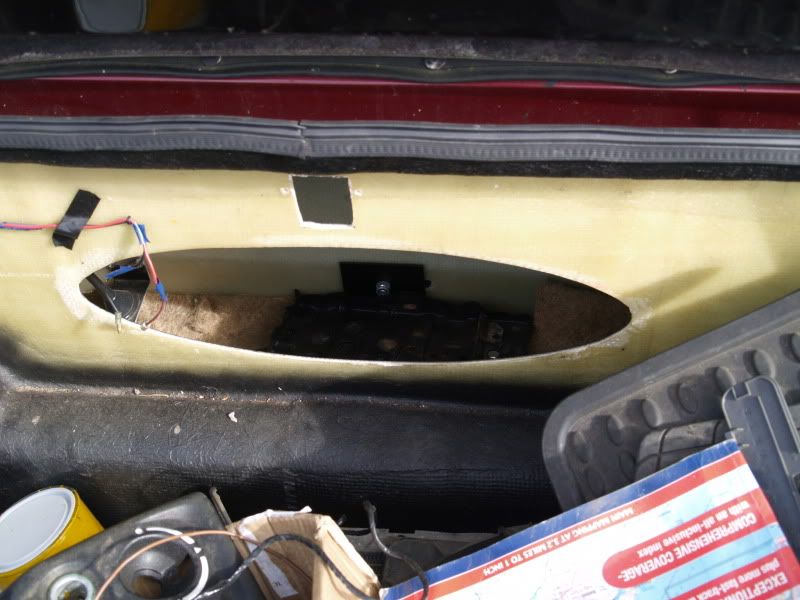 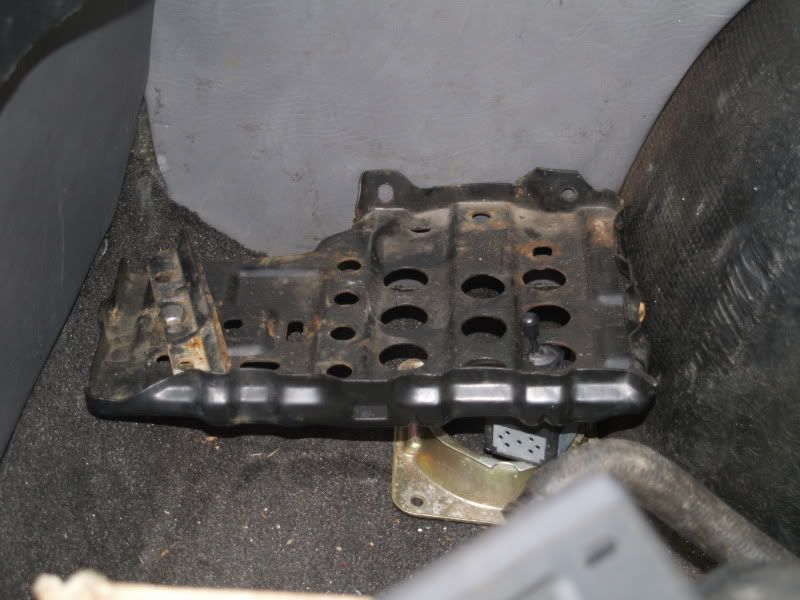 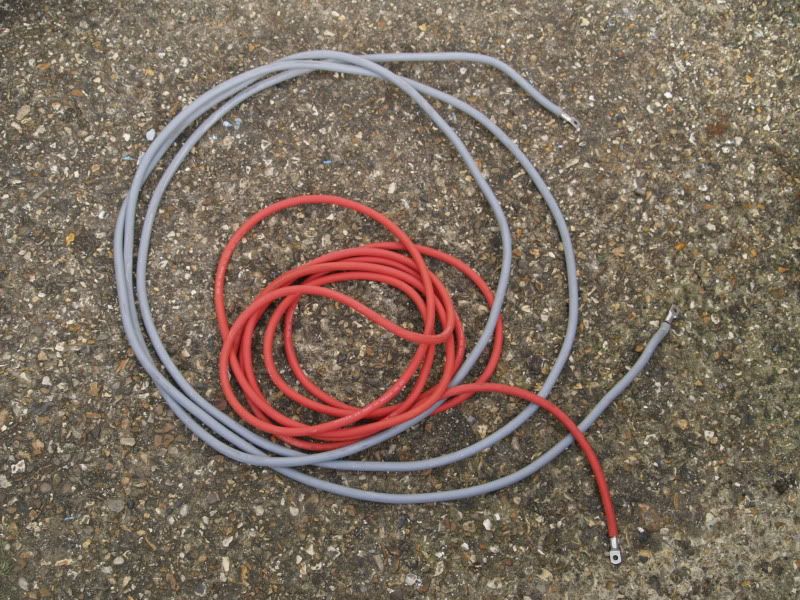 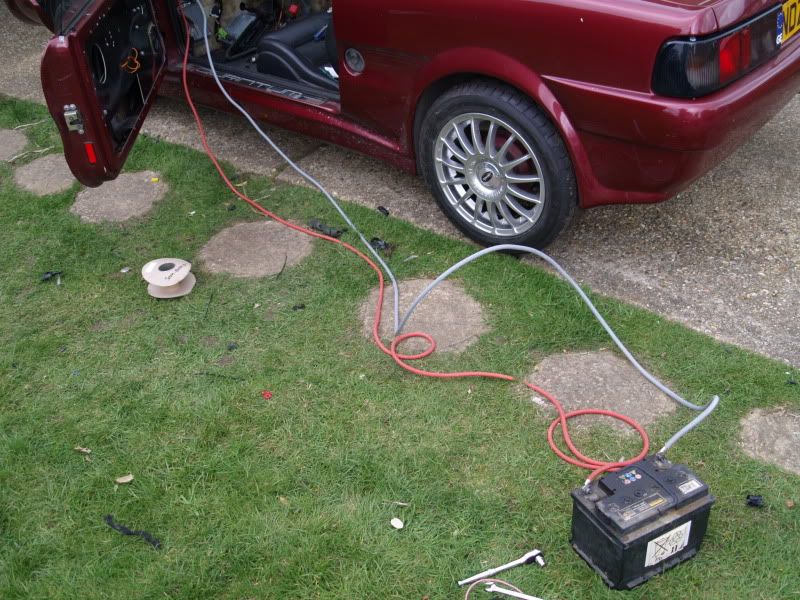 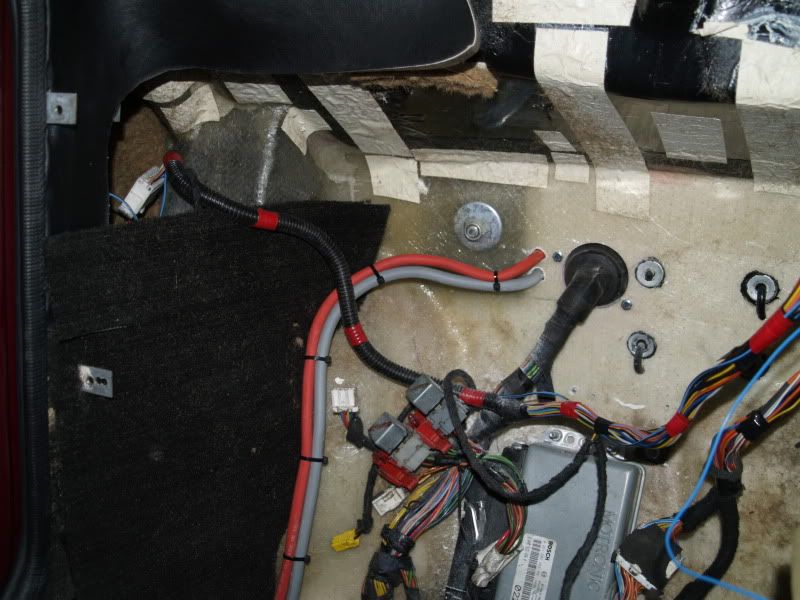 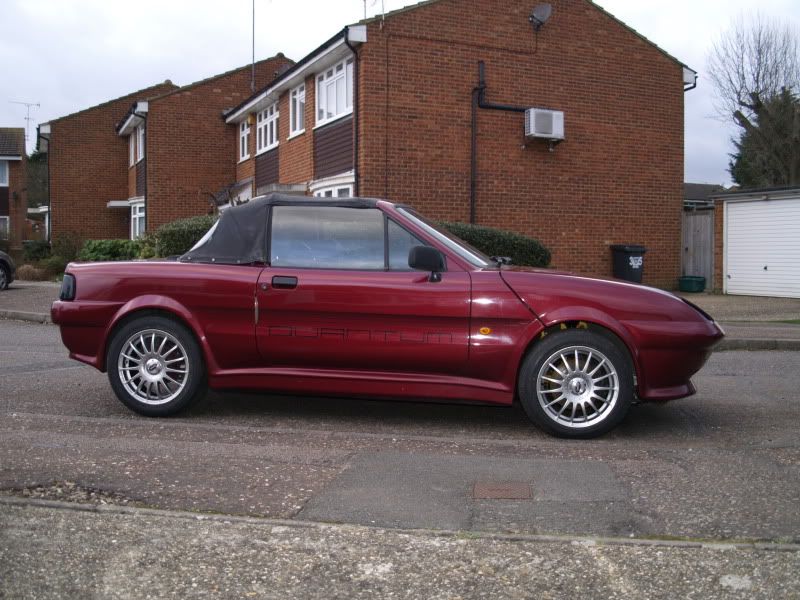 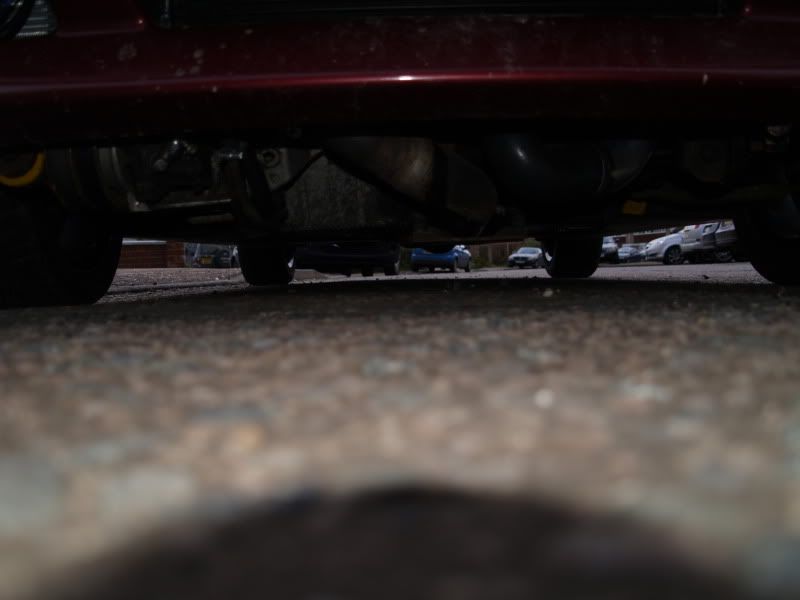 18 days to MOT.
Last edited by barnacle; 09/03/2011 20:46. Reason: Added piccies
|
|
|
 Re: It lives! My creature lives!
[Re: barnacle]
#1183966
11/03/2011 16:51
11/03/2011 16:51
|
Joined: Dec 2005
Posts: 33,720
Berlin
barnacle
 OP
OP
Club Member 18 - ex-Minister without Portfolio
|
 OP
OP
Club Member 18 - ex-Minister without Portfolio
Forum Demigod
Joined: Dec 2005
Posts: 33,720
Berlin
|
Yeeeeeeeeeeeeeha!
Memo to brain - do not attempt to use full throttle in first...
A minor problem this morning; on the way to get the tracking done the engine would stall every time I tried to accelerate, or change gear, or when it felt like it. Decided this was perhaps fuel starvation, since the tank was last filled in August. It wasn't...
Turned out that the tube from the tank to the filter was being sucked so hard that a crimp had developed in the pipe where it did a 180 and it was sealing itself closed.
After being ripped off by the local plumbing supply - why isn't half inch pipe easily available? - and now have a solid copper 180 which appears to allow the fuel through.
With the nasty Halfords chav filter on, every fart and hiccup and whoop and psssssssh from the system pollutes my earholes. I trust that the K&N - when I work out how to fit it - will be a little more discrete.
Meanwhile, goes in a straight line, stops in a straight line. There's work to do, but it's good for the test - which is now on Tuesday, due to having a job interview on Monday.
|
|
|
 Re: Quantum Coupe - Neil and Joe's secret project!
[Re: barnacle]
#1196205
04/04/2011 11:27
04/04/2011 11:27
|
Joined: Dec 2005
Posts: 33,720
Berlin
barnacle
 OP
OP
Club Member 18 - ex-Minister without Portfolio
|
 OP
OP
Club Member 18 - ex-Minister without Portfolio
Forum Demigod
Joined: Dec 2005
Posts: 33,720
Berlin
|
It's been a while since I updated here - so here's a brief resume: - sailed through the MOT, in spite of a couple of bulbs and the horn failing for some reason on the way across to Joe's - old age probably, just like the driver. - now done about four hundred miles... the suspension is in dire need of stronger springs, as the wheels touch at the front under braking and the rear under acceleration. A trip to Faulkner Springs to test the originals revealed that they were quite low rates, and under the current load had 720lbs on the front and 380lbs (no driver, nothing in the boot) at the rear. Not too bad a weight distribution once there's a hundred kilos of me almost over the back axle though it's still going to be nose heavy. New springs will arrive shortly, hopefully before the shows at the end of the month. Might look a bit spindly with no-one in it, but I need the ground clearance... - the pedals were a bit tight and offset to the right, forced by the shape of the bulkhead and the necessary mounting points for the brake servo. After some measurement, they came on a trip to Joe's and while Patch was trying to stop the bleeding, some precision cold forming[1] reshaped the pedals. 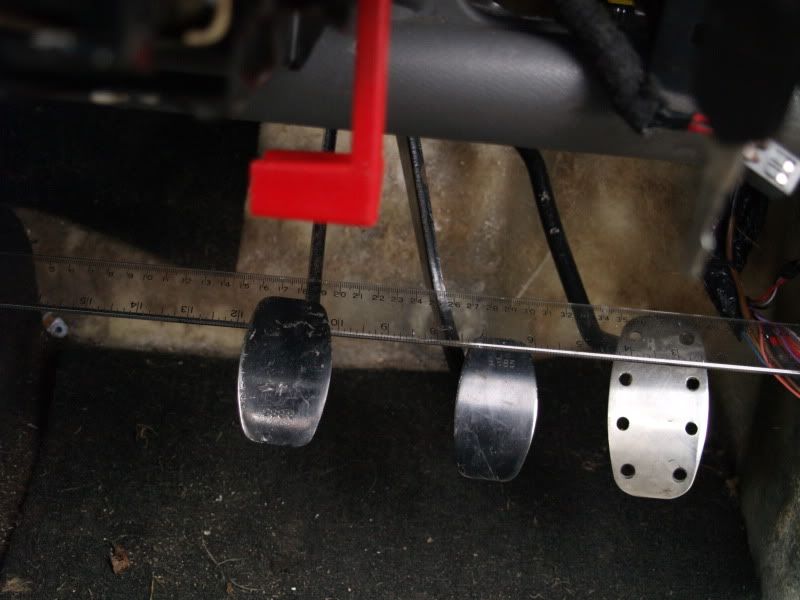 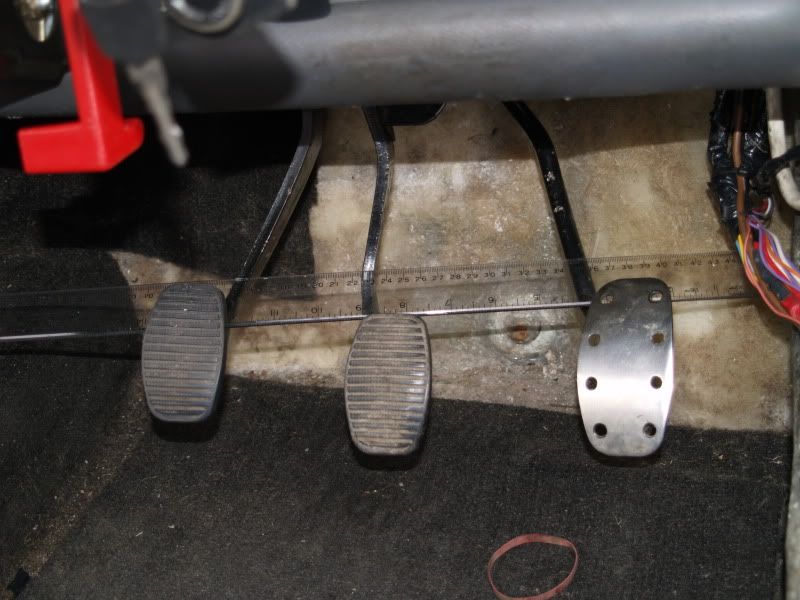 You can't see the incredibly tidy weld Joe did at the top of the clutch to move it back into alignment with the other two pedals; the clutch master is mounted slightly nearer the actuator than on the coupe and that raised the pedal a couple of inches; made it a long way to get to the clutch! - The interior progresses. The original Fiesta central console around the gearstick has been modified[2] to fit though it could still use some improvement; the control panel for the heater and cigarette lighter is fitted and wired, except for its illumination which is completely bursared; and the door 'trims' are once again fitted in all their tatty eighties glory. All that's left is the main instrument panel console for which I think I will have to get busy with the fiberglass to accommodate the slight bulge at the top of the instrument pack. Neil [1] Joe hit them with a hammer. [2] Butchered.
|
|
|
 Re: Quantum Coupe - Neil and Joe's secret project!
[Re: barnacle]
#1200800
12/04/2011 15:28
12/04/2011 15:28
|
Joined: Dec 2005
Posts: 33,720
Berlin
barnacle
 OP
OP
Club Member 18 - ex-Minister without Portfolio
|
 OP
OP
Club Member 18 - ex-Minister without Portfolio
Forum Demigod
Joined: Dec 2005
Posts: 33,720
Berlin
|
The new springs arrived from Faulkner's yesterday; in celebration, the heavens opened and it belted down... so they had to wait until today. The springs are uprated 50% at both ends; that gives a couple of inches at the front and an inch and a half at the back. With no-one in it and the boot empty, the car looks a little spindly but now nothing touches except a tiny brush with the nearside front of the bonnet; a moment with a rasp has resolved that issue. More importantly, it doesn't push the bodywork onto the tyres under acceleration (back) or braking (front)... I could possibly take half an inch out, but for now I'll leave it as it is and see how things go. The spring rates are spot on, really; it's firm but comfortable to ride; it corners pretty flat, as far as I've tried. Next thing to sort out is the gearbox oil leak. Just when moving, but it's washed all the underneath of the car with nice clean oil (to the annoyance of the lad who just did the tracking for me, who got a head full of gear oil!). I think it's the nearside oil seal, but it *could* be the filler pipe. 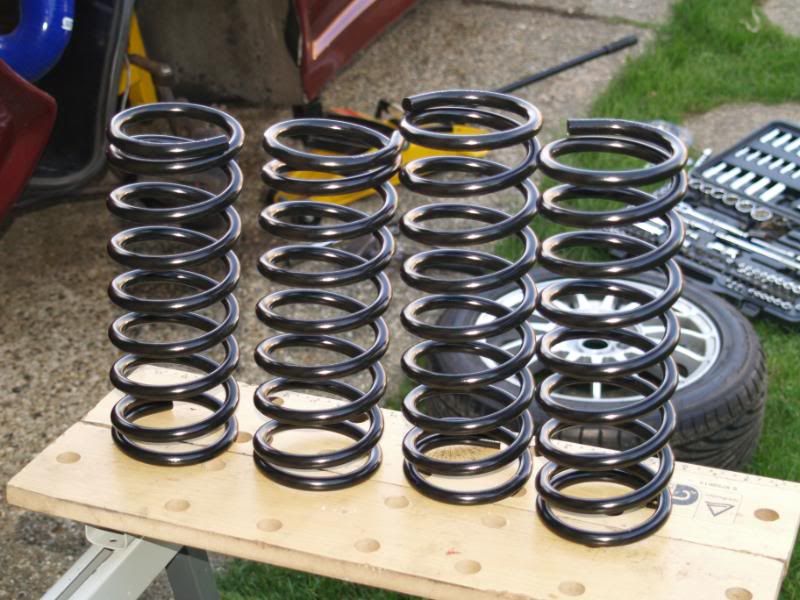 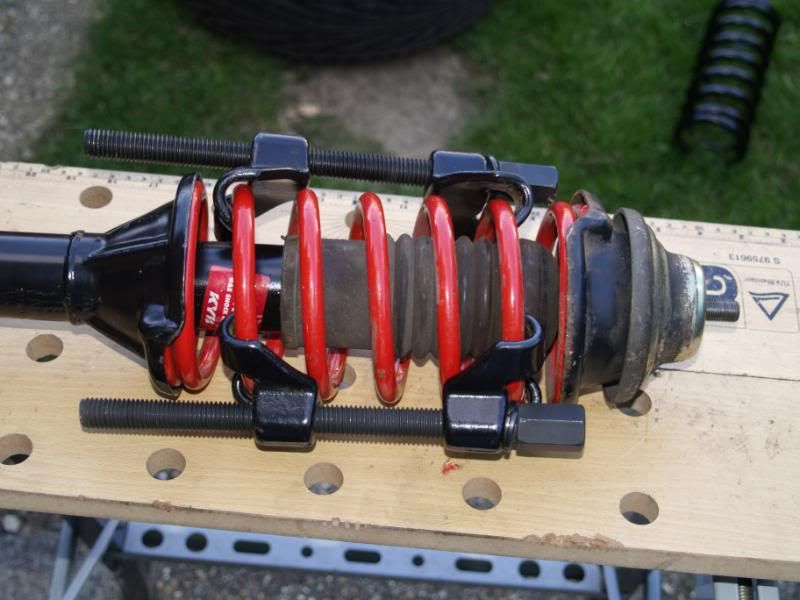 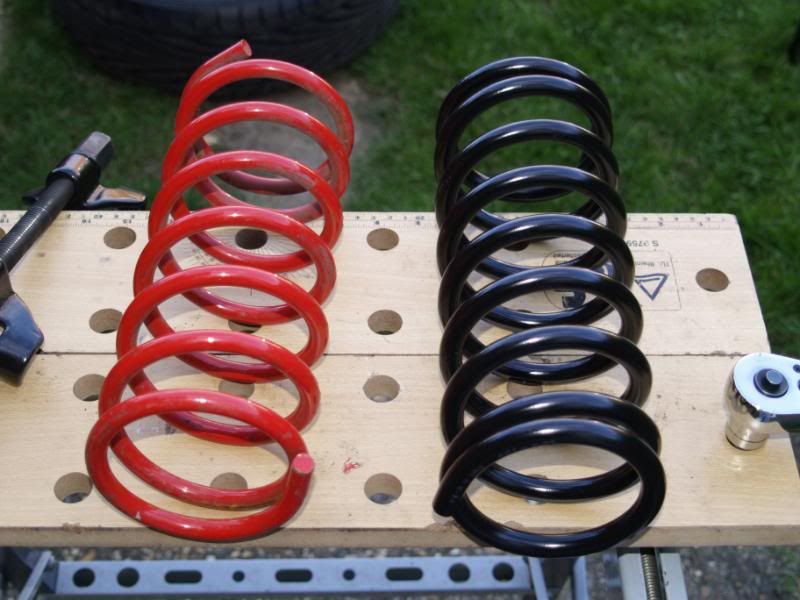 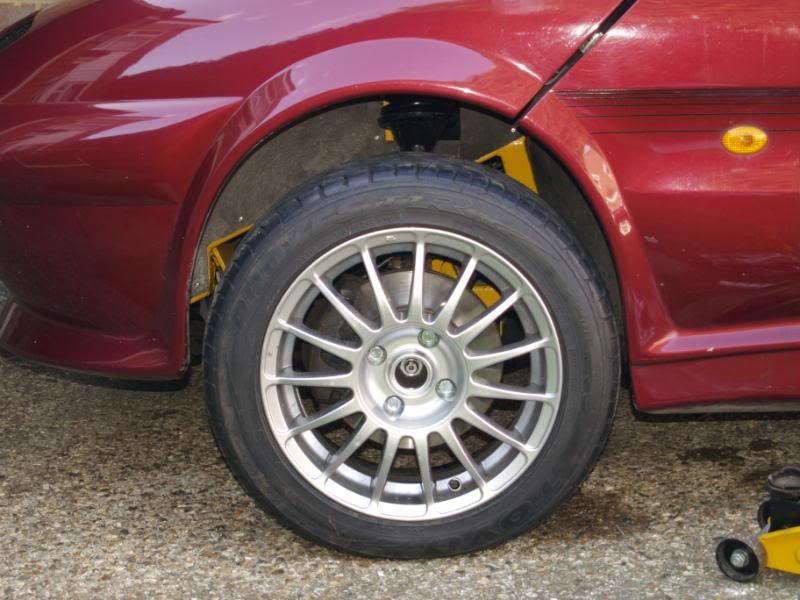 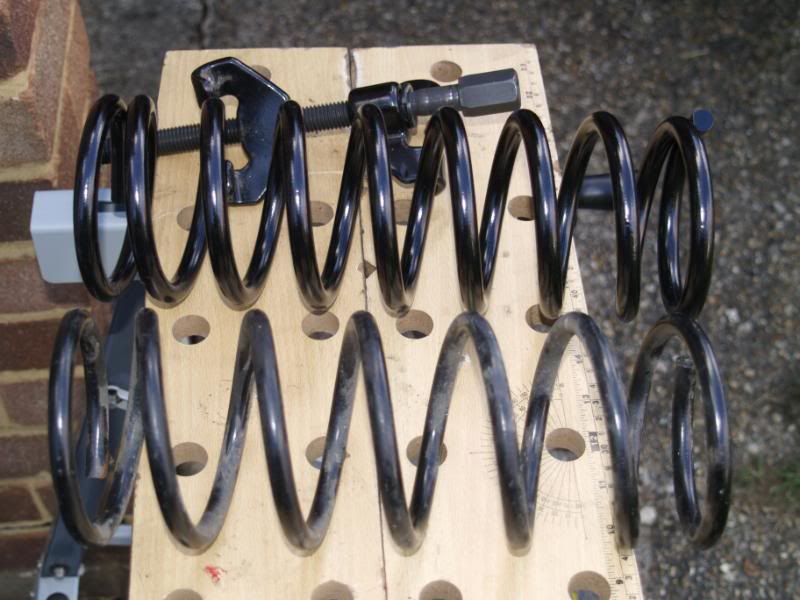 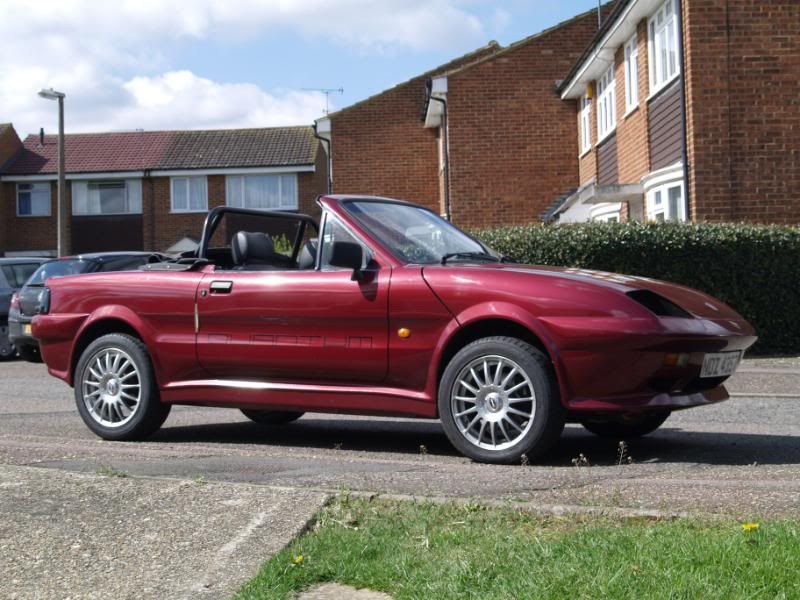 See you at Brooklands! Neil
|
|
|
|


